Showing posts with label UFOs. Show all posts

Monday, April 8, 2024

Broderie Anglaise Partlet

I found a broderie anglaise skirt at the Op Shop (Thrift Store) for $2 and thought how pretty it would be as a partlet. I wasn't sure if there would be enough fabric, but I thought that it was worth the risk for $2.

Now, I know that broderie anglaise is a more modern style of embroidered decoration, and that this was made by machine, but I thought it probably wouldn't be too obviously modern if trimmed as a partlet. After all, cutwork and pulled work were done in the sixteenth century. 

I used my trusty collarless partlet pattern and cut the pieces out. As usual, I french seamed the sides and shoulder seams, and hand finished them. I did a narrow zigzag around all the edges, but the cut outs in the embroidery meant that there were shaggy edges even after finishing. I was disheartened, and put the piece aside for (mumble, mumble,) an unspecified amount of time.

Then last year I started working on my WIPs and UFOs again and pulled the partlet out. I decided to use a faux silk (polyester) bias binding to trim the edges. I machined the outer seam and hand sewed everything else.

I liked the way the binding tidied up the edges, but it just looked too shiny in outside light. So I went through my stash looking for some lace that could go over the bias to tone down the shiny and add a bit more to the piece. When I found a suitable cotton lace, I hand sewed it on.

I toyed with the idea of embroidering along the front of the lace with embroidery floss but didn't like the way it looked. It feels like it needs a little something to elevate it a bit, but I'm not sure what. I have some gilt cord, but it is not especially durable and I throw my partlets in the washing machine after wearing. I'll stew on it a bit and see if anything jumps out at me next time I am rummaging through my stash.


Monday, February 19, 2024

UFO Pile of Shame and The 100 Day Project Inspiration

I've been spending some time lately trying to prioritise my works in progress (WIPs) and UFOs (UnFinished Objects) so that I can really get some finished this year. I am very good at starting projects- buoyed by the excitement of something new - but lack of energy, lack of time, and often lack of confidence make the project stall. It is amazing how quickly time flies, and suddenly something you put aside 'for a little while' has been sitting around for a year (or more). Covid certainly didn't help with any of that!

In a happy coincidence, I was reading a social media post by the Baroness of Politarchopolis and she mentioned #The100DayProject. #The100DayProject | online art community It is basically on online project to encourage people to be creative and commit to 100 days of creating. Very much the same as #100 Days of A&S which I loved being involved in, and which has set up really good habits of doing at least ten minutes a day on SCA A&S projects (and which I have pretty much continued with). This new project has given me a shot of motivation to spend the next 100 days focusing on UFOs and WIPs. Probably for only a short time every day as I am at a very low spot right now health wise, but every little bit helps.

I won't be posting day-by-day updates on what I have been doing because I think it will take a while to achieve anything as I will be working slowly (and it will be boring to readers). But I hope to at least have some Finished Article victory posts for you soon!

(Please imagine a tidy little pile of nicely folded UFOs here. In reality my UFO/WIP projects would probably take up half a dozen storage tubs and that is downright embarrassing.) I try to console myself with the thought that a lot of them are embroidery which takes a very long time to do.


Friday, July 28, 2023

Red Velveteen Tie-On Italian Style Sleeves

Sleeves again this week, and boy! am I happy with these! So rich and soft - I love them. I got the velveteen before the quality of cotton velveteen being offered by my local Spotlight dropped, and the fabric is lush.


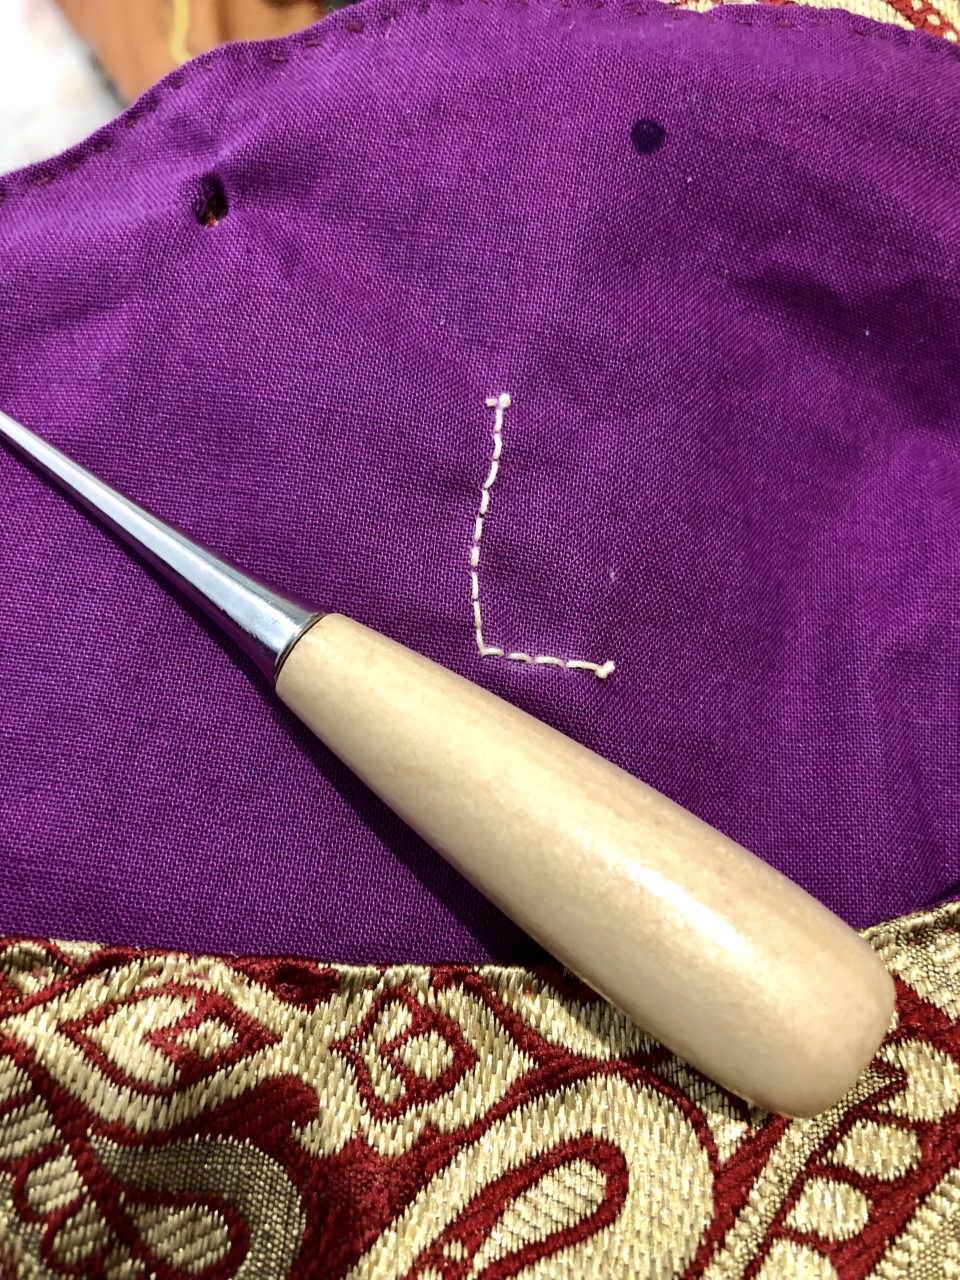
These were created in the same way as previous iterations: the pattern is my roomy, self-drafted pattern that is super comfortable and very wearable. The centre back seam of velveteen and stash fabric lining was machine sewn and hand felled. Then the pieces were put together, wrong way around, and machine sewn. The arc at the top of the sleeve was clipped, and then the sleeve turned right way out ("bagged out"). I generally choose to do a small whip stitch around the top of the sleeve to stop the lining rolling out with wear, and I did that with these. I usually embroider an 'L' on the left sleeve lining before hemming also, just to help with speedier dressing on those days when I am in a rush or brain foggy.

I hemmed the outer sleeve first, anchoring it with small stab stitches. Then I hemmed the lining; turning the lining under quite a bit more so that it won't show when I move my arms.

The final step is to slog through one of my hated jobs - eyelets. I am getting faster at them, but they are very hard on my sore hands. I generally use 4 strands of waxed sewing thread, and use an awl to make a hole. I then do a double running stitch around the hole and then cover the edges with what is essentially a satin stitch.

I am super happy with this pair of sleeves; they feel so wonderful to touch.

Thursday, July 20, 2023

Purple Tie-On Italian Style Sleeves

I'm still working on the UFO pile, and this week's completed item is a pair of Italian style tie-on sleeves in linen. 
They are lined in black cotton remnants, with hand worked eyelets. I had to ease in the linen on one of the sleeves, which has led to a small amount of wrinkling around the wrist on one of the sleeves. Hopefully it will settle with wear, or at least not be noticeable, because I don't feel inspired to unpick the sleeve and lining hem and re-sew the inner seam of the lining (especially since the inner seams on sleeve and linings are felled).


Friday, June 16, 2023

May Day Challenge - Tie-On Italian Style Sleeves #3 (Purple)

 Last year Duchess Constanzia Moralez of Lochac set a Challenge to all those interested -The May Day Challenge (a personal challenge on 'how to improve your SCA in any way by May Day, AS LVII'). 

Image credit: R. Vess

My Challenge was to work on that UnFinished Object pile and get some items finished. My friend won Crown during the Challenge, and so some of my energy was diverted into helping create garb for Them and Their Household, but I did manage to get some items finished before the Challenge ended.

This pair of sleeves had been languishing in the UFO pile, cut out but unsewn. I machine sewed the centre back seam on the lining and outer fabrics, and stab stitched the seams open. Then the sleeves were joined at the shoulder seam and the lining and outer parts were hemmed individually. I then whip stitched around the top of each sleeve to prevent any movement in the lining, and worked five eyelets at the top of each sleeve.


These sleeves look blue in the picture but are actually purple.


Sunday, June 11, 2023

May Day Challenge - Tie-On Italian Style Sleeves #2 (White with gold trim)

 Last year Duchess Constanzia Moralez of Lochac set a Challenge to all those interested -The May Day Challenge (a personal challenge on 'how to improve your SCA in any way by May Day, AS LVII'). 

Image credit: R. Vess

My Challenge was to work on that UnFinished Object pile and get some items finished. My friend won Crown during the Challenge, and so some of my energy was diverted into helping create garb for Them and Their Household, but I did manage to get some items finished before the Challenge ended.

Second is another pair of sleeves that just needed two more eyelets added on each sleeve and the top edge whip- stitched to be wearable.


Tuesday, June 6, 2023

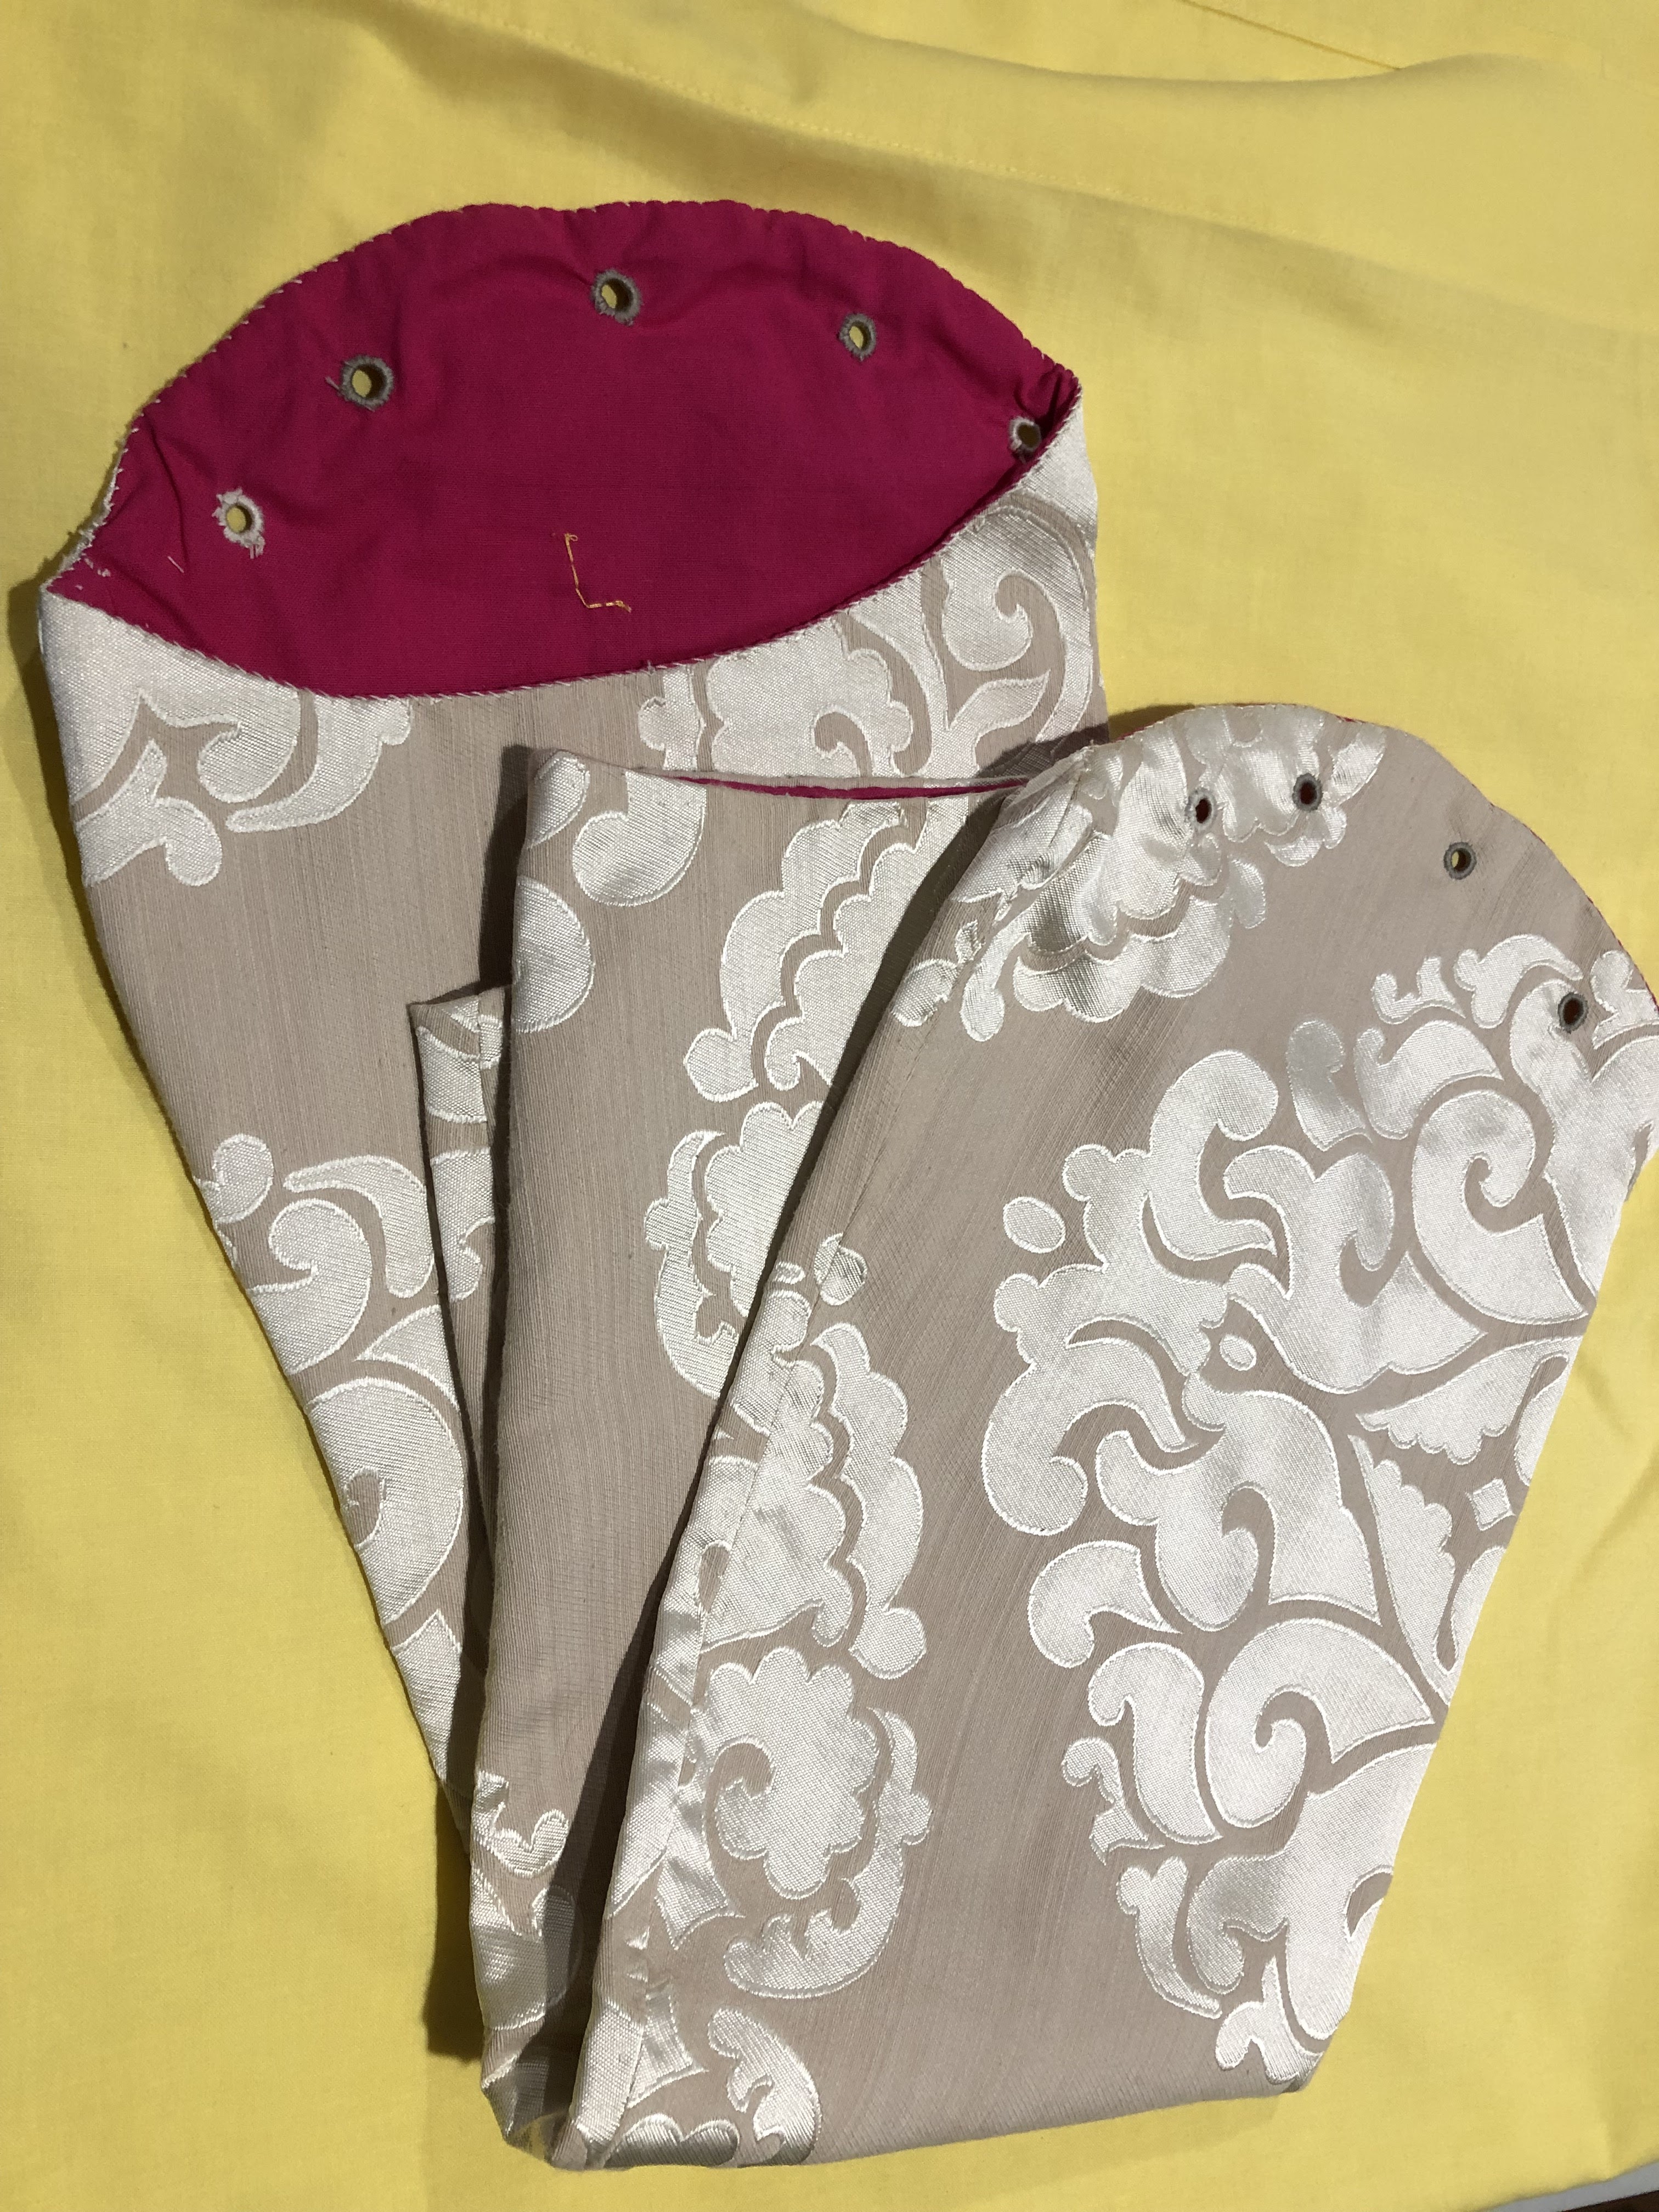
May Day Challenge - Italian Style Tie-on Sleeves #1 (Cream damask)

Last year Duchess Constanzia Moralez of Lochac set a Challenge to all those interested -The May Day Challenge (a personal challenge on how to improve your SCA in any way by May Day, AS LVII). 

Image credit: R. Vess

My Challenge was to work on that UnFinished Object pile and get some items finished. My friend won Crown during the Challenge, and so some of my energy was diverted into helping create garb for Them and Their Household, but I did manage to get some items finished before the Challenge ended.

First up is a pair of sleeves that just needed two more eyelets added on each sleeve. (An easy task to put off, because I hate doing eyelets!)


Thursday, March 2, 2023

Mouse Pouch

In my SCA Kingdom, admission to the Mouse Guard is given by the Crown in recognition of the contribution to our Kingdom by children between the ages of four and thirteen years old. Recipients are traditionally presented with a red pouch known as a 'mouse pouch'.

I found this unfinished mouse pouch in my Unfinished Object (UFO) pile, just lacking eyelets and ties. So I finished it off, and presented it to His Majesty to be presented to a new member of the Guard sometime in the future.


I'm pleased to have another UFO completed, and relatively happy with how the pouch turned out (although I would thread the ties differently next time).


Thursday, February 23, 2023

Post- Christmas Sewing Projects

 Hello everyone and apologies for the delay in posting. The usual post-Christmas flare has meant that I haven't been able to do most of what I wanted to get done. I have had a lot of very boring mending to do as well as mundane sewing, so I haven't had much to report that relates to historical projects - plus internet connectivity has been an issue.

I hope everyone had a pleasant festive season. I received a lovely, thoughtful gift from one of my friends.

The seam ripper has a hand-made wooden handle and was commissioned by a local artisan in Queensland (and has already had quite the work-out).

The yarn is hand spun by my friend. She only taught herself to spin in the last year or so, and I am very impressed. I need to think of a suitable project to showcase it.

Monday, May 9, 2022

Green Linen Tie-On Sleeves In The Italian Style

 Are you getting bored with sleeves yet?!

I recently finished another pair, this time in a pretty green linen.

They are constructed in the same way as the rest. I cut out my favourite roomy sleeve pattern in the lining and fashion fabrics and edged them with zigzag stitch on the  machine. The seams were sewn on machine with straight stitch and opened out and stitched down. 

I sewed the green linen fashion fabric and lining together at the sleeve head (wrong sides out), and clipped the curves to reduce bulk before turning the right way out. 

I hand stitched around the top of the sleeve to stop the lining rolling out. 

I sewed the wrist hem by hand and then whipped the lining in with another row of stitching. This seems like extra work,  but if the lining ever stretches, it means I can re-hem it without affecting the hem on the green fashion fabric.

I worked eyelets around the top of the sleeve for tying on and then put my trusty 'L' on the inside of the left sleeve.


Thursday, April 21, 2022

Khaki Tie-On Sleeves in the Italian Style

 Another pair of sleeves finished!

These are made out of a cotton fabric remnant that I found in an op (thrift) shop.

They are constructed in the same way as all the others; the lining and fashion fabrics were cut out using my favourite sleeve pattern and edged with zigzag stitch. The seams were sewn on machine with straight stitch and opened out and stitched down. Then the fashion fabric and lining were sewn together at the sleeve head (wrong sides out), curves clipped and then turned right way out. The top of the sleeve was top stitched by hand to stop the lining rolling out. The wrist hem was sewn by hand and the lining whipped into place. Eyelets were worked by hand at the top of the sleeve and an 'L' was sewn into the left sleeve to make lacing the sleeves on in a hurry easier.


Wednesday, April 6, 2022

Red-Gilt Tie On Sleeve in the Italian Renaissance Style

I finished another pair of sleeves this week, and boy! are they pretty. The fabric was purchased from etsy several years ago. A miscellaneous fibre content includes gilt threads. They were sold as silk brocade but I would be very surprised if they actually contain silk.

I'm very pleased with these sleeves. Eyelets are still very hard on my hands but I am getting faster at working them.

I made these sleeves to the same pattern and in the same way as the others I have blogged about recently. The lining is purple broadcloth.

Putting a small running stitch along the inside of the top edge to stop the lining rolling out with wear.


Hemming the sleeves. I sewed down the fashion fabric hem with tiny stitches, and then hemmed the lining separately.

Working the eyelets. (I've added an L for Left to save time getting ready before events.)

The finished product. The pictures fail to capture the richness of the fabric.


Thursday, March 31, 2022

Red Tie-On Sleeves in the Italian Style

I finished another pair of sleeves this week. The majority of the sewing had been completed and it was just -you guessed it - eyelets needing to be done. On a positive note; I am getting faster at eyelets now, and hating them slightly less. (Good thing too, as no doubt have hundreds in my future!)

These sleeves were constructed in the same way as the others listed previously. I'm not sure what the fabric content is but they certainly have some metallic threads in them. They have a bit of a shine as the light moves over them. They are not a bright red, but are brighter in real life than the brown-red shade that they look like in the final pictures.

Whip stitching the lining wrist hem into place.

My trusty 'helper'


Sunday, March 13, 2022

Pale Blue Tie-on Sleeves in the Italian Style

Another pair of sleeves complete and out of the UFO pile! This pair is made from a light blue brocade type fabric that I found in a remnant bin at a thrift store and is based on the Italian tie-on style.


The camera has was washed the colour out a bit:

The sleeves were created in the same way as outlined in my previous post. 

As usual, the eyelets were what was holding me up.


I've embroidered an 'L' on the left sleeve because I always seem to be in a rush when it is time for events, and nothing wastes more time or adds more stress than struggling into a big dress only to find out you laced your sleeves on wrong - and then have to struggle back out of it, unlace them and then re-lace them on the correct sleeves. Ask me how I know, haha.


Monday, March 7, 2022

Italian Tie-On Sleeves Made From A Thrifted Green Sari Skirt

I finished a pair of sleeves that was sitting in my UnFinished Objects pile.

This pair has not been waiting to be finished as long as some others in the pile. (I only started them in 2021.) I picked up a pretty skirt made out of sari fabric at an op shop and thought it would made a nice pair of sleeves. The skirt was child size so there was some careful unpicking and placing to be done. 

I used my trusty pattern which makes a roomy and comfortable sleeve. Placement was key to try and get best use from the fabric and make sure the motifs were all going in the same direction.
Luckily, I have a great helper!
Edges were zigzag stitched on the machine and the seams ironed open and tacked down. Linings were given the same treatment.
The sleeve and lining was sewn wrong side out then I clipped the corners and turned the right sides out.
I whip stitched around the top of the sleeve head to stop the lining pulling to the outside over time as a bit of pressure is put on the sleeve head from the lacing.
I turned the hem under at the wrist and secured it with tiny stab stitches.
Then I folded the lining hem under and hand sewed it in place.
Finally, I added five eyelet holes at the top of each sleeve so it can be tied into place.
The finished sleeves. I am pleased with how these turned out. I only *just* had enough fabric to get sleeves out of the skirt. The gilt thread in the motif makes the sleeves look quite opulent. I don't expect that they will be the most durable sleeves ever, but they sure are pretty.