Showing posts with label Italian sleeves. Show all posts

Tuesday, February 13, 2024

Future Challenge - Blue Brocade

 Here's an idea I had for a future challenge for myself: I found this gorgeous remnant at an op shop (thrift store) for about $1.50. It looks like it has been trimmed off the bottom of a curtain; it is quite narrow and has a hem on the bottom.

Will I be able to make a pair of detachable sleeves out of it? Stay tuned...


Tuesday, April 11, 2023

Sleeves - Italian Style Green Gown for a Young Woman

These are the sleeves that I made to go with the green Italian style gown that I did an earlier progress post on. 

The sleeve pattern is not in the traditional 16th Century style (with the seam running down the outside back seam), but rather a modern style sleeve with the seam underneath. This is because the patterns for  the bodice and sleeves were 'guess-timations' as the wearer was not available to be fitted.

The plain pair is self -lined, and the pair with hand-sewn trim have a light calico lining because the trim adds quite a lot of stiffness. The sleeves tie on with ribbons through hand-sewn eyelets. I fell my seams by hand to keep everything nice and flat, and I prefer to sew the sleeve hem and lining hem separately so that I can offset the lining to prevent it rolling out if the sleeve stretches a bit with wear.


Monday, May 9, 2022

Green Linen Tie-On Sleeves In The Italian Style

 Are you getting bored with sleeves yet?!

I recently finished another pair, this time in a pretty green linen.

They are constructed in the same way as the rest. I cut out my favourite roomy sleeve pattern in the lining and fashion fabrics and edged them with zigzag stitch on the  machine. The seams were sewn on machine with straight stitch and opened out and stitched down. 

I sewed the green linen fashion fabric and lining together at the sleeve head (wrong sides out), and clipped the curves to reduce bulk before turning the right way out. 

I hand stitched around the top of the sleeve to stop the lining rolling out. 

I sewed the wrist hem by hand and then whipped the lining in with another row of stitching. This seems like extra work,  but if the lining ever stretches, it means I can re-hem it without affecting the hem on the green fashion fabric.

I worked eyelets around the top of the sleeve for tying on and then put my trusty 'L' on the inside of the left sleeve.


Thursday, April 21, 2022

Khaki Tie-On Sleeves in the Italian Style

 Another pair of sleeves finished!

These are made out of a cotton fabric remnant that I found in an op (thrift) shop.

They are constructed in the same way as all the others; the lining and fashion fabrics were cut out using my favourite sleeve pattern and edged with zigzag stitch. The seams were sewn on machine with straight stitch and opened out and stitched down. Then the fashion fabric and lining were sewn together at the sleeve head (wrong sides out), curves clipped and then turned right way out. The top of the sleeve was top stitched by hand to stop the lining rolling out. The wrist hem was sewn by hand and the lining whipped into place. Eyelets were worked by hand at the top of the sleeve and an 'L' was sewn into the left sleeve to make lacing the sleeves on in a hurry easier.


Monday, March 7, 2022

Italian Tie-On Sleeves Made From A Thrifted Green Sari Skirt

I finished a pair of sleeves that was sitting in my UnFinished Objects pile.

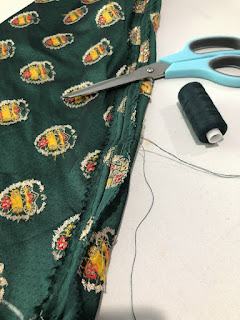
This pair has not been waiting to be finished as long as some others in the pile. (I only started them in 2021.) I picked up a pretty skirt made out of sari fabric at an op shop and thought it would made a nice pair of sleeves. The skirt was child size so there was some careful unpicking and placing to be done. 

I used my trusty pattern which makes a roomy and comfortable sleeve. Placement was key to try and get best use from the fabric and make sure the motifs were all going in the same direction.
Luckily, I have a great helper!
Edges were zigzag stitched on the machine and the seams ironed open and tacked down. Linings were given the same treatment.
The sleeve and lining was sewn wrong side out then I clipped the corners and turned the right sides out.
I whip stitched around the top of the sleeve head to stop the lining pulling to the outside over time as a bit of pressure is put on the sleeve head from the lacing.
I turned the hem under at the wrist and secured it with tiny stab stitches.
Then I folded the lining hem under and hand sewed it in place.
Finally, I added five eyelet holes at the top of each sleeve so it can be tied into place.
The finished sleeves. I am pleased with how these turned out. I only *just* had enough fabric to get sleeves out of the skirt. The gilt thread in the motif makes the sleeves look quite opulent. I don't expect that they will be the most durable sleeves ever, but they sure are pretty.


Friday, December 10, 2021

Tie-On Sleeves of Red and Gold WIP

I am still trying to work through my UnFinished Object pile. I pulled these sleeves out this week; they have been unfinished since 2019 and I had completely forgotten about them! What a nice surprise to find them when I was looking for interfacing for a  mundane sewing project. The fabric is lovely and vibrant (the photo doesn't really do them justice).


The sleeves have been cut out and edged and have the cotton lining with them. They just need to be hand finished, hemmed and have eyelets put in to be wearable, so that is my next project to work on.

Friday, October 19, 2018

Blue and Gold Tie-On Sleeves

I had an event back in September and I thought a new pair of sleeves would perk up my old gown.
I used an existing sleeve as a pattern.
The fashion fabric was sold to me as 'silk and gilt.'
I cut out the sleeve in the fashion fabric and lining in some solid cotton broadcloth. I machine zigzagged round the edges for stability.
I machine sewed the centre back seam, and then hand tacked all the seams open. Then I slid the sleeve and lining together (wrong sides out) and pinned together at the top.


I machine stitched around the top, clipped my curves and then turned the sleeve right way out. I use a pin to make sure that the seam is fully pulled out and sitting nicely, and then pin the lining into a secure position. I then whip stitch around the top of the sleeve to make sure the lining doesn't move around when I am wearing the sleeve.


I mark the positions of the eyelets to correspond with the ties on my gown. I use an awl and a knitting needle to make the holes. I use a double running stitch to sew around the outside of the hole and then I go over the edges with a satin stitch in thick thread.
I added a decorative tabbed piece at the wrist. This decorative effect can be seen in many sixteenth century portraits. I double over a piece of fabric, and sew it together. I then sandwich it in place at the edge of bodice or sleeve (as in this case.) I whip stitched it into place on the outside and inside. Sometimes I add a running stitch along the inner edge for extra strength. I usually don't snip the tabs until it is sewn into place; it depends on how tired I am! Be very careful when snipping that you don't catch the actual sleeve. I usually do 0.5 cm or 1 cm tabs (snipping every 5mm or 10mm).

The bodice edge on this gown shows a similar tabbed effect. 
Portrait of a Woman inspired by Lucretia by Lorenzo Lotto c 1530
Image from: https://www.nationalgallery.org.uk/paintings/lorenzo-lotto-portrait-of-a-woman-inspired-by-lucretia

This portrait of the lovely Eleanor of Toledo shows a tabbed edge to her bodice.
Portrait of Eleanor of Toldeo by Agnolo Bronzino
Image from: https://upload.wikimedia.org/wikipedia/commons/7/75/Agnolo_Bronzino_-_Eleonora_of_Toledo_-_Google_Art_Project.jpg

You can see tabbed bodice edges on several of Eleanor's gowns, including this one: https://www.alamy.com/portrait-of-eleanor-of-toledo-1522-1562-museum-staatliche-museen-berlin-image212355471.html

Supervision by Bitey

The new sleeves with my black gown


I was really happy with how this project turned out. I am looking forward to making up some more sleeves in different fabrics. I know I have said it before, but a range of tie-on sleeves really are a great investment and a valuable addition to an Italian noble wardrobe.

Monday, October 9, 2017

Italian style Tie-On Renaissance Sleeves - Aqua Blue

Okay, one more pair finished from the Huge Unfinished Sleeve Pile. I tried to get a few more pictures to explain the process this time, too.
This is not the aqua blue sleeve, but is the same pattern shape.

The sleeves and linings are sewn up and then I stab-stitch the seams open.

You can see the tiny dots running along the outside of the seam below.


Once the seams are finished, I put the 'good' sides of the sleeve and lining together (so that I can see the messy inner seam on my side) and run a line of stitching around the top of the sleeve to join them together. If there are tabs on the top of the sleeve, you need to position them before you sew this seam, and also make sure that they are positioned so that they won't move around when sewing (and crucially) so that the tabs will be on the outside of the sleeve when you turn it the right way out.

Once this seam is sewn, I put clips in the seam allowance to reduce puckering when the sleeve is turned the right way out.

Next, I turn the sleeve right way out. All seams should be hidden inside the sleeve and only nice finished seams visible when you look inside as well as on the outside. I usually put a line of small whip stitching around the top of the sleeve to make sure the lining doesn't roll out or move.


 Notice the whip stitching around the top of the sleeve.

Making sure that the lining is not tucked up inside and is sitting smoothly, I measure my hem allowance. I also zigzag my edges for durability.

This sleeve has been hemmed; you can just see the tiny dots showing on the outside which is the hemming line. I clip triangles into the outer and inner fabrics to reduce puckering and bunching.


I prefer to hem  my lining separately to reduce puckering. I use a little whip stitch, same as on the fashion layer of fabric.

 The hemmed sleeve showing the lining

Working the eyelets on top of the sleeves: the holes correspond with the ties in the gown. I make a hole with an awl, and then increase the size of the hole with a bigger awl that I made out of a wooden knitting needle. I go around the hole with a line of double running stitch. I usually use four strands of thread for strength. I don't use buttonhole stitch because I think it adds too much bulk on top of the double running stitch - I just go over the edges with satin stitch. The eyelets turn out very durable and are big enough that lucet cords can be threaded through without needing a bodkin. This is important as friends usually lace my sleeves on for me at events and I don't want to make it harder for them than it has to be!


 The completed sleeves, waiting to be tried on.