If you have been following me for any length of time, you would know that I love Renaissance accessories, and I love the flexibility that tie-on sleeves provide. It won't come as a shock that I have been working on the 'Accessories' layer of the River Haven Clothing Challenge.
I'd love to do all accessories, but my plan is to start with two pairs of detachable sleeves.
My sleeve fabric
I used my trusty old sleeve pattern and cut into the cream fabric first. I also cut the cotton lining. I zig zag stitched by machine around all the edges and then sewed up the seam that runs down the back of the arm on both the fashion fabric and the lining.
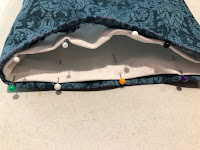
I put the right sides of the lining and fashion fabric tubes together (with a lot of double checking to make sure I was sewing the correct pieces) and machine stitched around the top of the armscye. I then clipped the curves to make sure the top of the sleeve would sit nicely and not be bulky, and then I turned it all right side out. I whip stitched around the top edge of the sleeve to make sure that the lining didn't roll out at any stage.
At this point I quickly embroidered an 'L' inside the left sleeve on the lining to help save time when lacing on sleeves on busy event days.
I marked 1.5cm seam allowance on the fashion fabric and turned the hem under at the wrist and stab stitched it down. Then I turned the lining hem up inside the sleeve slightly more (around 1.75cm) and whip stitched that into place. There were a couple of spots where I clipped a little triangle where the fabric was a bit tight and pulling. I once used to sew the hem and lining together in one step, but I found that often the lining and fashion fabric would stretch at different rates and sometimes the lining would start to poke out a bit.
The final step after pressing the hem with an iron was to mark and sew five eyelets in each sleeve head. I opened the fabric up with an awl, went around the hole with a double running stitch and then enclosed the hole with a ring of satin stitch.
This sleeve pattern is nice and roomy. I have seen slightly more narrow sleeves as well as wider ones in portraits from the 1530s-1550s, so there does seem some leeway in designs.
Image from: mid-1530s Paris Bordone - Portrait of a Lady with... (tumblr.com)
I love this portrait of Lady with a Boy by Paris Bordogne.
The dress is the style I like to wear and her sleeves are beautiful; I'd love the whole outfit. I do wonder if a single fastening on that cut-away style of sleeve is practical for someone who doesn't have a maid to do her lifting and carrying, however. (It may also just be artistic licence on the part of Bordogne.) Hopefully I will have time in the future to play around with my pattern and possibly modify it slightly to try and achieve the general look of that sleeve, but with a stronger attachment point.


.JPG)

.JPG)


