Monday, June 25, 2018
Newcomer Sewing
On the weekend I spent a second Saturday helping a newcomer to cut and sew Viking garb for their first event. I was not the lead on the project, and was just helping doing supplementary jobs. I always find it interesting to work with other people on sewing projects; it is a great way to refine your skill set and help to serve your local group, but it is also a great opportunity to see how and why other people do things in a different way.
Wednesday, June 20, 2018
A Gilded Piggy (hopefully!) fit for a King
I was recently honoured to attend a Royal Event to watch the elevation of a friend to the Order of the Laurel. As part of the festivities, I created a marzipan pig gilded in 23k gold and surrounded with marzipan fruits.
 I've been quite unwell in the last couple of weeks leading up to the event, so I used commercially produced marzipan rather than making my own from scratch. The gold was food grade edible gilt, which comes in sheets and is challenging to work with.
Piggy started off looking reasonably realistic:


Piggy started off looking reasonably realistic:
 |
| This ear was too big and started to bend, so I made the ears smaller |


Castor sugar is under the head to prevent the marzipan from sticking to the platter. Water with a small amount of rosewater added is used as a bonding agent to encourage the pieces to stick together. (Don't use too much or you will get a slimy mess that won't hold shapes and will crack when drying.)
The images I used for inspiration:


Sunday, June 17, 2018
Heraldic Bunting
The head of my SCA household had an idea recently - buy some pre-packaged canvas flags and decorate them with the heraldry of the household to create a decorative bunting. I thought it was a brilliant plan; quick, easy enough for all experience levels, cost effective, and visually impressive.
I had some cheap poster paints in my heraldic colours and just got some fixative to add to make the paint into fabric paint. The coverage was not great, and the result was pretty streaky. I put this down to the cheap acrylic poster paint, and next time I would invest a bit more on pigment-rich, higher quality paint.
The flags are canvas with holes punched into them. I decided to buttonhole edge mine because it can get quite windy here, and I would hate for them to fray and fall apart.
 This is a great project for younger people to get involved in; I printed my device off from the Roll of Arms and put the print up against a window to use it as a "light box''. After that, it was just a matter of painting in the lines and putting down colour. I followed the directions on the fixative bottle; in this instance the flag had to dry for 24 hours before being ironed with an indirect heat to set.
Wednesday, June 13, 2018
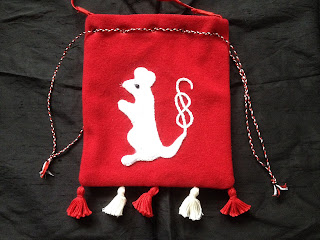
Mouse Pouch for the Mouse Guard
I managed to get a Mouse Pouch finished to coincide with the recent Royal Visit to my Barony. The Mouse Pouch is the token for admission into the Mouse Guard, which is given in recognition of the contribution given to our Kingdom by children between the ages of 4 and 13 years. Pouches are traditionally made for the Crown by members of the Worshipful Company of Broderers of Lochac and need to be pretty sturdy to withstand active little people. It is a cute pouch and I just love seeing the looks on the kid's faces when they are admitted to the Guard.
More information on the pouches can be found here: http://broiderers.lochac.sca.org/projects/mouse
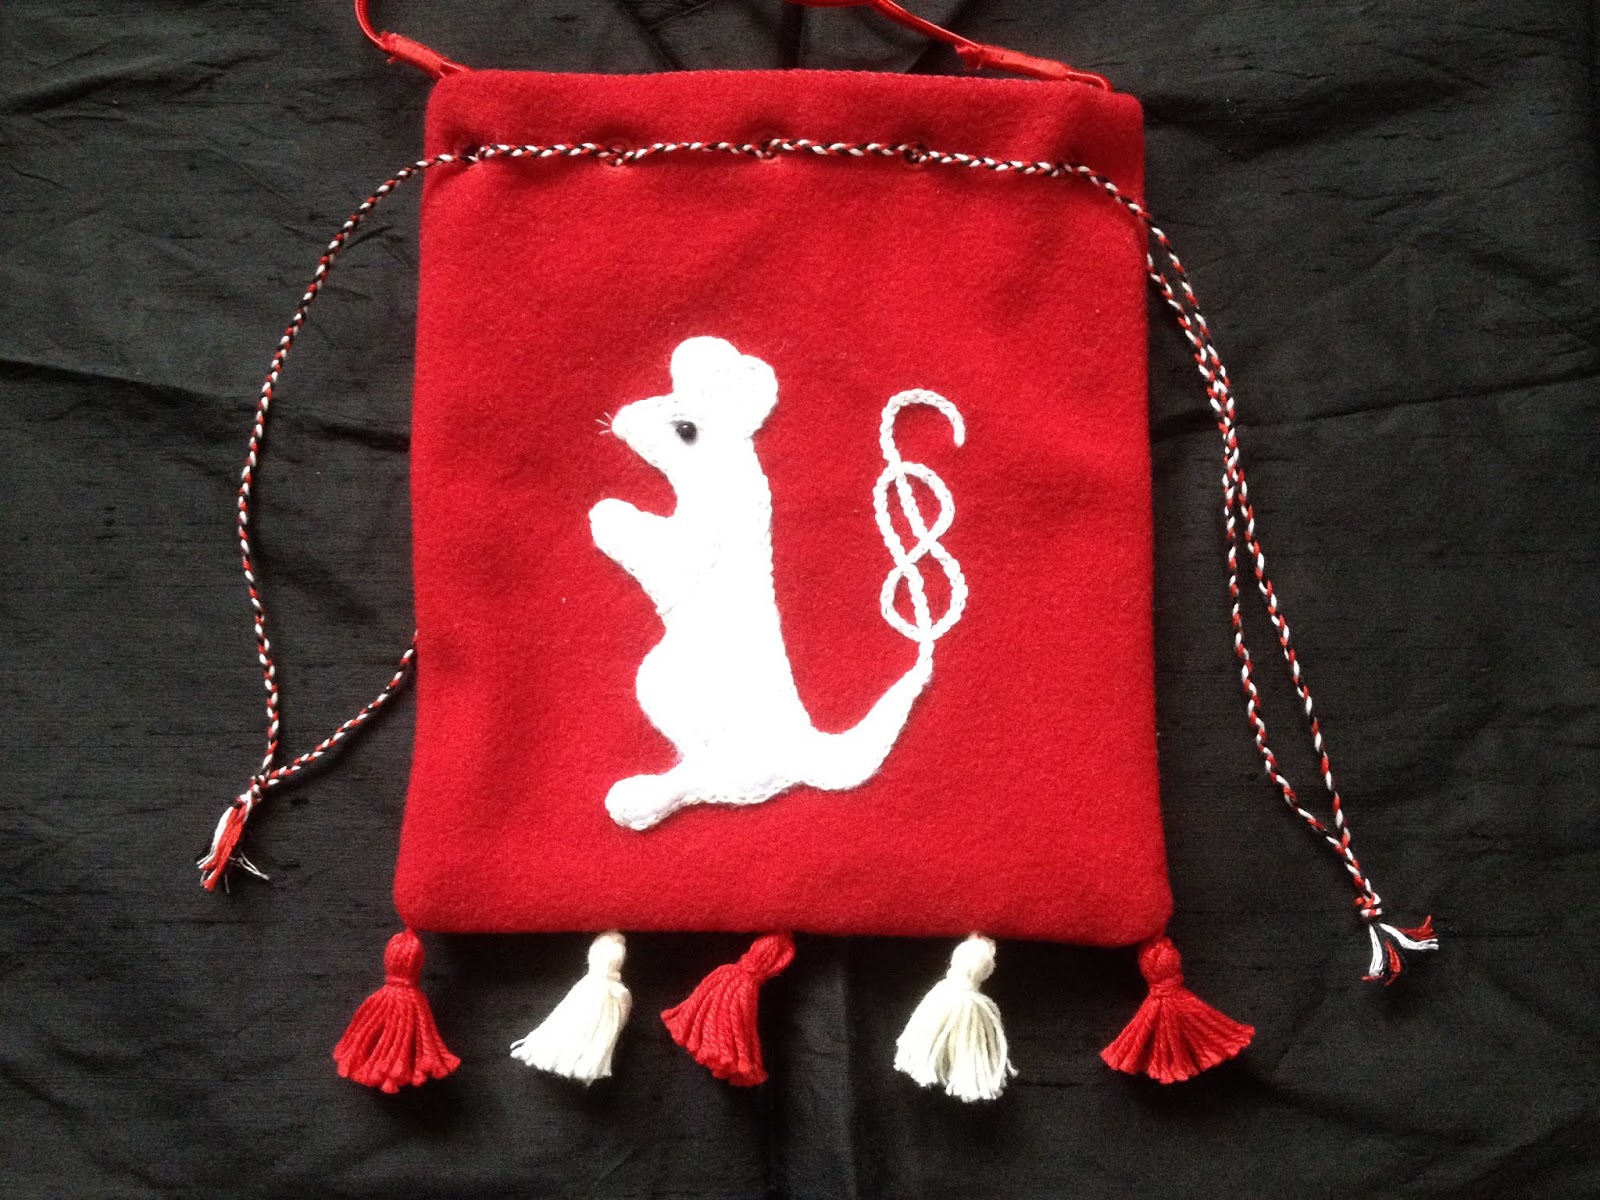
I made my pouch from red wool lined in red linen. The mouse is white wool appliqued with chain stitch embroidery over the edges and for details. The eye is a black glass bead.

Next I appliqued and embroidered the design in the centre of the top half of the outer rectangle. You want your design to be nice and central, but allow a bit of extra room at the top for the fabric to be folded over and eyelets to be worked.
When I was happy with the design, I sewed the two side seams up and did the same on the lining, using the same seam allowance on both. I like to trim the bottom corner edges off so that the points come out nice and sharp when I turn the fabric right side out. Once the outer bag is right side out, I added some little tassels along the bottom of the bag.
One both pieces are sewn and the outer piece is right side out, I slid the linen lining piece inside. The goal is to have all the seams hidden inside the bag. I fold the top of the lining and outer pieces down and whip them together at the top edge so that two pieces are sealed.
The next step is to make the eyelets. I find this to be quite hard on my hands, so I usually don't do them all in one hit. I like five eyelets on each side for this size pouch. I mark the position that I want them to be with a removable pen and then make a hole with an awl. Next I go around the edge of the hole with a double running or back stitch, leaving a couple of millimetres space between the edge of the hole and the stitching. When that is done, I use a satin stitch to bind the edges of the hole.
 Before I add the cords, I sew in the hanging cord. For this one I used a commercially made cord and whipped it to a lacing ring on each side. Then I just sewed in the ring.
 I made some lacing cords out of multiple strands of DMC embroidery floss. I used a simple three strand braid which I thought looked quite effective. I incorporated the three colours used on the pouch.

More information on the pouches can be found here: http://broiderers.lochac.sca.org/projects/mouse
I made my pouch from red wool lined in red linen. The mouse is white wool appliqued with chain stitch embroidery over the edges and for details. The eye is a black glass bead.

Although this is a specific pouch for a specific purpose, the technique is the same for a plain pouch or one with a different design.
First, I drew up a rectangle of the required size. I wanted it big enough to get your hand in, but not so big it would swamp a child. I cut my fabric with a fold at the bottom rather than a seam to reduce bulk. I then cut out the lining in the same way but took a couple of millimetres off the side edges because we want the lining to slide inside.
Next I appliqued and embroidered the design in the centre of the top half of the outer rectangle. You want your design to be nice and central, but allow a bit of extra room at the top for the fabric to be folded over and eyelets to be worked.
When I was happy with the design, I sewed the two side seams up and did the same on the lining, using the same seam allowance on both. I like to trim the bottom corner edges off so that the points come out nice and sharp when I turn the fabric right side out. Once the outer bag is right side out, I added some little tassels along the bottom of the bag.
One both pieces are sewn and the outer piece is right side out, I slid the linen lining piece inside. The goal is to have all the seams hidden inside the bag. I fold the top of the lining and outer pieces down and whip them together at the top edge so that two pieces are sealed.
The next step is to make the eyelets. I find this to be quite hard on my hands, so I usually don't do them all in one hit. I like five eyelets on each side for this size pouch. I mark the position that I want them to be with a removable pen and then make a hole with an awl. Next I go around the edge of the hole with a double running or back stitch, leaving a couple of millimetres space between the edge of the hole and the stitching. When that is done, I use a satin stitch to bind the edges of the hole.


Tuesday, June 12, 2018
Medieval Faire 2018
Every year, my SCA group does a display at a local Medieval Faire. It is a fun event, with a wide range of displays and activities. It includes displays by many local living history and re-enactment groups.

 |
| Some of the heavy fighters in my group putting on a demonstration |
 |
| My friend Mistress Anna looking gorgeous and sitting in front of some of my embroideries |
 |
| I finally finished off this dress that I started in 2013, and got my photo taken with a beautiful falcon |
Monday, June 11, 2018
Newcomer Garb
I had a rough second half of the week, battling a stomach bug. I wasn't well enough to watch the local archery day on the weekend, so I spent the time with a friend helping a college newcomer make their first set of garb.
 I also had the privilege of seeing a third generation SCA kid have their first try at rapier.


Friday, June 8, 2018
Tunics, tunics, tunics!
I've been sick again this week, but where possible I have been working on the suite of tunics for the Baron.
It is also getting quite chilly here, so I am thinking about cold weather clothing. I often have a low grade fever, so I don't have a large amount of warm weather clothing. Since coming off of one of my medications about eighteen months ago I have been almost continuously sick with infections -including chest infections. So a cloak or shoulder cloak with a nice fur collar seems like a sensible item to have in the wardrobe.
Last year I experimented with dyeing an old blanket. The plan was to achieve some blue wool, but I ended up with a pale purpley-grey colour. I cut out a short circle cloak from it and lined it in some very bright pink linen, and left it to hang.
It has been hanging for a looong time! Time to finish it off so I can use it for winter wear. It will be nice to finish off some UFOs that have been hanging around for far too long!
Subscribe to:
Posts (Atom)