Here is the completed outfit that I referenced in an earlier post. There are three foreparts and two sets of sleeves that go with the dress and it is mostly handsewn.
Elizabethan, Tudor and Renaissance inspired embroidery, clothing and accessories - historical costuming, embroidery and re-creation
Friday, April 28, 2023
Tuesday, August 16, 2022
Black Linen Summer Gown in the Italian Front-Lacing Style
This was a quick project with some modern sewing techniques used to save time. I modified one of my other gown bodice patterns to drop the waist a bit, make the shoulders a little wider and put a bit more depth into the point of the bodice.
The gown bodice was an experiment with no boning. The linen was lined with heavy cotton canvas and the two pieces 'bagged out' or sewn together with the machine and then turned right side out.
I hand sewed the bottom edge of the bodice and the armholes.
The trim is just simple ribbon, sewn on by hand.
The eyelets were all done by hand with an awl and sewing thread. I decided to add some bias binding along the font edges and slip bones in for a bit of rigidity and to stop the eyelets puckering. Once I tried the completed bodice on, I felt that it needed some extra boning, so I added bias binding strips at the centre side seams and across the back of the bodice, and put four more bones in.
The skirt is simply a series of rectangles of fabric sewn together. I let the skirt hang for a long time to let the hem drop and reduce distortion due to the weight of the fabric.
I pleated the skirt on by turning the top edge under and then marking out regular dots along the skirt top edge. I ran a heavy thread through to draw the skirt up into cartridge pleats. Normally you would use a double row of thread to do this, but I cheated and only did one. The risks with one thread are that it may break and you will have to start all over again, and that the pleats may be slightly uneven if you are not very careful with your dot marking and needle placement. I usually do a two-part line of pleating; on a front opening gown, I run one line of pleating thread from centre-back to centre- front on one side, and do the same on the other. I find that it makes adjusting the pleats more manageable, especially if the skirt is very full and bulky.
Ones the lines of pleating thread are in, I put safety pins in to mark the centre-back and centre-sides of the skirt panel. I line the safty pins up with the corresponding side seams, centre-back point and centre-front point of the bodice. Then I carefully draw up my pleating thread, adjusting the pleats to sit evenly in their quarter. Then I adjust a quarter at a time to make sure the pleats are all evenly spread out and looking nice. A quarter panel at a time, I use heavy thread to sew each pleat onto the bottom edge of the bodice. I usually use four strands of sewing thread that has been waxed for strength. I also knot the thread off unobtrusively at about every 10 cm point, so that if I were to rip some pleats out by accident when wearing the dress, the whole skirt will not fall off.
Once the skirt is on, I cut the pleating thread. This is optional; if you want defined cartridge pleats, leave it in. I prefer less defined pleats so I cut the thread on mine. I hand finish the front opening gap of the gown and add a buttonhole bar at the bottom of the skirt opening for extra strength. I did not add hooks and eyes on the opening of this gown - I left a bit of extra fabric at the front of the dress that I could pin shut and would be adjustable. I then let the gown hang for several more days to let the skirt drop if necessary and to let the pleats fall properly.
I had help from my dear Mum with the hemming, and I added some ribbon trim around the bottom when hemmed as well.
Finally, I used some scraps from gown construction and another project to make the pouffy sleeve heads that I like so much. I sewed strips of fabric together to make a panel approximately 2.5 times the size of the sleeve cap pattern that I drafted as a base. I pinned the puffs into place by eye, until I got roughly the look I was going for. This is a tedious task, but I can't think of a better way to do it. Once pinned, I hand sewed down all the puff pieces in sections to keep it secure. Then I make all the bulky fabric puffs point to the centre of the sleeve cap and then put the lining piece on top and machine sew most of the way around (without catching any of the puffs in the seam.) Then I trimmed the seams, turned the puff the right way out and hand sewed the gap shut. I also hand sewed around the edge of the entire puff to stop the bulky puff section moving or turning in. It is important to have a stable base for these puffs or they move around and stick up.
I added some lucet ties underneath so I can wear the dress with removable sleeves.
The dress was reasonably cool, but I unfortunately made the bodice a smidge too long and wide, so there is some wrinkling that I am not happy with. I will make the next one a bit shorter so it sits better and I wont have to worry about my sash riding up or down. This one needs taking up so it sits better.
| I spent a good proportion of the day adjusting my sash because the bodice is too long |
Tuesday, October 6, 2020
Calontir Clothing Challenge (Post 2)
Amusingly (after being very excited and enthusiastic in the lead up to the start date), this Challenge seems to have me paralysed with doubt and uncertainty. I haven't been feeling very well either, which doesn't help, and I have a lot of other SCA commitments. All combing to be the Perfect Storm of Getting Nothing Done.
I did manage to get a pair of sleeves cut out (just the fashion fabric part), and a linen partlet cut out. Ive sewed up and enclosed the side seams but haven't hemmed it yet. I need to decide how to decorate it (the fun part!) but the design I go with will depend on the final design I pick for the dress. I'm not sure I want to do a recreation of a specific gown, more a blending of design elements from several similar portraits.
Saturday, September 19, 2020
Comfy purple tie-on sleeves
Last month I was chatting to a friend about how we might previously have thought that a global pandemic (and subsequent SCA shut-down) would be a great time to catch up on projects and get things done, and how surprised we were by how tired and unmotivated we were. We decided that we would try and motivate each other and challenged ourselves to complete a pair of sleeves each in a month.
The first step was the pattern. I had a nice comfy one that needed a bit of a tweak, but my friend didn't have a pattern. We had a fun Zoom session with me trying to help her draft a pattern by draping.
Next step was cutting out. I was lucky that I had some fabric set aside to make a set of sleeves. Two lots actually, which was lucky because I was tired when I cut the first pair out and I cut out two left sleeves. Ugh! I know better, but if I didn't do any cutting or sewing when tired, I would be getting even less done than I am now.
Take 2 and the sleeves were cut out along with a matching lining. I ran a machine zig-zag stitch around the edges and then sewed the seam.
Then I finger pressed the seams open and ran a little stab stitch along the inside to keep them open.
I lay the sleeve flat and pin the outer sleeve (fashion fabric) hem. It is important here to make sure that the inner lining is nice and smooth too with no bumps or folds. I use tiny stab stitch to sew it in place. Then I fold the lining hem under, leaving about 3 mm of the sleeve showing. I used to just marry the two edges together, but I was finding that the lining would often start to bubble out slightly after a bit of wear, especially if the lining was a different type or thickness of fabric.
This lot of eyelets is not the best that I have done, mainly because I haven't done any in so long and because I was rushing. But they work fine, and I got them done in a night. I actually wore the sleeves to a virtual online event. It was nice to be back in garb again and I was happy to have finished them. I like my 'comfy' sleeve pattern because it is not restrictive, unlike some of my tighter sleeves.
Thursday, May 21, 2020
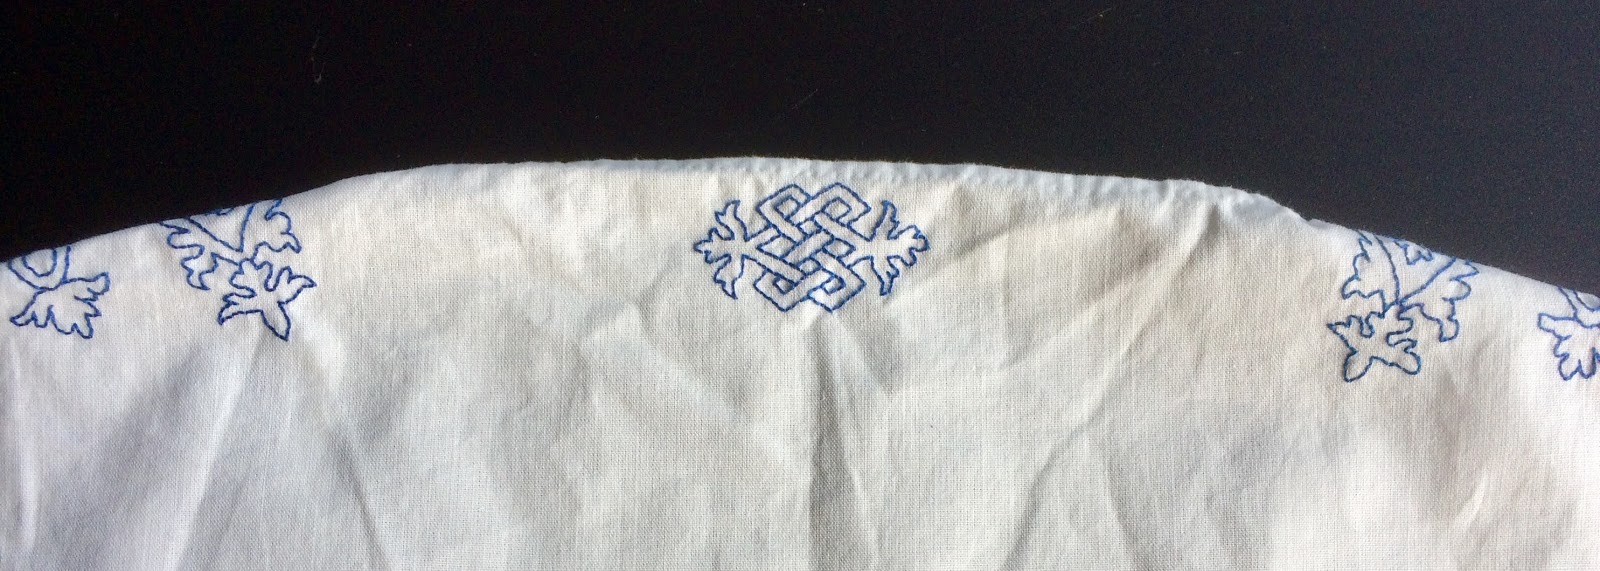
Partlet with Blue Knotted Embroidery (Complete)
Monday, May 4, 2020
Linen Partlet with Purple Flowers
I will keep you posted!
Wednesday, March 11, 2020
Red and Gold Tie-On Sleeves Made From A Sari
I carefully washed and dried the tunic. Unpicking it was challenging as the fabric is delicate and has gilt metal threads through it. I would not be surprised if it is a silk or silk blend fabric. The garment had obviously had several adjustments for a growing child, and there were interesting tucks and joins all over the tunic.
I also removed the trim which was pretty but very much the worse for wear.
Saturday, May 11, 2019
Tie-on Sleeves in Plum Cotton Fabric
The sleeves are cut out and zigzag stitch put along the cut edges. Then the side seam is machine sewn (or hand-sewn if I have the time and manual dexterity, which I usually don't).
Th idea with the inside seam is to press or finger-press the seam open and flat on the inside and sew it down with tiny invisible stitches so that it doesn't bunch or twist with wear.
I'll admit that I was struggling with the project, so I was pretty satisfied when I was done.
Yep, those are two right sleeves!
Of course, I noticed this after the seams had been machined and then hand sewed flat. (Eyeroll.)
Thursday, September 20, 2018
Repurposed Tatted Lace Partlet
The piece had a few rust stains, but with some careful laundering I managed to brighten it up. I cut the piece to use the two parts as the front panels of a collarless partlet. I managed to use the pretty edging on the central parts and avoid most of the remaining rust marks.
I made the back part of the parlet up in linen and hand hemmed it with a small hem. I pinned the tatted panels in place. I will trim the excess tatting on the outer edge (which will be hidden by my gown) and trim with binding. I have a couple of colour options waiting to be tested for the binding as matching the colour is difficult.
I have been pretty busy with projects for other people lately, so this one is sitting in the to-do pile, but I am looking forward to getting it finished as I really love the tatted piece and it makes me happy to think that some other ladies' hand work is getting a new lease on life and will be admired rather than languishing in a bin of ugly doilies.
Wednesday, September 13, 2017
Hemming of Body Linens
Sewing the enclosed seam flat.
Tacking down the edge of the partlet prior to pinning the second fold into place. Although it seems like extra work, I do it this way because I have a lot of issues with my hands and it hurts to sew. Any extra, uneccessary fabric manipulation just means unnecessary pain.
Tuesday, September 12, 2017
Purple Tie-on Italian Sleeves
Here are the purple pair in-progress and completed. The black satin ribbon had already been sewn on and the seams sewn open. I whipped around the top edge of the sleeve to stop the lining rolling out. Then the purple fabric was hemmed. Then I hemmed the black lining seperately and added the eyelets.
Sunday, June 18, 2017
A&S Challenge - Seam Treatments and a New Sash
Saturday, April 9, 2016
Striped Dresses in the Renaissance - Research Notes
Detail from ''The Finding of Moses'' - Bonifacio Veronese
Image from: http://www.wga.hu/html_m/b/bonifaci/
Portrait of a Lady with a Boy - Paris Bordone
Image from: http://www.myartprints.com/a/bordone-paris/portrait-of-a-lady-with-a-14.html
Portrait of Noblewoman and Son - Bartolomeo Passarotti
Image from: http://upload.wikimedia.org/wikipedia/commons/6/61/Bartolomeo_passarotti,_ritratto_di_nobildonna_col_figlio.JPG
Portrait of a Venetian Noblewoman at the age of 18 - Giovanni Antonio Fasolo
Image from: http://starlightmasquerade.com/PortraitGallery/Closed-Bodice-Venetian/inspiration-pages/closedbodice52a.htm

Portrait of the Women of the Giusti del Giardino family - Girolamo Forni
Image from: http://bjws.blogspot.com.au/2016_02_04_archive.html
Self Portrait - Marietta Robusti c. 1580
Image from : http://www.wikiart.org/en/marietta-robusti/self-portrait-1580?utm_source=returned&utm_medium=referral&utm_campaign=referral

Porrait of a Lady with a Dog - Paolo Caliari (Veronese)
Image from: https://blogger.googleusercontent.com/img/b/R29vZ2xl/AVvXsEgmmV50GzVZbSS_a-BdmRaRzWX183-Bph7tKmAE-BPWgVvdxJyx1NbzBzwbIl6HawD4W1NZ4TEj5FGYPCDoVd1-apVPMJmR_EJFzYhf4Qx5YL97aIpsRAIClBG9pVBfjEiX5Xh3p8tM-dN4/s1600/Portrait-of-a-LadyPaolo+Veronese1560-70.jpg

Paola Gualdo And Daughters Laura and Virginia- Giovanni Antonio Fasolo
Image from: https://au.pinterest.com/pin/538883911640923357/
and detail:

https://s-media-cache-ak0.pinimg.com/236x/c8/b0/ef/c8b0ef5ad5f769f462767bb70db5d757.jpg
Portrait of Caterina di Ferdinando I de' Medici - Tiberio di Tito
Image from: http://www.wga.hu/support/viewer_m/z.html
Portrait of the artists sisters and brother - Sofonisba Anguissola
Image from: http://www.artexpertswebsite.com/pages/artists/anguissola.php

Portrait of Cardinal Granvelle's Dwarf - Antonis Mor
Image from: http://www.artinconnu.com/2009/05/antonis-mor-anthonis-mor-van-dashorst_07.html
Portrait of a Knight of Calatrava - Frans Pourbus the Elder
Image from: https://commons.wikimedia.org/wiki/File:Knight_of_Calatrava_by_F._Pourbus_the_Elder.jpeg
Portrait of a Man in Armor with Two Pages (Detail) - Paris BordoneImage from: http://the-earth-is-flat.blogspot.com.au/p/we-were-there-stripes.html
Portrait of a Boy with Fruit - Mirabello Cavalori
Image from: http://the-earth-is-flat.blogspot.com.au/p/we-were-there-stripes.html
Giovanni Battista Moroni
Image from: http://realmofvenus.renaissanceitaly.net/yourgarb/2009/Christy-children.jpg
The Daughters of Giovanni II Bentivoglio and Ginevra Sforza - Lorenzo Costa
Image from: http://thescarletlibrarian.tumblr.com/post/141801959572/how-would-you-rate-the-borgias-costumes-as-far-as

Detail of Madonna in Trono e Santi - Jacopo Bassano
Image from: https://au.pinterest.com/desamona/history-1560-s/
Invitation to the Dance - Giovanni Antonio Fasolo
Image from: http://www.gettyimages.com.au/detail/news-photo/invitation-to-the-dance-by-giovanni-antonio-fasolo-fresco-news-photo/154715850

Portrait of a Girl', 16th or early 17th century. Found in the collection of the Regional A Deineka Art Gallery, Kursk, Russia.
Image from: https://au.pinterest.com/pin/66639269461585875/