Sunday, April 28, 2013

Blue dress update

I wore the mostly-finished blue drill dress to an event last night. It was 'one of those nights' where everything went wrong while I was getting ready, so I didn't have time for anything more than a quick mobile phone snap before I ran out the door. I will get some nice, good quality shots soon, but this one at least gives you an idea of how it looks.


It was a warm and muggy night, so I didn't need the undersleeves after all.

Saturday, April 20, 2013

Blue Drill Dress Update

Yesterday, my friend Heather (Queen of Luceters) presented me with the cords to tie on to the sleeve puffs of the blue drill dress. Thank you Heather!


The dress looked so nice with the ties on the sleeves that I was inspired to hand sew the trim onto the hem of the dress. I think it looks very nice, and the trim really stiffens the hem.


Blue Drill Dress Update - Sleeves


Here are a couple of pictures that I took (before the hem was done) to try out sleeve colours. I just used lace-on sleeves (that I already had) to see how they would look. I think I am heading towards white for the final sleeve colour....


Elizabeth I Portrait


Interesting article on an unflattering portrait of an ageing Queen Elizabeth I at http://elizabethangardens.org/visit-elizabethan-gardens-outer-banks-nc/rarequeen-elizabeth-i-portrait/


Image taken from:
http://elizabethangardens.org/visit-elizabethan-gardens-outer-banks-nc/rarequeen-elizabeth-i-portrait/

Thursday, April 18, 2013

Blue Drill Dress Update

I am still working on the blue drill dress. I put the hooks and eyes on and hemmed the skirt yesterday, and there was enough fabric left to turn the hem under, even after my terrible back-to-front skirt panel disaster. What a relief! The dress is now at a wearable stage. Not 100% complete, but wearable. Ideally, I would like to add trim around the hem, and make some sleeves to go with it. I also need to add the cord ties to go on the puffs, and I would like to put a band of trim around the bottom of the sleeve caps.


Hand sewing the sleeves in place. I thought they looked a bit bare, so I decided to add some trim tabs around the stop of the sleeve head. I think it looks much more 'complete' with them.


I have joined the third Italian Renaissance Costuming Challenge, so I need to get this dress finished soon.

Thursday, April 11, 2013

Sleeve ideas for Blue Drill Dress


I am still playing with the sleeve heads for the blue drill dress.

Originally, I planned to have false puffs peeking out from anchored strapwork:


But in the end, I decided that rows of false puffs would be better:


The hand sewing is quite time consuming because I have to angle the needle quite heavily to hide the stitches. It will be worth it though, because I have a tendency to catch real slashes on every door handle I walk past, and always end up ripping them!

One sleeve has all the straps and puffs sewn on, so I am halfway there!


Tuesday, April 9, 2013

Blue dress update

Here is a photo of the blue dress 'in progress'. The front has yet to be hand stitched together. When I placed the trim, I didn't consider that it would have to match up with the trim on the bodice and I put the trim too far from the edge. Because the skirt seam edge is doubled over, the edge is quite thick. This is causing a bit of a problem with placing the hooks and eyes. I am focussing on the sleeves at the moment, and will come back to the skirt later. Hopefully inspiration will strike in the meantime!


Sunday, April 7, 2013

Inferior sewing thread and motherly advice

Anyone who learnt how to sew from their mother or grandmother has probably been told not to waste time on poor quality thread. Up until the last fortnight, I have been extremely lucky with budget threads and I have not had a problem with them. I have been hand sewing my lovely sparkly trim onto the blue drill dress with a roll of thread that was tucked into my thread box. I must never have used the thread before because it is absolutely awful and proves that all that motherly advice was true! It breaks, it twists into lumps, it will not sit flat no matter how hard you tug on it and generally makes the project much more difficult than it needs to be. I bought some Gutermann thread to replace it, and what a relief! Although I really don't enjoy machine sewing, I quite like hand sewing, and good quality thread makes it a much more enjoyable experience.

Easter gift

Because I have been a tad focussed on working on the blue drill dress, I can't believe that I forgot to share my exciting news: my parents gave me a copy of The Tudor Child for Easter! It really is as fantastic as everyone says it is; it has many excellent portraits, as well as the detailed recreation instructions and photographs that owners of The Tudor Tailor would recognise and expect.


Poster from the exhibition and picture of Jane and Ninya from  http://www.tudortailor.com/

Thursday, April 4, 2013

Blue drill dress update - brain fog

I have continued working on the blue drill dress since my last post. As many of you know, I have health issues that involve pain, fatigue and 'brain fog'. Well, the brain fog struck again this week. Over the last few days I have been hand sewing trim onto the dress, sewing skirt panels and grading the slope on the front panels to accommodate the point of the bodice.

Last night I was feeling quite satisfied with what I had done and was getting ready to start sewing the last piece of trim onto the skirt. As I was looking at the last panel, I noticed something odd in the way the light was hitting the fabric. It took me about a minute to realise that I had sewn the final panel on back-to-front. I was horrified, because not only were all the seams pressed open and the edges finished, but I had trimmed the top of the panel to allow for the bodice point. These sorts of things happen to me so often that I am well beyond the stage of bursting into tears. Usually, there is just a very resigned sigh and an extended internal monologue about how much I hate sewing and how bad I am at it!

Needless to say, I spent my leisure time today unpicking, and re-doing the last two days worth of work, hopefully right side out! I have my fingers crossed that there will still be enough hem left to fold up when the dress is hemmed. I had hoped to be able to put a tuck in around the base of the dress, but this error has ruled that idea out. I really do believe in the "measure twice, cut once" rule, and use it. Because I suffer so much from fatigue I am actually very careful about double checking what I do, but these mistakes slip through.

Over the next few days I will be pleating on the skirt, and then I can try it on and get an idea of where I stand regarding the hem length. Hopefully it will all work out!

Friday, March 29, 2013

Front-opening bodice with exposed lacing holes

Over the Easter long weekend I have been working on a blue drill dress that I started in about August or September last year. There have been lots of changes to the plan as I work on this dress in dribs and drabs. I re-made a pattern which has straps further off the shoulders and a pointed bodice. I wanted a front lacing dress so that I can dress myself, as often I don't have anyone to help me dress.

I had planned to close the front of the dress with hooks and eyes, but when I basted them in, they didn't seem terribly secure. Because I am big busted, I plan to wear a pair of bodies underneath the dress anyway, but I didn't want to take a chance on the closures opening up when I bend or move. I also considered ladder lacing, but I have not done it before and I need this dress to be finished within a month. So I am planning on doing ladder lacing through eyelets. This is not a very common bodice closure based on what I have seen of period portraiture.

I have a whole roll of some very nice blue and gold trim, so I can 'go to town' with the decoration. The real trouble is making a decision on which way to go with it! I am also unsure about what type of sleeve head decoration to use. I played around with the pattern for several hours this week and am completely fed up with the whole concept of sleeves, so the sleeve head pattern is on the back burner while I work on pleats and eyelets.

Here are some portraits that have been an inspiration to me:


Titziano Vecellio (Titian) Portrait of Titian's Daughter Lavinia
http://starlightmasquerade.com/PortraitGallery/Ladder-Laced-Venetian/inspiration-pages/Venetian8.htm


Giovanni Antonio Fasolo Portrait of a Lady

http://starlightmasquerade.com/PortraitGallery/Ladder-Laced-Venetian/inspiration-pages/Venetian11.htm


http://upload.wikimedia.org/wikipedia/commons/5/58/Judith_with_the_head_of_Holofernes.jpg


Tiziano Vecellio (Titian) Portrait of a Young Woman
http://starlightmasquerade.com/PortraitGallery/Ladder-Laced-Venetian/inspiration-pages/openbodice118.htm


Anonymous Venetian (maybe Jacopo Robusti) Portrait of a Lady
http://starlightmasquerade.com/PortraitGallery/Ladder-Laced-Venetian/inspiration-pages/openbodice7.htm


http://starlightmasquerade.com/PortraitGallery/Ladder-Laced-Venetian/inspiration-pages/openbodice74.htm

Wednesday, March 27, 2013

First attempt at pewter casting


A couple of weeks ago, I had a 'play' with lead-free pewter. I had read a lot of articles on the internet, but didn't really feel that I had an idea of how a cuttlefish mould would react to the molten metal. My only previous experience of casting had been in childhood -  casting lead fishing sinkers in commercially made moulds with my Dad. 

I roughly carved designs in the cuttlefish shell


Melting the pewter on a gas stove outside (for good ventilation)


The first pour - what a mess!


The result


All in all, it was a useful and valuable experiment. I have a much better idea of how the cuttlefish reacts to carving, how a second cast in the same mould turns out, and the general properties of molten pewter. I am considering other options for making moulds, as the natural variations in the cuttlefish translate into the cast piece.
I am already looking forward to doing more casting!

Monday, March 25, 2013

Tudor Child Exhibition

The Weiss Gallery is having an exhibition of Tudor Children's clothing to celebrate the launch of the Tudor Tailor's new book 'The Tudor Child'.


Details can be found at: http://www.weissgallery.com/DesktopDefault.aspx?tabid=149&tabindex=148&postid=11901

Speaking of this exciting new publication, look what arrived on the doorstep last week:

I dropped some pretty big hints about wanting this signed edition of the book for my birthday. I did get to have a sneak peek at a friend's copy. Now I just have to wait. Seven months suddenly seems like a VERY long time!

Op Shop Score

I had a couple of medical appointments last week, and I had to wait a long time for my films to be printed. To kill some time, I went into a local opportunity shop and got some great bargains. It was a discount day too, so I got these brooches for even less than the marked price!


Friday, March 22, 2013

Tudor and Stuart Fashion Exhibition

A new exhibition is coming up; how I would love to see this!

In Fine Style: The Art of Tudor & Stuart Fashion

The Queen's Gallery, Buckingham Palace

Friday, 10 May 2013 to Sunday, 06 October 2013


http://www.royalcollection.org.uk/exhibitions/in-fine-style-the-art-of-tudor-and-stuart-fashion-QGBP


Wednesday, March 20, 2013

How to Dye Silk Organza from Threads Magazine


Here is a link to Threads Magazine's article on How to Dye Silk Organza:
http://www.threadsmagazine.com/item/29867/how-to-dye-silk-organza?utm_source=email&utm_medium=eletter&utm_content=20130312-dyeing-silk-organza&utm_campaign=threads-eletter


Monday, March 18, 2013

Rapier Tourney

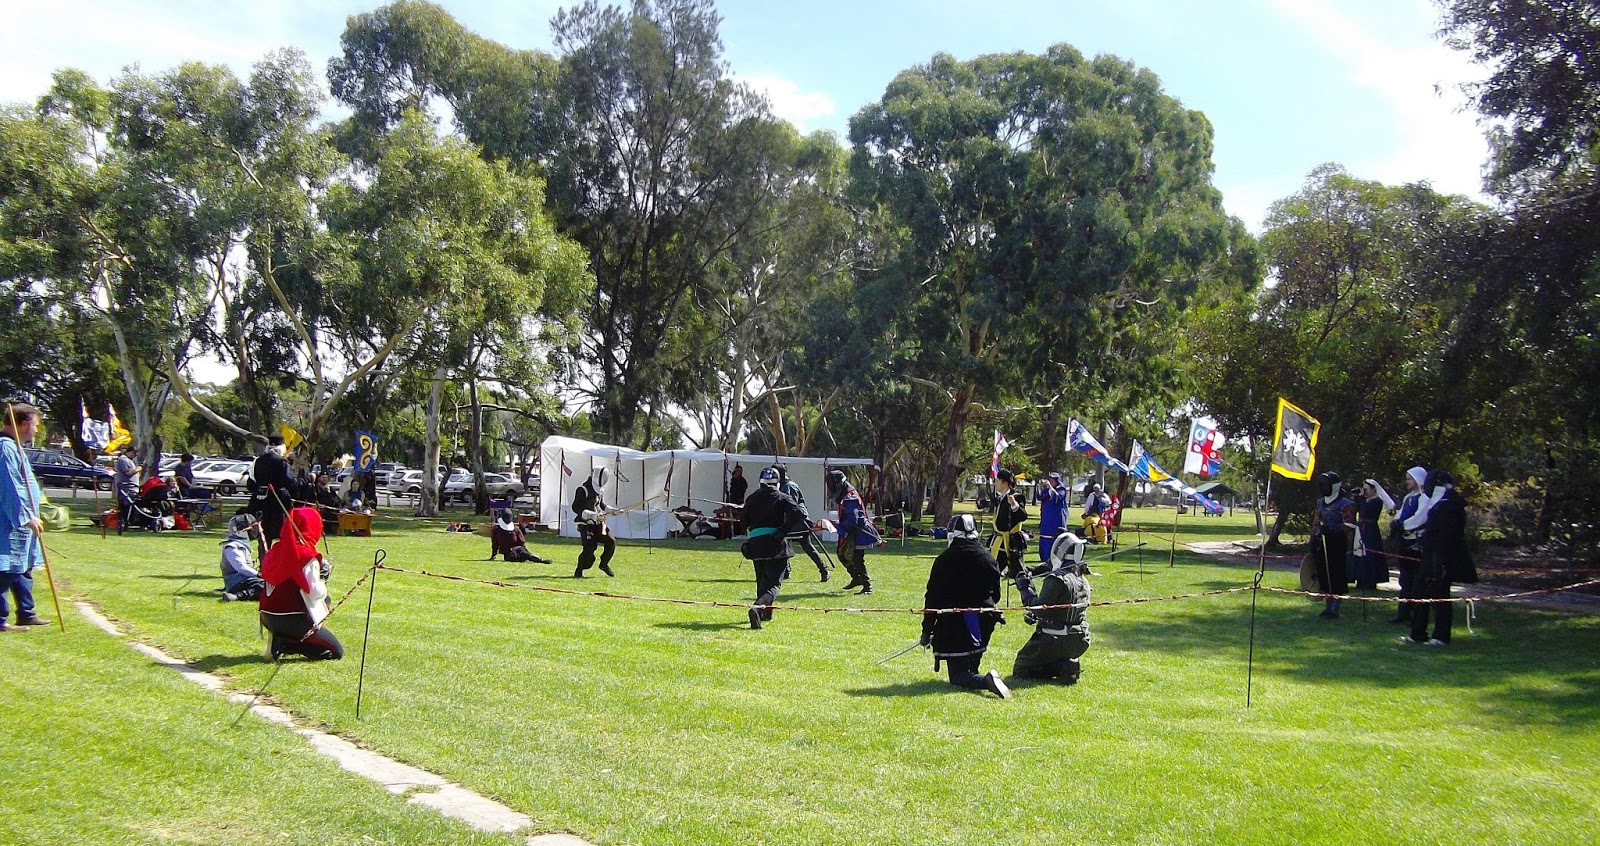
Yesterday I went to a small rapier tourney in my Barony. It was one of those events where the camaraderie, the pageantry and the courtesy just recharges your SCA batteries. I feel excited and motivated about current and planned projects again!


Thursday, March 14, 2013

Coif for a Man

I know that it probably looks like I have had a super-productive week, but in reality it has just been one of those weeks where a lot of smaller projects that I have been working on for weeks have been finished off.
Nevertheless, I am riding high on a wave of personal satisfaction to get a few things off the 'To Do' pile. I think it is probably a law of Nature, or physics (or maybe just Murphy's Law!) that at least as many requests for items/assistance come in as finished items go out, but at least I am never bored. (Or likely to be, in any conceivable lifetime!)


Here is another coif for a man. It is designed as a court-type article, rather than an arming coif (which I believe usually has a gusset in the middle. Given my fear and loathing of gussets, I have not yet attempted one of those.)

This coif is constructed in the same way as the light blue one I posted about earlier. The pattern was cut out of two pieces of cotton linen blend fabric. The edges were zig-zagged to prevent fraying and then the seam up the back was sewn up. I opened the seam out and stab stitched it down on both pieces to reduce bulk. The pieces were then sewn together (inside out) leaving a small gap for turning. Triangles were clipped into the seam allowance to ensure the fabric sat smoothly when turned.


Once the coif was turned right side out, I used a blunt wooden knitting needle to push the seams out. Then I whip stitched over all the edges.


Finally, I sewed a piece of bias binding along the bottom edge. Another was applied to the top, and the long hanging ends were doubled over to make the ties. I added a small line of running stitch in black embroidery thread just to fancy it up.


Since I enjoy hand sewing - and make less mistakes with hand sewing than machine sewing - I added the bias strips by hand.


Wednesday, March 13, 2013

Rapier Coif

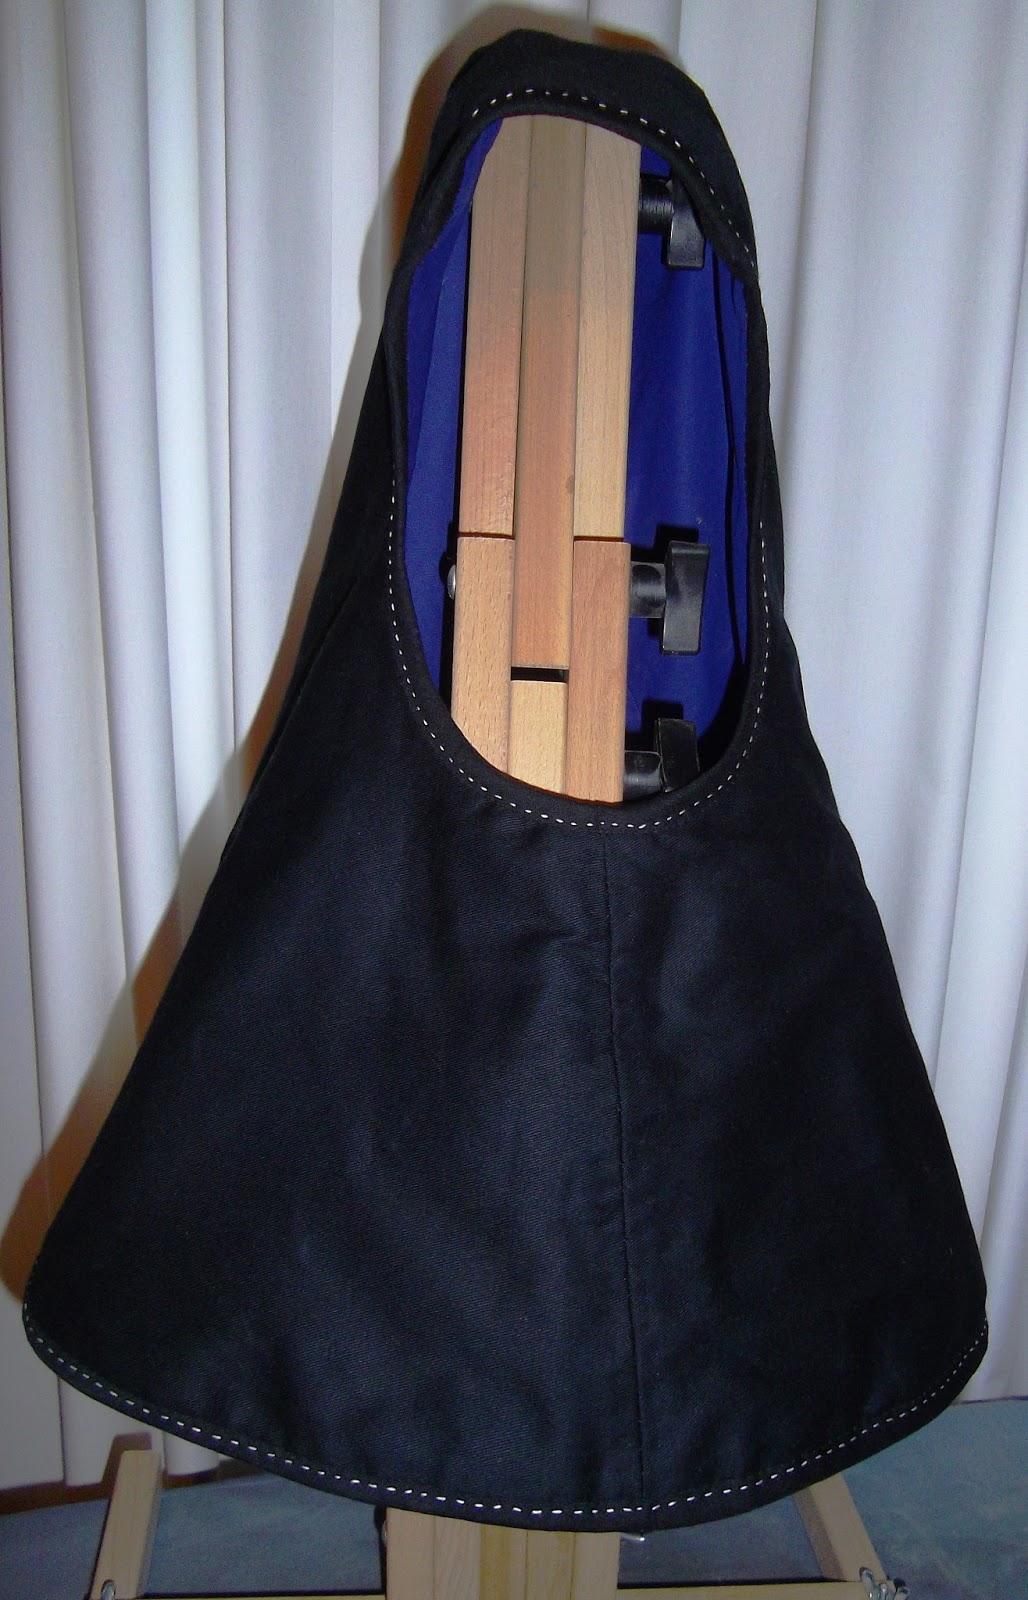
I have been consistently busy for the last few weeks, working on projects (mainly) for other people. Here is another item that I have finally finished (huzzah!)  - a rapier coif for a friend.


Yes, that is an embroidery frame holder serving as a head mannikin. It is a very long coif!

This has been one of those projects that just went wrong at every turn. It has four layers, and all the layers needed to have the seams sewn open to reduce bulk. I whipped the layers together and hand sewed all the bias down. One of the many exciting problems that arose during construction was the bias strip join splitting. Naturally, this happened right at the end of the project! I normally make my own bias, and if I am caught short and have to purchase pre-made bias, I check that the joins are sewn rather than glued. I don't know how this bias slipped through, but slip through it did. I was so disappointed; I had to darn the split and then I added another small piece over for strength.

I am relieved that this one is done, and reasonably pleased with how it turned out.

Friday, March 8, 2013

Man's Blue Linen Coif

I finished this man's coif last week. It is the first time that I have made a coif of this type. I used the machine to sew up the back seam, then hand sewed the seam flat. Then I bagged the coif out, turned it right side out, and then whip stitched over all the edges. Then I hand sewed an ornamental bias strip around the edges, turning the edge of the top strip into ties.


It looks like it has a weird shape in the pictures, but that is because it is sitting on a vase. I am pleased with how it turned out, and I hope that the recipient likes it.

Thursday, March 7, 2013

Blue Floral Elizabethan Coif Update

In between other projects I have been working on my blue floral Elizabethan coif. Here is how it is looking:


There is still some seeding to be done. Then I need to decide whether or not I will add spangles. I am also (as an alternative to spangles) considering adding some red or orange highlights.


Tuesday, March 5, 2013

Project Pics

I have a few new project pics to show, but I am having trouble transferring pictures from my camera.

Sunday, March 3, 2013

Food Historian at Minneapolis Institute of Arts

Famed Food Historian to Visit the MIA
"Supper with Shakespeare: The Evolution of English Banqueting"


Reproduction Tudor Quince Marmalade from 
http://www.artsmia.org/index.php?section_id=2&exh_id=4561

Food historian Ivan Day (from shows such as 'Royal Upstairs Downstairs') is recreating historic recipes for the Minneapolis Institute of Art's new exhibition relating to English banqueting history.

Find the details at http://www.artsmia.org/index.php?section_id=2&exh_id=4561


Friday, March 1, 2013

Street Vendor Woodcuts


from http://spitalfieldslife.com/2013/02/21/samuel-pepys-cries-of-london/


This interesting site has some excellent prints of street vendors that may be of interest to costumers. Go to http://spitalfieldslife.com/2013/02/21/samuel-pepys-cries-of-london/

Thursday, February 28, 2013

Your Wardrobe Unlock'd Competition Link

If you are after some out of period costuming inspiration, have a look at the Your Wardrobe Unlock'd costuming competition entries for 2013:

http://yourwardrobeunlockd.com/competition/2013-competition-entries

Wednesday, February 27, 2013

First Attempt At Illumination

This week I finished my first try at illumination.The experience reminded me of painting on sugar plate, but the colours are much bolder.


A Dragon from a Bestiary c. 1270 (Therouanne?)
JPGM, Ms. Ludwig XV 3, folio 89
p. 90, 'Beasts' by Elizabeth Morrison, 2007, J Paul Getty Trust


I found the experience to be very enjoyable, and I learned a lot from my first attempt.
* Medieval scribes must have been very patient people with an enormous skill base, tons of patience and steady hands.
* You should not get overexcited and try to rush this type of work. (I know this from embroidery, but I'll admit that I did get overexcited and rush it!)
* Doing scribal work at the kitchen table in a busy household during the afternoon/tea time rush is not ideal.
* I need a finer paintbrush.

I used Winsor and Newton Designers Gouache as recommended by the Lochac Scribes (www.sca.org.au/scribe/   and   http://www.sca.org.au/scribe/handbook/Lochac%20College%20of%20Scribes%20Handbook%202012.pdf)

I am still enthusiastic, and plan to continue practicing in my sketchbook. I love the fact that you can get such a bold and dramatic effect relatively quickly; well, compared to embroidery, anyway. I chose this particular picture because it looks like the original artist used a paintbrush to draw the black lines, and I thought that would be very good practice for me. (Plus, I liked the dragon.) I have a lot of trouble with shaky hands, but I am reasonably happy with how the lines turned out. Learning how to load the brush with an appropriate amount of paint is another thing that I need to learn.

My introduction to the scribal arts has been the very talented Honorable Lady Katerina da Brescia of the Purple Files. You can see some of her work here:
http://katerina.purplefiles.net/art&scribes/C&I.htm

Tuesday, February 26, 2013

New IRC Challenge Announced


Lovely Lady Bella from Realm of Venus has announced a new Italian Renaissance Costuming Challenge. Head to
http://realmofvenus.renaissanceitaly.net/challenges/IRCC2013/IRCC3-2013.htm
for more information.

I am planning on entering; I am getting organised and working out what I have in my stash - and what I need!

Friday, February 22, 2013

Plimoth Jacket Project link

Here is an interesting page on the gorgeous reproduction of the Plimoth Jacket-
http://www.winterthur.org/?p=972


One day I will make an embroidered jacket for myself.

Thursday, February 21, 2013

Unpicking my Italian gown and Elizabethan coat

I started two sewing projects mid to late last year; an Italian front lacing gown (in blue) and an Elizabethan coat (in grey). I worked on them yesterday but I'm afraid my fatigue and brain fog was so bad that I spent more time un-picking and re-sewing and ironing than actually achieving anything. On the plus side, I am getting very good at unpicking!

Monday, February 18, 2013

Illumination research

It was at least 100 degrees today, so no stitching for me. I have piles to do, but mundane life got in the way. I did get a chance to have a look at a couple of illumination books, but I have not yet picked something to do as a scribal exemplar.

Sunday, February 17, 2013

Scribal Meeting

I have been thinking about getting involved in my local SCA scribal group for quite a long time. Recently, the meetings were moved closer to my house, and so yesterday I took the opportunity to go to my first meeting. It was very interesting and exciting. I think that calligraphy is a bit beyond my skills at this stage, but I am excited about trying the illumination. The process seems very similar to the design process for embroideries, which I really enjoy. It was a lot of fun to really look closely at the pictures of manuscripts and enjoy the imaginations of those old scribes. This one below really took my fancy:


It illustrates the old riddle about the man trying to get his turnips, his lamb and a wolf across a river in the boat without anyone getting eaten. This is from the thirteenth century- early fourteenth century Ormesby Psalter -
http://ductus.asu.edu/Files/ductus/scriptorium/plates/D-005.html