Showing posts with label split stitch badge. Show all posts

Monday, August 4, 2025

Heraldic Split Stitch Badge

I made another split stitch heraldic badge this year, for a friend. Instead of working the white split stitches in an oval shape around the tree, I drew a sort of wave pattern across the background and worked the split stitches in waves. I did this to make the sewing a bit more interesting, and to create a feeling of texture across the background.

I wouldn't do this again. I don't feel it was particularly effective in creating texture and it also didn't make the process of stitching it any more interesting. (It was worth trying though.)

This patch will be sewn onto a Championship cloak. It is a cotton calico base fabric with split stitches worked in DMC cotton floss.


Thursday, July 7, 2022

Embroidered Heraldic Patches

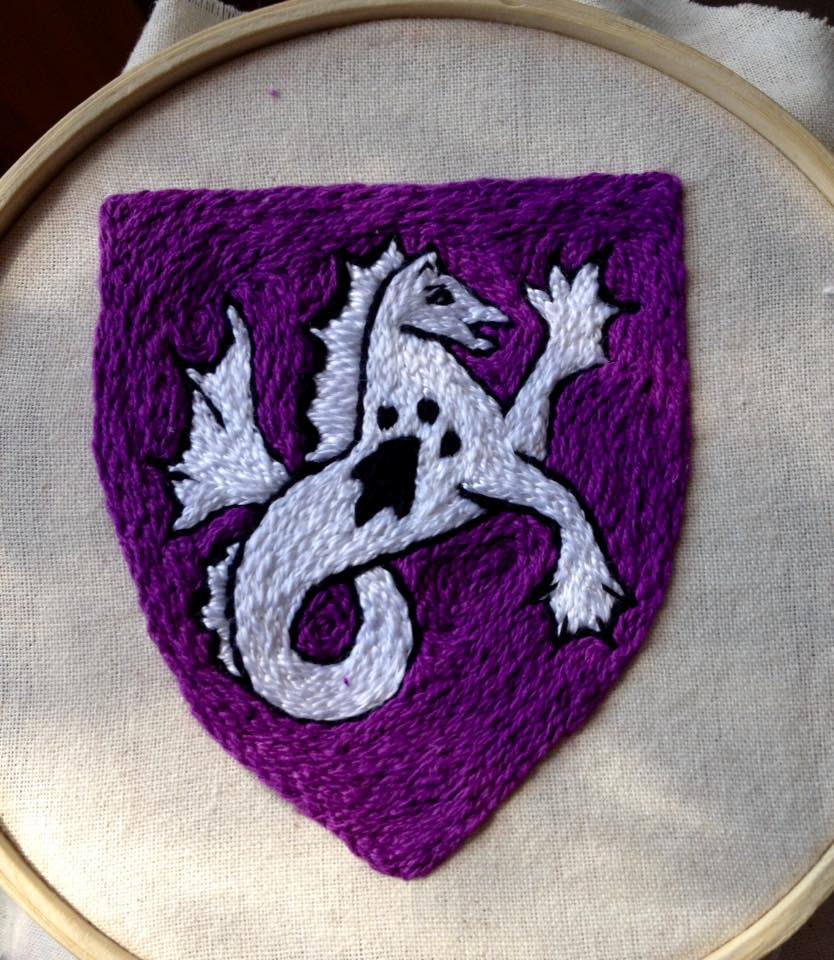
 I recently finished the second of two heraldic patches for a Championship cloak. I wasn't super pleased with how this one turned out, but it was my third try, so it was time to quit and accept it for how it worked out. The embroidery is done in silk thread in split and chain stitch.


The seahorse was done in cotton floss in split stitch.


Thursday, April 4, 2019

Embroidered Heraldic Patch for the Archery Championship Cloak

Recently I finished an embroidered heraldic badge for a friend.

Last year I made a woolen cloak as the regalia for my Barony's archery champion.

A friend of mine won the Championship and I offered to embroider his device for the cloak, as he doesn't embroider. The patch is just a small version of his heraldry, embroidered as a slip on a calico base and then added to the cloak.

I actually had two attempts at this because I was really unhappy with the first one.
I traced the design onto the calico with pencil and then I used a small piece of iron-on interfacing on the back as a stabiliser. I have found that this helps to stop the base fabric warping and puckering. I used a small hoop for this project.

This is the second attempt. I did something a little different, and used some small chain stitches as well as the split stitch that I usually use for these badges.

The flosses are cotton and also cashmere. The cashmere is the central stitching behind the tree. It is fairly delicate floss compared to the cotton, so we will see how it stands up to wear and tear.

Monday, October 29, 2018

Split Stitch Heraldic Weasel Badge

I recently finished this large (approximately 15 cm long) heraldic split stitch badge for a friend.
The design is traced onto calico that has been reinforced with iron on interfacing. I started in the middle of the design and worked out to try and keep the tension even.

I find that lining my inner embroidery hoop with bias binding also helps to maintain an even tension.
The embroidery is split stitch worked in wool. The weasel (meerkat) features and chevron outline are also worked in split stitch but I used a fine crochet cotton.
I rinsed the completed piece, and when it had dried a little I stretched out any tight patches using a hot steam iron on the back of the damp piece.

I trimmed the excess calico away leaving about 1.5cm around the edge.
I roughly sewed down the edges of the calico to the back of the piece.
 

Next I couched some silver gilt cord around the edge.

Finally I whipped a piece of felt onto the back to cover the stitching.


Thursday, October 19, 2017

Embroidered Pouch with Split Stitch Badge

In August I made a heraldic pouch as a 'gift bag' for a present for my friend. The bag itself is red linen, self-lined. The general shape is based on Elizabethan sweete-bags.  I made little tassels for the bottom corners.


The heraldic design is executed in various types of cotton floss in split stitch. The design was traced onto calico base fabric with a pencil and the panel reinforced with a small piece of iron-on interfacing to minimise warping of the base fabric. After the colours were blocked in, I worked the details. I used a small hoop to maintain the tension.
After the embroidery was finished, I trimmed the interfacing and calico back and whipped the calico down onto the back of the piece.

The bag has eyelets at the top for the cords  to pass through, and the cords are plaited cotton threads in the recipient's heraldic colours.

Sunday, October 8, 2017

Split-Stitch Embroidery on Woolen Hoods

Here is a project that I worked on back in August to help some friends. They were running a big event and wanted a way to identify key people on the event team, like the Head Herald, List Keeper, Head Cook etc. They came up with the idea of different coloured hoods, and I volunteered to embroider some of the designs.

Marking out embroidery designs on wool can be problematic. Normally I would recommend tracing out the design with ink, lead pencil, chalk or removable felt tip pen or Frixion pen. Sometimes, using the prick and pounce method works well. None of these methods were appropriate for this particular surface as the wool was rather fuzzy and absorbent.

I printed out the designs that I needed, then traced the design onto tracing paper.

I (pretty thoroughly) pinned the paper into place on the hood. It is important to have the design pinned down well so that it doesn't move at all. I sewed over the design in a very small running stitch.


Once the design was marked out in yellow hand sewing thread, I carefully ripped off the tracing paper, trying not to pull or distort the running stitch.

This left me with a faintly marked line of stitching to follow.


I went over the running stitch with a double strand of embroidery floss in split stitch.


I was very pleased with the final result. The motifs stood out well against the green and black wool.


Sunday, May 14, 2017

A&S Century Challenge - Split stitch heraldic badge

I'm still sick and not to be trusted with anything remotely complicated, so finished off my heraldic split stitch patch today.'
It just needs to be sewn onto the cloak now.


Yesterday I woke up sick and had to cancel all my plans, so I worked on this project too.

Tuesday, May 9, 2017

100 Days of A&S - Split stitch Badge

Today I finished the split stitch badge for a friend.
In my SCA Barony, we have cloaks that the Heavy, Rapier & A&S Champions wear. They are decorated with the devices of the Champions & this is what these split stitch badges are for.


Sunday, May 7, 2017

Days 8 & 9 - 100 Days of A&S (Hemming and Split Stitching)

I couldn't post yesterday, so you get two day's worth today!

Day 9
Boring old hand hemming again today.


Day 8
Spent a good part of the day adding spangles to an embroidered caul at an SCA demo, but also managed to finish off the split stitch championship patches.


Saturday, April 29, 2017

SCA A&S 100 Challenge - Day 1

Some SCA friends have proposed an A&S Challenge in the style of the armoured combatant Century Drill Challenge (100 blows for 100 days). The aim is to work on A&S projects for (at least ten minutes a day) for 100 days.

The point of the challenge is to build habit and consistency, reduce the number of Unfinished Objects (UFOs) we all have, and (hopefully,) generate enthusiasm.

I have such a large pile of ongoing projects at hand at any given time that it is unusual for me to go a day without doing ten minutes of A&S work. I am hoping that the Challenge will help me to keep better records of what I am doing and blog more often. I prefer to blog items when they are finally complete because it all seems a little disjointed - especially at the beginning of a project and because I jump from unfinished project to unfinished project. But maybe getting into the habit of blogging as an ongoing process will mean more things get blogged.

Today I worked on some split stitch Championship patches for friends in my SCA group. I got two washed and blocked. They just need backing. Another two are still in the hoop.


Friday, September 26, 2014

Another Banner Device

Recently I completed another device for the banner for my local group. This one is constructed of wool felt and the outlines are done in black crochet cotton in split stitch.


Saturday, December 15, 2012

Busy week

I have spent this week frantically embroidering projects for other people. I am feeling satisfied with the amount of work that I put in and what I have achieved, especially given the trouble that I have been having with my hands. Unfortunately, the projects are all multi-person projects, and when my part is done I pass them on to the person who is doing the next part. So there is not much to show at this stage.  These pictures are of lines of embroidery that will be a set of cuffs and a collar, a split stitch badge that will be couched down with gold thread, and some flowers that will decorate tabbards.