Showing posts with label italian renaissance sleeves. Show all posts

Tuesday, April 11, 2023

Sleeves - Italian Style Green Gown for a Young Woman

These are the sleeves that I made to go with the green Italian style gown that I did an earlier progress post on. 

The sleeve pattern is not in the traditional 16th Century style (with the seam running down the outside back seam), but rather a modern style sleeve with the seam underneath. This is because the patterns for  the bodice and sleeves were 'guess-timations' as the wearer was not available to be fitted.

The plain pair is self -lined, and the pair with hand-sewn trim have a light calico lining because the trim adds quite a lot of stiffness. The sleeves tie on with ribbons through hand-sewn eyelets. I fell my seams by hand to keep everything nice and flat, and I prefer to sew the sleeve hem and lining hem separately so that I can offset the lining to prevent it rolling out if the sleeve stretches a bit with wear.


Monday, May 9, 2022

Green Linen Tie-On Sleeves In The Italian Style

 Are you getting bored with sleeves yet?!

I recently finished another pair, this time in a pretty green linen.

They are constructed in the same way as the rest. I cut out my favourite roomy sleeve pattern in the lining and fashion fabrics and edged them with zigzag stitch on the  machine. The seams were sewn on machine with straight stitch and opened out and stitched down. 

I sewed the green linen fashion fabric and lining together at the sleeve head (wrong sides out), and clipped the curves to reduce bulk before turning the right way out. 

I hand stitched around the top of the sleeve to stop the lining rolling out. 

I sewed the wrist hem by hand and then whipped the lining in with another row of stitching. This seems like extra work,  but if the lining ever stretches, it means I can re-hem it without affecting the hem on the green fashion fabric.

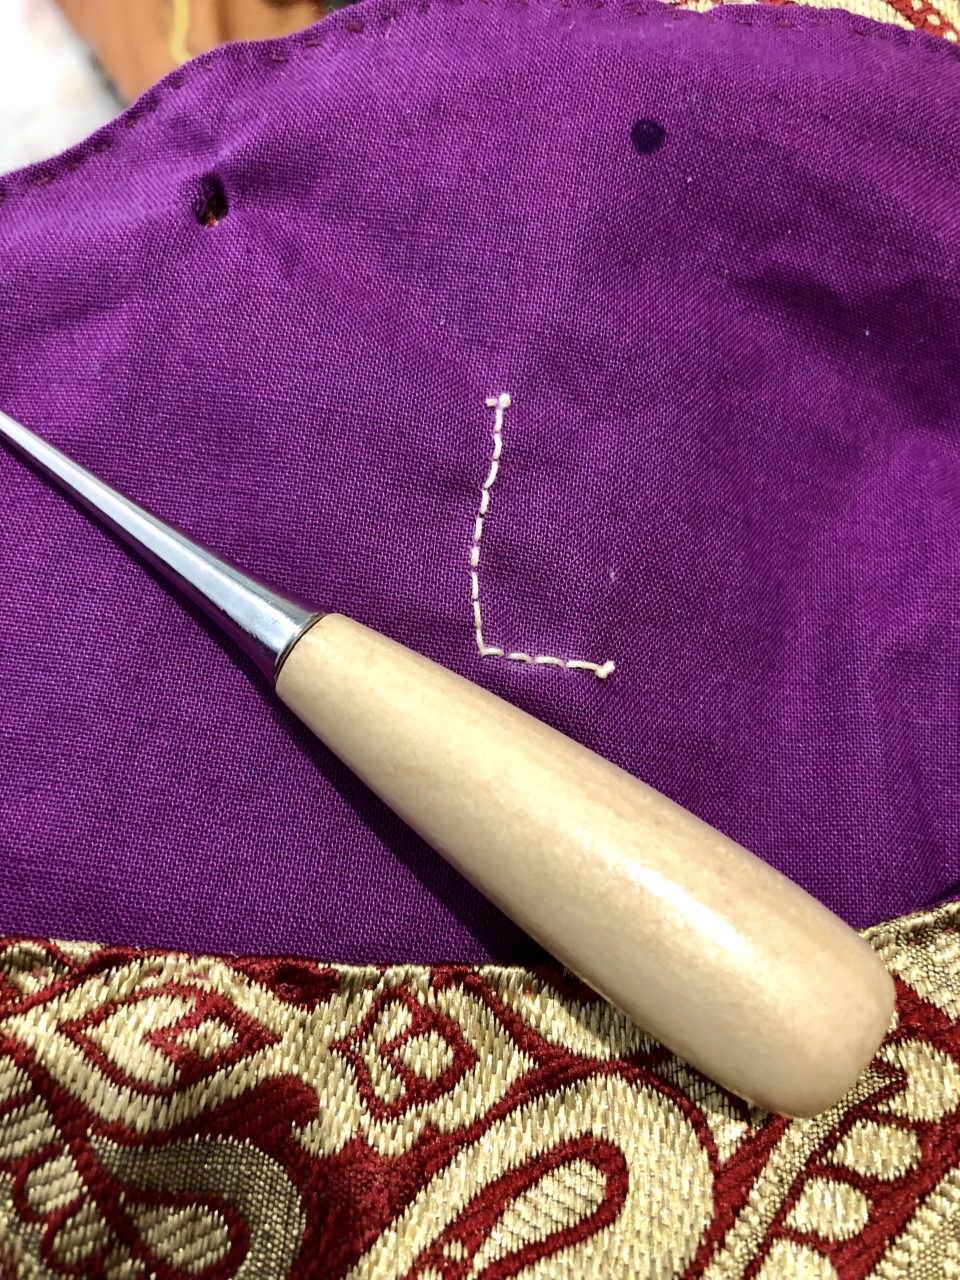
I worked eyelets around the top of the sleeve for tying on and then put my trusty 'L' on the inside of the left sleeve.


Thursday, April 21, 2022

Khaki Tie-On Sleeves in the Italian Style

 Another pair of sleeves finished!

These are made out of a cotton fabric remnant that I found in an op (thrift) shop.

They are constructed in the same way as all the others; the lining and fashion fabrics were cut out using my favourite sleeve pattern and edged with zigzag stitch. The seams were sewn on machine with straight stitch and opened out and stitched down. Then the fashion fabric and lining were sewn together at the sleeve head (wrong sides out), curves clipped and then turned right way out. The top of the sleeve was top stitched by hand to stop the lining rolling out. The wrist hem was sewn by hand and the lining whipped into place. Eyelets were worked by hand at the top of the sleeve and an 'L' was sewn into the left sleeve to make lacing the sleeves on in a hurry easier.


Wednesday, April 6, 2022

Red-Gilt Tie On Sleeve in the Italian Renaissance Style

I finished another pair of sleeves this week, and boy! are they pretty. The fabric was purchased from etsy several years ago. A miscellaneous fibre content includes gilt threads. They were sold as silk brocade but I would be very surprised if they actually contain silk.

I'm very pleased with these sleeves. Eyelets are still very hard on my hands but I am getting faster at working them.

I made these sleeves to the same pattern and in the same way as the others I have blogged about recently. The lining is purple broadcloth.

Putting a small running stitch along the inside of the top edge to stop the lining rolling out with wear.


Hemming the sleeves. I sewed down the fashion fabric hem with tiny stitches, and then hemmed the lining separately.

Working the eyelets. (I've added an L for Left to save time getting ready before events.)

The finished product. The pictures fail to capture the richness of the fabric.


Thursday, March 31, 2022

Red Tie-On Sleeves in the Italian Style

I finished another pair of sleeves this week. The majority of the sewing had been completed and it was just -you guessed it - eyelets needing to be done. On a positive note; I am getting faster at eyelets now, and hating them slightly less. (Good thing too, as no doubt have hundreds in my future!)

These sleeves were constructed in the same way as the others listed previously. I'm not sure what the fabric content is but they certainly have some metallic threads in them. They have a bit of a shine as the light moves over them. They are not a bright red, but are brighter in real life than the brown-red shade that they look like in the final pictures.

Whip stitching the lining wrist hem into place.

My trusty 'helper'


Sunday, March 13, 2022

Pale Blue Tie-on Sleeves in the Italian Style

Another pair of sleeves complete and out of the UFO pile! This pair is made from a light blue brocade type fabric that I found in a remnant bin at a thrift store and is based on the Italian tie-on style.


The camera has was washed the colour out a bit:

The sleeves were created in the same way as outlined in my previous post. 

As usual, the eyelets were what was holding me up.


I've embroidered an 'L' on the left sleeve because I always seem to be in a rush when it is time for events, and nothing wastes more time or adds more stress than struggling into a big dress only to find out you laced your sleeves on wrong - and then have to struggle back out of it, unlace them and then re-lace them on the correct sleeves. Ask me how I know, haha.


Monday, March 7, 2022

Italian Tie-On Sleeves Made From A Thrifted Green Sari Skirt

I finished a pair of sleeves that was sitting in my UnFinished Objects pile.

This pair has not been waiting to be finished as long as some others in the pile. (I only started them in 2021.) I picked up a pretty skirt made out of sari fabric at an op shop and thought it would made a nice pair of sleeves. The skirt was child size so there was some careful unpicking and placing to be done. 

I used my trusty pattern which makes a roomy and comfortable sleeve. Placement was key to try and get best use from the fabric and make sure the motifs were all going in the same direction.
Luckily, I have a great helper!
Edges were zigzag stitched on the machine and the seams ironed open and tacked down. Linings were given the same treatment.
The sleeve and lining was sewn wrong side out then I clipped the corners and turned the right sides out.
I whip stitched around the top of the sleeve head to stop the lining pulling to the outside over time as a bit of pressure is put on the sleeve head from the lacing.
I turned the hem under at the wrist and secured it with tiny stab stitches.
Then I folded the lining hem under and hand sewed it in place.
Finally, I added five eyelet holes at the top of each sleeve so it can be tied into place.
The finished sleeves. I am pleased with how these turned out. I only *just* had enough fabric to get sleeves out of the skirt. The gilt thread in the motif makes the sleeves look quite opulent. I don't expect that they will be the most durable sleeves ever, but they sure are pretty.


Friday, December 10, 2021

Tie-On Sleeves of Red and Gold WIP

I am still trying to work through my UnFinished Object pile. I pulled these sleeves out this week; they have been unfinished since 2019 and I had completely forgotten about them! What a nice surprise to find them when I was looking for interfacing for a  mundane sewing project. The fabric is lovely and vibrant (the photo doesn't really do them justice).


The sleeves have been cut out and edged and have the cotton lining with them. They just need to be hand finished, hemmed and have eyelets put in to be wearable, so that is my next project to work on.

Tuesday, November 16, 2021

Plodding along with UnFinished Objects

Lately, I have challenged myself to not forget the UnFinished Objects pile. Most of the UFOs are there because they involve tasks that I don't like (such as eyelets,) or because I am not excited or enthusiastic about them. So it is actually more of a challenge than it sounds. (Let's face it, many of us would rather tap into the excitement of new research and a new project than tackle the old, boring tasks.)

This week I have been working through internal sleeve treatments on this pile of sleeves. Some need to be felled, some just tacked open and flat. Nothing  too stressful, and easily done in front of the telly.

Tuesday, October 26, 2021

Orange Tie-On Sleeves

I have so many unfinished projects that I will never be bored! They actually came in handy recently though, when someone suggested that an upcoming event have a relaxed Halloween style theme. 

I remembered that I had a pair of mostly complete orange tie on sleeves with black ribbon stripes in the pile. All that was needed was about five eyelets. It didn't take long and they were finished and ready to wear on 31st of October!


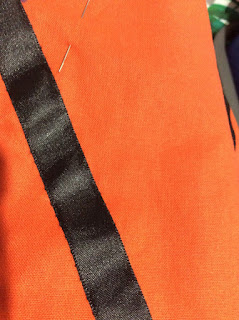
The sleeves are orange cotton broadcloth with a black satin ribbon hand stitched prior to sewing the sleeve up and lining.


Thursday, June 3, 2021

Gold Tie-On Sleeves

 I've been working on that perennial project again - the Sleeve Pile.

I got this pair of gold tie-on sleeves completed last month.

I ordered a silk fabric from a vendor on Etsy and got this fabric instead. It arrived with grease stains on it. I managed to launder it but never did get the silk I ordered. Still, I think this mystery fabric is pretty.


Thursday, May 14, 2020

UFOs - Sleeve Pile

One of my current challenges is to go through my UnFinished Object pile and prioritise everything,  and to start working through tasks. I still have a large pile of sleeves cut out and waiting to be sewn, so this is something I will be working on over the next several months.

Friday, October 6, 2017

Italian style Tie-On Renaissance Sleeves - Orange

I'm gradually trying to get back to normal, but it is slow going. Late last year I cut out a whole heap of different coloured tie-on sleeves with the grand plan of working through them in my "leisure time" to extend my Renaissance wardrobe.


Needless to say, other projects took over and they never ended up getting finished! Just before the last big SCA event that I went to, I realised that I had lost the sleeves that I planned to wear, and I fished out the Huge Unfinished Sleeve Pile. One pair was mostly done, so I finished them off at high speed with the help of my Mum.

This week I pulled out another tabbed pair and finished them off. I haven't had the energy yet to try them on with a gown, but I think they will look nice.


The outer shell and lining are each one piece and the seam runs down the back of the arm. This is particular sleeve is quite a loose pattern and very comfortable. I zig-zag my fabric pieces to reduce fraying. I then sew the back seam of the two arm pieces and the two lining pieces.
(This is a different pair, but it is the same technique)


Next, I make little hand stitches to hold the seams open so they don't move around or bulk up when being worn, and I put in a couple of clips to reduce any pulling on the sleeve. I put the lining and fashion fabric sleeves together with 'good' sides facing and seams visible, and then run around the top of the arm with the machine and clip. On this pair I placed the tabs in place before sewing that line of stitching. The tabs themselves are just long rectangles of fabric that are sewn up into a tube and turned so that the seams are inside. They are then cut to size and placed where I think they look good.


Once the sleeves are turned right side out (so that all the seams are hidden), it is just a matter of hemming the wrist end. I like to hem the fashion outer fabric first, and then separately whip in the lining fabric.

The final thing I do is make eyelets at the top of the sleeve to accommodate the ties that my gowns all have. It is possible to do hidden eyelets on a strip of fabric, or use hooks and eyes or decorative buttons, but eyelets suit me because I usually put my sleeves on at the event after set up etc. when I am already in my gown. I get really hot really fast, so having sleeves that are easy to get on and off is a real necessity for me and this design is perfect.


I was having issues with my phone during this process, so no progress pictures. I will try and get more for the next pair!