May has been a busy month for me. I decided to use thie Italian renaissance Costuming Challenge (http://realmofvenus.renaissanceitaly.net/challenges/IRCC2015/IRCC5-2015-Entrants.htm) as an opportunity to try new techniques and experiment a little. This month I worked on a new tourney dress. I decided to try a front lacing dress with a large gap, and also to make it without boning. This was a big step for me, as I really like the support and smooth lines that boning gives.
My inspiration was this style of dress as painted by Ghirlandaio:

image from- https://blogger.googleusercontent.com/img/b/R29vZ2xl/AVvXsEj1cfPPTc544n1nQg5N58H1s9jeSDSnAO79pSZSk_DH5YdCgSC3xO5UbZXq1M5jOBt-nFPJA22oAJEZX3hh613Wo-rJ93zcSG0pi6ZnRmMyiW-gZMsVTx27UglPqnfmwQE3kXsSctEFG5Jr/s640/w+Domenico+Ghirlandaio+(Italian+artist,+1449%E2%80%931494)+Ludovica+Tornabuoni+(2).jpg
I looked at many variations on this style and decided not to copy any particular one specifically. There are a wide range of bodice shapes, sleeve styles, lacing options, and trim designs seen in this period.
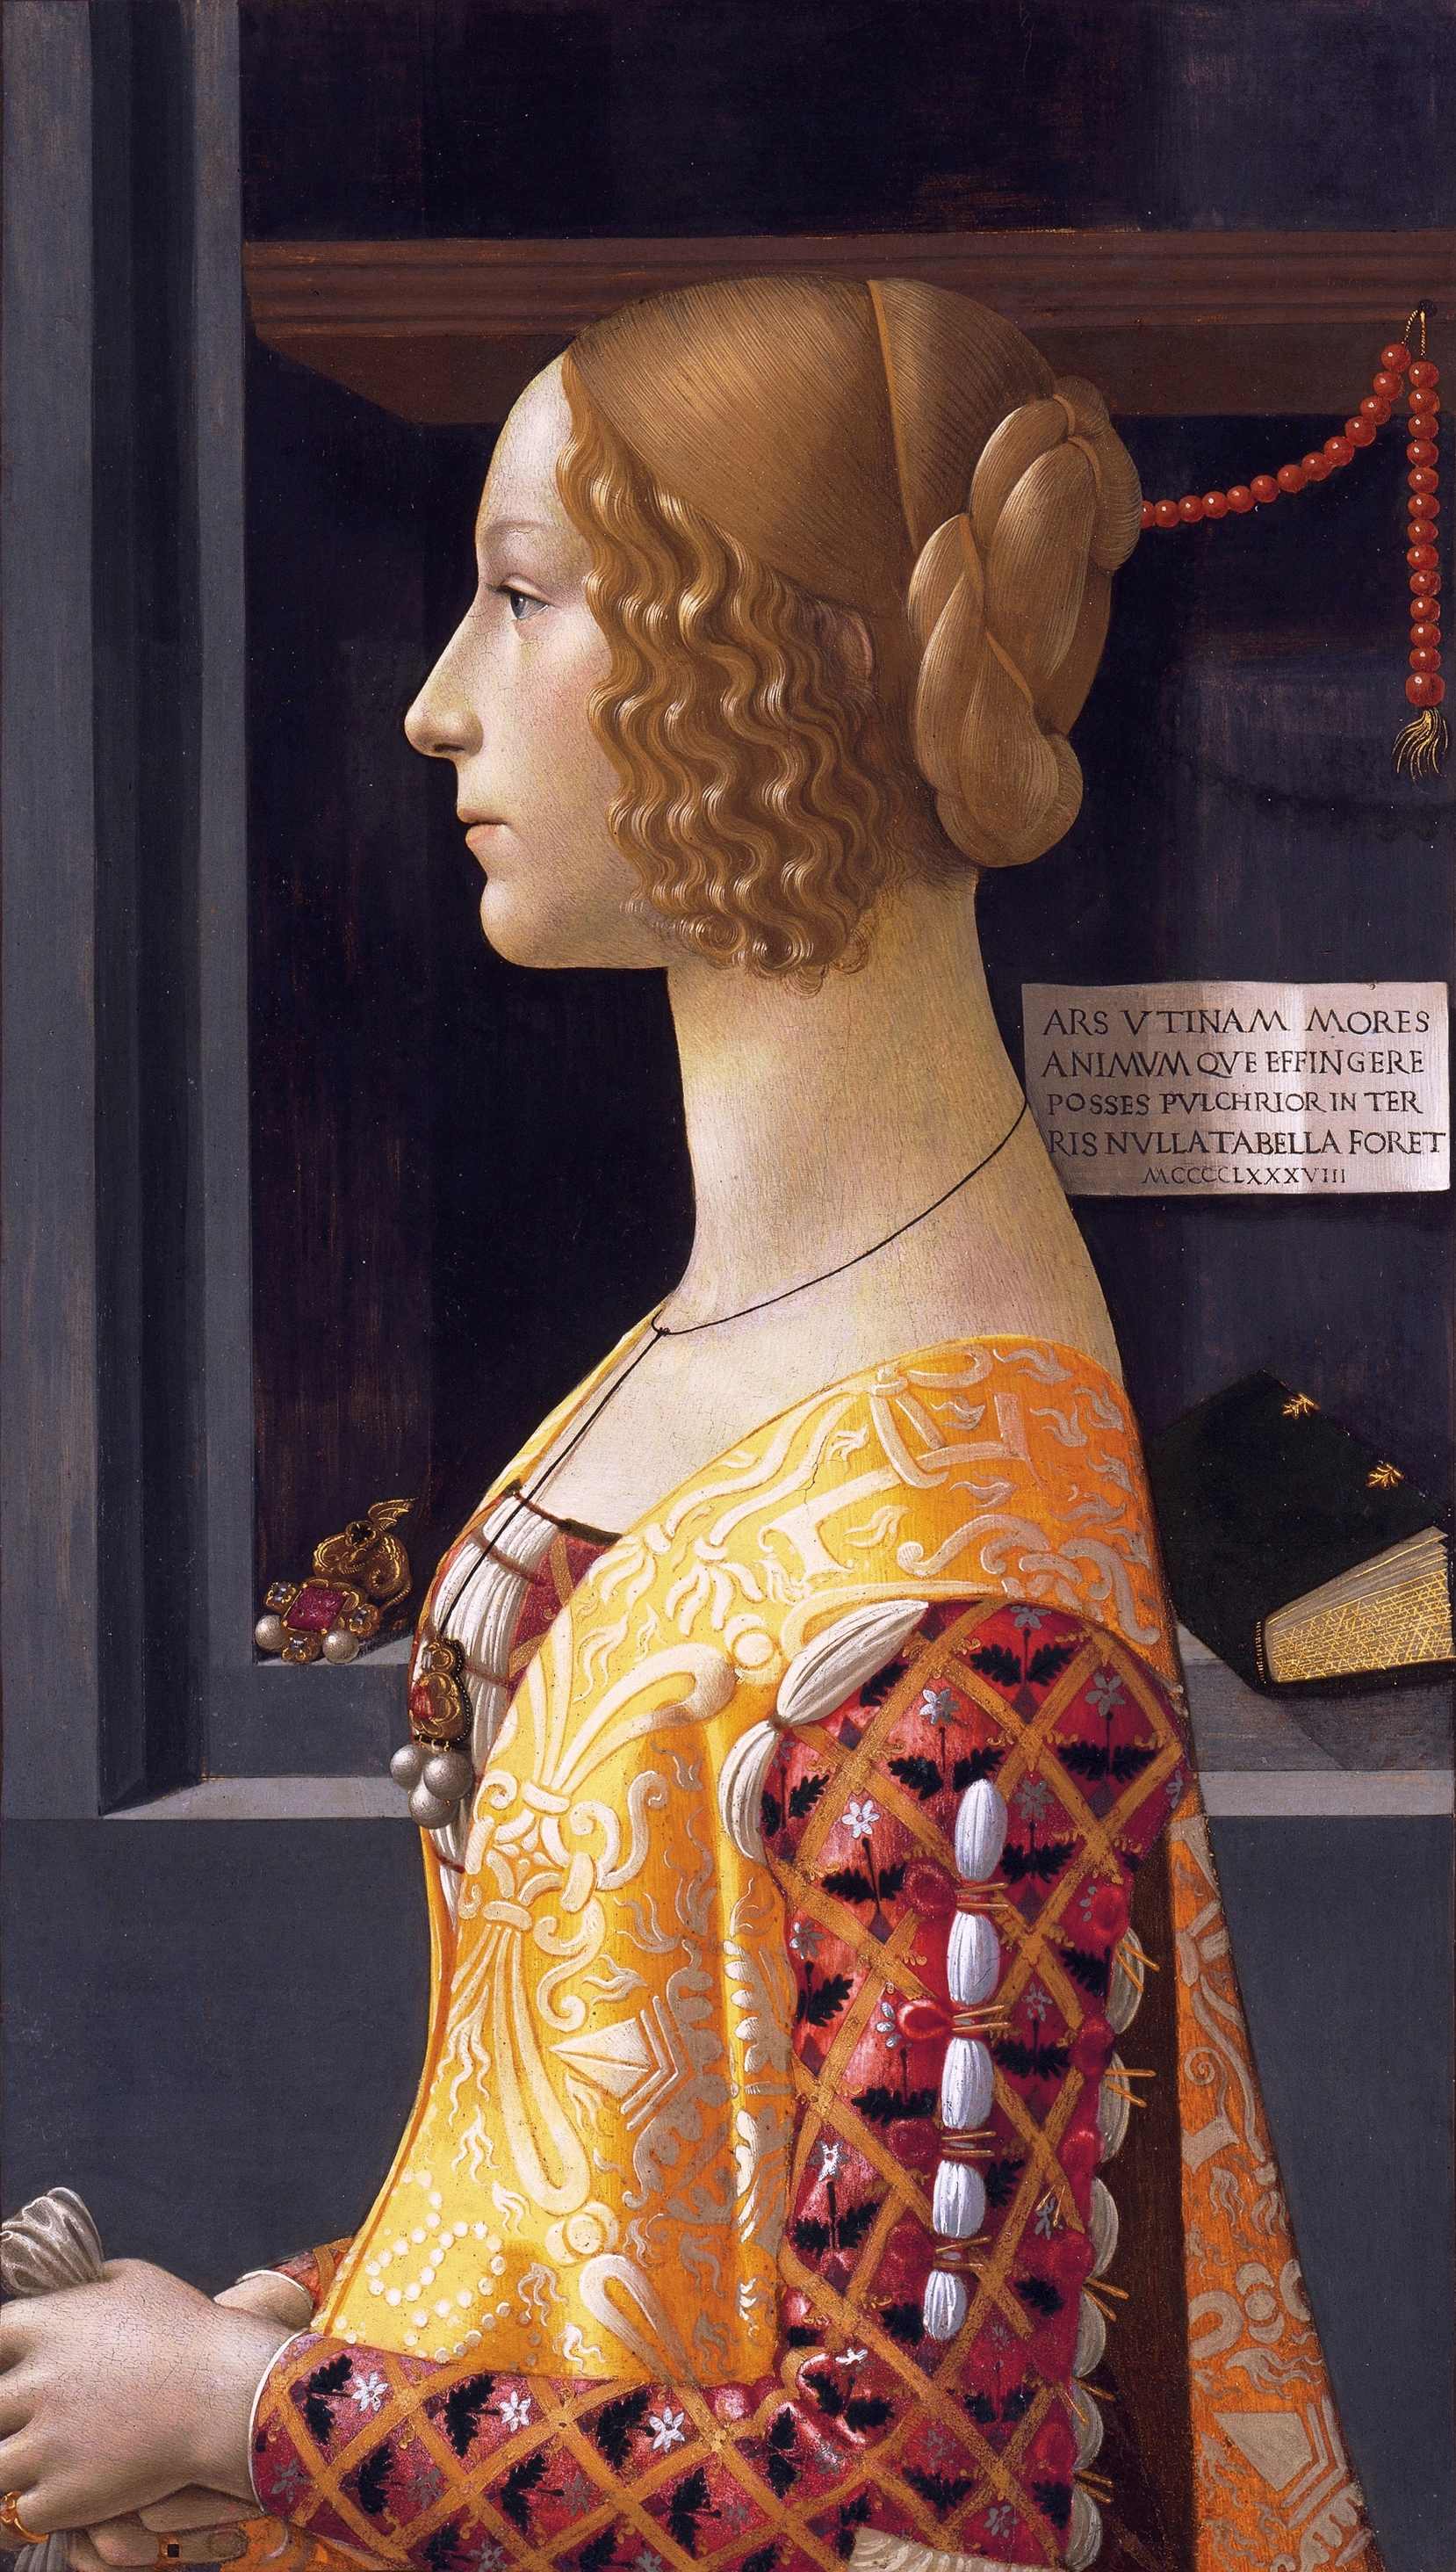
Portrait of Giovann Tornabuoni by Ghirlandaio
Image from: http://upload.wikimedia.org/wikipedia/commons/3/3b/Ghirlandaio-Giovanna_Tornabuoni_cropped.jpg

Detail from Birth of St John the Baptist by Ghirlandaio
Image from: http://it.wikipedia.org/wiki/Tornabuoni
+Zacharias+Writes+Down+the+Name+of+his+Son+Ghirlandaio+Tornabuoni+Chapel.jpg)
Zaccharias Writes Down The Name of His Son by Ghirlandaio
Image from: https://blogger.googleusercontent.com/img/b/R29vZ2xl/AVvXsEh_CC-VZcpuD6gHsd8TJyFBhem2XH7xawzSpDtkJPCP-AaT-a-dKwFi9pYpdexGxcabmtEEq7bU5TvXiRaaVzmEtzm3IXjcqtsFRiHjTP7CUCBfv0vXC6PTms15jV2D7BIlWY-wXSV7PRCY/s1600/w+Domenico+Ghirlandaio+(Italian+artist,+1449%E2%80%931494)+Zacharias+Writes+Down+the+Name+of+his+Son+Ghirlandaio+Tornabuoni+Chapel.jpg

Birth of the Virgin (detail) by Ghirlandaio
Image from: http://www.poderesantapia.com/images/art/ghirlandaio/tornabuonibirth2600.jpg
I adapted an existing bodice pattern to make the neckline higher and more rounded. I cut my cotton fabric, lining and two interlinings and zigzagged all the edges. Then I sewed all the pieces together so I had an outer layer, two lining layers and an inner layer. I stab stitched all the seams open but did the rest on the machine to save time. Then I sewed the bodice layers together inside out, clipped the seams, and turned it all the right way out. I hand sewed the neckline the bodice and armholes closed.


(I have used this technique successfully in the past with boned bodices; I think that the plastic hoop boning that I like to use for bodices gives a thickness to the bodice and hides any bulk. I would not use this technique again for an unlined bodice because there is no hiding the bulk of all the seam allowances around the seam lines.)
 |
| Here you can see the bulky seam allowances showing through |
I had a lot of fun playing with trim options:


But in the end, I sewed a line of purple gimp braid along the neckline edge for decoration.

I added brass lacing rings along the front of the bodice just to try a new option. I was a bit worried about using lacing rings on this bodice because I was worried that the rings might pull away from the fabric. I have worn the dress with a lightly boned pair of bodies, and it was fine. I just need to remember not to ''yank'' on the lacing in the way that I might do with a bodice that has lacing holes reinforced by boning. I think I do still prefer lacing holes though.

I added some lucet cord ties around the shoulder so that sleeves could be tied on. Thank you to Heather for making the cords for me.
I cartridge pleated the skirt onto the bottom of the bodice. I usually use 5mm pleats; this time I marked out 1cm pleats. My skirt was made of three equal rectangles of fabric joined together and finished at the top. I then turned the finished edge over to hide the machine sewing. Then I marked out a line of dots 1cm apart and went joined them up with a thick thread. Usually I use two parallel lines of quadrupled sewing thread to make my pleats. This time I tried out a short cut by using one piece of crochet cotton. It worked a treat and saved a lot of time, but I may just have been very, very lucky that the thread didn't break and cause me to have to start over again. I probably would go back to using a double row of threads next time, just to be on the safe side. Having said that, I managed to get the whole skirt marked out and pleated on in an evening, as opposed to the whole day that it usually takes me. I whip stitched through the centre of each pleat with a quadrupled strong thread to anchor the skirt to the bodice. I left a small split at the middle front of the skirt to make it easier to put on and take off.
After my trusty helper pinned my hem up for me (thank you Sharyn!), I trimmed it and sewed it into place by hand.

I added hooks and eyes at the front skirt split, but actually ended up just pinning the front into place when I wore the dress because it meant that I could adjust the lacing tighter or more loosely depending on how I felt on the day.

I am considering whether to add a line of purple ribbon around the bottom edge of the dress skirt.
The gown is not completely finished, and I am not completely satisfied with it, but it is wearable, and I am glad that I have tried a few new techniques.


2ed.jpg)
ed.jpg)