
Monday, December 26, 2022
Friday, November 25, 2022

Tuesday, November 15, 2022
Stringing Award Tokens
I have lots of little jobs on the to-do list, one of which has been to string some of the tokens we give to A&S judges.

I always seem to manage to get them tangled up, so I am going to see if putting them on cards is more effective.

Friday, November 11, 2022

Saturday, November 5, 2022
Coptic Roundel Embroidery
I recently made a start on a project that I have wanted to attempt for a long time but which has slightly intimidated me.
When I first got involved in the SCA and was interested in embroidery, I saw this piece of Coptic embroidery from the 7-8th century CE which is held in the V&A Museum .

 |
.PNG) |
| (This is one of the other pieces assumed to be from the same tunic and held by the V&A Museum) |
I loved the colours, and the unusual, almost cartoonish quality of the piece. I also loved the richness of the colour and texture of the densely worked stitches. I didn't know anything about the Coptic culture, but I knew that one day I would attempt something based on this piece.
The Copts were Christians from Egypt. Originally the term was used for all Egyptians, but came to mean Christians after the Muslims conquered Egypt in 639-646 CE (Wikipedia). These embroidered roundels have Christian imagery on them, and are from the seventh or eighth century.
The Egyptian culture is so old; Egypt has been a centre of global commerce for a very long time, and during the middle ages was at the axis of trading systems which linked Asia, Africa and Europe. There were two branches of the Silk Road there, with Alexandria (Mediterranean Sea), and Berenice (Red Sea), and a connecting road allowed products to travel between the two cities (and by extension, Asia to Europe and vice versa). There have been examples of Chinese silks and ceramics found in ancient sites, suggesting the great extent of the trade going on (UNESCO Silk Roads Program).
The extant piece of embroidery is one of three in the same style (V&A accession numbers 814-1903, 815-1903 and 816-1903,), and all are quite big (around 20cm). I decided that an easy way to get a start on a project like this would be to start with some small roundels adapted from the border design of hearts (apples? modified arrowheads?,) and flower shapes. I have drawn up simple patterns for these and traced them onto scrap linen with a Frixion marker. I am unsure how designs would have been drawn on at the time of construction of the original piece; perhaps ink, sharpened charcoal or chalk/ochre. In the sixteenth century, ink was definitely used to draw out embroidery designs, because there are extant unfinished examples showing the ink lines. I haven't seen any extant pieces from this time or region showing exactly how they did it.
As I have done more reading about Coptic textiles, I realise that I was lucky to find this piece as embroidery on Coptic tunics is relatively uncommon. Of the many extant clothing pieces (tunics) from the region that have been preserved by the hot and dry climate, the majority are highly decorated, and the main form of decoration is woven into the cloth. The V&A suggests that this unusual series of embroidered pieces may have been embroidered or imported by a non-Egyptian and that they were probably all from the same tunic.
The V& A Museum believes that these roundels may have been worn by a Coptic priest, possibly due to the religious scenes embroidered in the roundels (the Annunciation and Visitation). However, lay people and clergy wore the same type of decorated tunics. The tunic may have looked similar to this 6-8th century CE child's tunic held by the Walter's Art Museum – all extant tunics that I have seen follow a similar style.
 |
| Tunic
| The Walters Art Museum
|
The description of the pieces on the V&A Museum website simply lists embroidery on linen. The excellent zoom feature on the site allows the user to zoom right in for a closer look. The stitches look to be a combination of long and short stitches, split stitches and forms of couching.
.png)
I plan to use my mini-roundels on a tunic for a child, and so I opted to use split stitch. I like the speed with which long and short stitch works up, but I felt that split stitch would probably be more durable as the stitches are more densely packed and closely anchored.
I used silk floss on linen and will apply the roundels as slips. The original seems to have been worked straight onto the linen background, but kids grow out of things so fast that it seems like a good idea to do slips so they can be removed and reused if need be.
I love the lustre of the finished product but was very surprised at how long it took to work just one roundel. It has certainly given me an appreciation of just how prestigious a garment the original would have been, as well as how the embroidery would have glowed in the light.
When I have finished the current series of floral designs, I may experiment with using long and short stitches/satin stitches – perhaps on the 'heart' design. I have knotted my threads off on the back of the piece for extra durability.


Websites accessed
New World Encyclopedia 'Copts' Silk Road - New World Encyclopedia - accessed 29/10/22
Pinterest Pinterest -accessed 29/10/22 – well, daily, really :-)
UNESCO Silk Roads Program Egypt | Silk Roads Programme (unesco.org) - accessed 29/10/22
V&A Museum Search Results | V&A Explore the Collections (vam.ac.uk) - accessed 29/10/22
Walters Art Museum Tunic | The Walters Art Museum - accessed 29/10/22
Wikipedia 'Copts' Copts - Wikipedia - accessed 29/10/22
Wednesday, October 19, 2022
'To Preserve Potatoes' - An Elizabethan Sweet Potato Recipe
I had the opportunity earlier this year to take part in a cooking competition with a theme of 'preserves'. I was excited when I heard the theme of this competition because I have a number of recipes that I am keen to try. I had been toying with the idea of trying an intriguing recipe for preserved potatoes since last year, but the main thing holding me back was that my family would probably be the test audience and they often find medieval recipes a little strange. Having the opportunity to test it out on people who are more experienced with the often unusual flavour combinations and textures of medieval food is ideal.
The recipe comes from Elinor Fettiplace’s Receipt Book (edited by Hilary Spurling). The recipe book is dated 1604; just one year after the death of Good Queen Bess and the end of the Elizabethan Age. It is most likely that the recipes in the book are ones that had been around (or developed from ones that had been around) for quite a while. In an era when there was no copyright or intellectual property laws, it is very common to see recipes (and embroidery patterns) show up over and over again in different publications, often with only very minor changes if any at all.
I was astonished to see a preserved potato recipe; I quickly realised it was for sweet potatoes (and was a tad disappointed!).

Potatoes and sweet potatoes are New World ingredients. Christopher Columbus is credited with introducing sweet potatoes to Spain (University of Missouri web page) and they made their way to England in the Tudor period. The first definitive account of sweet potatoes in England comes from Gerard’s Herball in 1597, who speaks of it favourably, “howsoeuer they bee dressed, they comfort, nourish, and strengthen the body” (Historic Royal Palaces webpage). The tubers grown at this time in England were much smaller than what we see in Australia now, because they are a warm climate plant.
This recipe is very similar to candied sweet potatoes, which is a popular Thanksgiving dish in many parts of the USA. It would be interesting to know if this recipe was brought over to the new colonies and was so beloved that a variation of it is still being cooked today.
I did some maths to change the imperial measurements to metric to give me a relatable idea of the amounts.
To Preserve Potatoes (p. 194, suggested as part of October’s [Northern Hemisphere] cooking)
“Boile your roots in faire water until they bee somewhat tender then pill of the skinne, then make your syrupe, weying to every pound of roots a pound of sugar and a quarter of a pinte of faire water, and as much of rose water and the juice of three or fowre oranges, then boile the syrupe and scum it, then cut your roots in the middle and put them into the syrupe, before you take it from the fire, put in a little musk and amber Greece.”
Spurling tells us that the extant recipe book actually has two different recipes for this dish, with the second omitting the muck and ambergris, and advising to cook the potatoes in syrup ‘till it look cleare, then when they are cold put them up in a glas and so keep them’ (p194).
I chose to follow the first recipe as best I could. I was pleased that the recipe actually gave guidelines on ingredient amounts; more often than not medieval and renaissance recipes do not, and also assume such a level of familiarity with cooking techniques that the ‘instructions’ are vague at best.
Elinor does not discuss her cooking tools, but a pot or a kettle would have been used for boiling (Eveleigh, p.15).
I filled a nice big pot with ‘faire water’ (nice clean water) and put my washed sweet potatoes in. I had to cut the small ones in half to make them fit. I brought the pot to the boil and left it on a rolling boil for ten to fifteen minutes. This method would not vary from what a cook in our time period would do, although I had the benefit of Teflon cookware, gas stove and clean running water. Cooking this dish over a fire or a wood fire fuelled stove would require the cook to be quite vigilant as keeping the temperature right would be tricky.
I took the sweet potatoes off the heat when inserting my knife under the skin made the skin lift easily. I let them cool on a chopping board, and, when cool I peeled them and cut them into largish cubes (as if I was making a rustic stew). I had to move fast with this part, as sweet potato discolours if exposed to air too long. I had to discard a small amount due to discolouration (which would not have affected the taste, but which looked unappealing).
While I was peeling and chopping the sweet potatoes, I had about 1.5l of water coming to the boil in the newly washed pot. I also added around 1.4kg of sugar. I added about 200g of brown sugar to the white sugar to try and get an approximation of the taste of the loaf sugar used in period. I stirred and then let the syrup boil down slightly. In some confectionery recipes, it is important not to stir your sugar syrup as it can form crystals on the side of the pot which can ruin your candy. This was not an issue for this recipe and its desired result, so I stirred occasionally.
Sugar was an expensive imported ingredient. By the late sixteenth century, a variety of sugar forms were available. Loaf sugar, madeira sugar, canary sugar, cassonade sugar, common sugar, and sugar candy were available in England (Brears, p. 530). I added the brown sugar to white to try and approximate muscovado sugar because I didn’t have any handy. Sugar was being refined and clarified in a variety of ways (including with lime water and egg whites,[Brears, p.530]) so our modern muscovado sugar would probably not be exactly like that available in the sixteenth century anyway.
All the ingredients in this dish would have demonstrated how prosperous the noble of the house was, because the ingredients were expensive and exotic. This is not a dish for poorer people.
I added the juice of four oranges. Sweet orange varieties had been brought to England by Portugese traders by the sixteenth century (Sharma) and what an exotic and exciting treat they must have been. I was thrilled to find such lovely oranges at my grocer even in an age where they are so common. I rolled the oranges on the chopping board first to try and get as much juice out as possible and they were lovely and juicy. The juice added a lovely fragrance and counterpoint to the sweetness of the sugar. Orange peels contain up to 30% pectin too (chempedia.info), so I suspect they could be added to the syrup and removed before bottling to help the preserve set a bit.
Isinglass was a fish product that could be used in a way similar to gelatin, and Brears (2015, p.553) includes several Elizabethan recipes for jelly which contain gelatin, so I guess there are a few options for making the preserve set more.
I wasn’t sure how long it would take for the chopped potatoes to boil so I watched them carefully. As confectioners know, it only takes seconds for a sugar syrup to go from a gentle boil to boiling over, and this syrup was no different. The syrup was pretty clean and clear at first, but the addition of the brown sugar and then the juice really made a lot of scum form on the surface and I had to remove it with a spoon multiple times.
I had to keep adjusting the heat level to keep it at a medium boil (this probably could have been solved by changing to a different size burner). I wanted the pieces to be cooked to softness but not fall apart.
When the pieces were soft enough to be ‘smooshed’ against the side of the pot with a spoon, I turned the mixture off the heat. I added quarter of a teaspoon of artificial musk flavouring.
Musk is a scent derived from the scent glands of the musk deer. The deer is killed to extract the glands, and this practice has recently been heavily reduced. Even if real musk was available, I would not choose to use it. I instead used an artificial musk flavour essence available from cake decorating shops. I only used a quarter of a teaspoon as it is quite a strong flavour. The flavour really came through when the mixture was hot but mellowed as it cooled.
I added a half a teaspoon of rosewater essence. Rosewater could be made in period by distilling an essence from the petals of freshly picked, delicately scented rose flowers. Nowadays, a range of qualities of rosewater and rose essences are available to purchase. If I had access to a better quality rosewater, I might adjust the amount I used. As with so many things, personal preference comes into play. I wanted the rosewater to add to the complexity of flavours without the syrup tasting like fruity perfume.
The recipe also called for ‘amber greece’. Ambergris is a bile secretion generated in the intestines of sperm whales and is a prohibited substance in our current modern age. This is because it can be vomited up by a whale or harvested from it’s body and there is no real way to know if a person has found the ambergris on a beach (vomit) or if the whale has been illegally killed and the ambergris harvested. Fresh or raw ambergris apparently smells like faeces or vomit, but when it has been aged (-the key chemical component, ‘ambrein’, oxidises into different compounds-) it has been described as sweet, earthy, and salty. It was common in the middle ages in Persian and Indian cuisine (Schmidt, 2015) and has historically been used as a perfume ingredient and was astronomically expensive and very sought after. There is a synthetic alternative to ambergris which is called Ambroxan, which is made from a chemical which is found in the Clary Sage plant. I am not familiar with Ambroxan or how it works with other ingredients, so chose to avoid it.
I wanted an earthy, woody flavour that might go a small way to approaching the complexity of flavour that ambergris could add, even though the second of Elinor Fettiplace’s recipes omits ambergris and musk altogether. I decided to add half a teaspoon of ground nutmeg. Nutmeg was a spice used by the wealthy classes during the middle ages and renaissance, and is often included in the various ‘poudre’ recipes, gingerbreads and savoury recipes. I thought it might be a nice counterpoint to the sweetness.
While the mixture was still hot, I poured it into sterilised jars and submerged them in boiling water. There is no indication in the recipe how long the author expected the preserve to last. I have relatively limited experience with jam making or other boiled preserves, but I am aware of the need of sterilisation to prevent spoilage. Elinor Fettiplace has other recipes for preserved fruits and vegetables, fruit gellies and marmalads, but unfortunately does not go into details about sterilisation or storage. (I don’t tend to go into lots of detail in my own personal cooking notes because I know the associated processes with the step I am writing about; I assume she was the same. How could she know that hundreds of years into the future her recipe book would be published and pondered over?)
The mixture needs time to season and for the flavours to develop, but I tried it with pork chops the day it was made. I used it as an accompaniment and I really liked it although the texture was unusual. If I made the recipe again, I would cut my ingredients by half. I would probably mash the potato up more in the syrup to form a chutney-like texture, and I may add pectin…. I will have to see how the mixture sets over time. You could probably put slices of potato in jars and use it as a vegetable side dish, but I am not a huge fan of the texture of sweet potato, so I chose not to do this. This may have been how the preserves were served in period, as sweet potato tubers were smaller then. I imagine you could add more sugar and possibly increase the essences and/or spices and make an interesting dessert to serve with one of the many cream recipes that were popular in our period. I would also experiment with reducing the amount of water and adding a setting agent (perhaps adding the orange peels to steep in the boiling syrup to release more pectin) and straining some of the syrup to make a jelly. I liked the flavour of the syrup most of all, and I think it might be a pleasant accompaniment to meats (in the way that redcurrant jelly is,) or even as a jelly on toast. All in all, this has been an enjoyable and interesting experiment and has certainly revealed a lot of interesting reading matter that I intend to explore.
My Ingredients
1.5 kg sweet potato, washed
1.5 l clean water
1.2 kg white sugar
200g brown sugar
Juice of 4 oranges
½ tsp rosewater essence
¼ tsp ground nutmeg
¼ tsp musk essence
Bibliography
Brears, Peter (2015). Cooking and Dining in Tudor and Early Stuart England, Prospect Books, London.
Everleigh,David J (2010). Old cooking utensils, Shire Publications, Oxford, UK.
Spurling, Hillary (1986). Elinor Fettiplace’s Receipt Book, The Salamander Press, England.
Online References
A Brief History of Oranges https://fruitstand.com/blogs/stories/a-brief-history-of-oranges
Published Aug 10, 2020 by Nick Musica.
Accessed 25 March 2022
Ambergris https://en.wikipedia.org/wiki/Ambergris
Published by the Wikipedia Project, last updated on 20 March 2022
Accessed 25 March 2022
Ambergris and Musk: Exotic scents of a cuisine blog post
https://madhavifeast.wordpress.com/ambergris-and-musk-exotic-scents-of-a-cuisine/
Posted by Madhavi
Accessed 25 March 2022
Big Chemical Encyclopedia: Oranges juice pectin https://chempedia.info/info/oranges_juice_pectin/
Published by chempedia.info in 2019
Accessed 25 March 2022
History of Orange https://fruitly.wordpress.com/2013/04/13/history-of-orange/
Published 2013 by Muskan Sharma
Accessed 25 March 2022
History of Sugar https://en.wikipedia.org/wiki/History_of_sugar
Published by the Wikipedia Project, last updated on 10 March 2022
Accessed 25 March 2022
History of the Sweet Potato https://blog.hrp.org.uk/gardeners/history-of-sweet-potato/
Published by Historic Royal Palaces on 26 November 2015
Accessed 25 March 2022
Manuscript Cookbooks Survey https://www.manuscriptcookbookssurvey.org/tag/musk/
Musk Ambergris, the Perfume of Whales that once Scented Foods
Posted July 2015 by Stephen Schmidt
Accessed 25 March 2022
Musk https://en.wikipedia.org/wiki/Musk
Published by the Wikipedia Project, last updated on 22 March 2022
Accessed 30 November 2021
Nutmeg: A Very Brief History https://thespiceacademy.com/nutmeg-a-very-brief-history/
Published By The Spice Academy on 9 December 2017
Accessed 25 March 2022
Nutmeg http://nutty-meg.weebly.com/history-of-nutmeg.html
Published by unknown on unknown
Accessed 25 March 2022
Nutmeg https://en.wikipedia.org/wiki/Nutmeg
Published by the Wikipedia Project, last updated on 22 March 2022
Accessed 25 March 2022
Orange (fruit) Wikipedia Entry https://en.wikipedia.org/wiki/Orange_(fruit)
Published by The Wikipedia Project, last updated on 19 February 2022
Accessed 25 March 2022
Rose water https://en.wikipedia.org/wiki/Rose_water
Published by the Wikipedia Project, last updated on 11 January 2022
Accessed 25 March 2022
Sweet Potato: https://en.wikipedia.org/wiki/Sweet_potato
Published by the Wikimedia Project, last updated on 19 March 2022
Accessed on 25 March 2022
Sweet Potato: A Brief History https://ipm.missouri.edu/MEG/2009/11/Sweet-Potato-A-Brief-History/
Published by on 1 November 2019 by University of Missouri Integrated Pest Management
Accessed 25 March 2022
Tuesday, October 11, 2022
A Baronial Bunting Experiment
Several years ago, a clever and generous gentle from another Barony sent out templates for Baronial bunting to all the mainland Lochac groups. I had planned to start a group project to create some, and did some tests with different types of paint and fabric mediums - and then the pandemic struck and closures happened.
In the mean time, other projects took precedence but I didn't forget the bunting. I wanted to do a test run, and the recent Crown tournament seemed like a good opportunity. I adjusted the template slightly by adding seam allowance, as I planned to use coloured backing panels on each tab.
I traced the heraldic design with pencil onto pre-washed and ironed cotton broadcloth.
I used acrylic paint mixed with fabric medium to colour the designs. It took a couple of coats and the paint was still a little patchy. (I suspect this would not happen with better quality paints.) I was also rushing to get the project done on time. After drying, the paint was set with a hot iron.


I sewed each tab to the backing piece by using the 'bagging out' method (i.e. putting right side to right side, machine sewing along the seam line, trimming and clipping the edges and then turning right side out. Then I gave each one a good press.

I sewed a double bias tape along the top of the tabs after spacing them evenly. I added little loops of bias so that the bunting could be used for a variety of purposes/on different structures. I made sure the backing colours alternated.

Tuesday, September 27, 2022
Post-Spring Crown Reflections
My home Barony just hosted Spring Crown Tournament, and I played a very minor role in the stewarding team, so my time for some weeks has been taken up with paperwork and projects for that.
The big event is over and now it is time to go 'splat' and recover. (And go through the photos, jot down all the ideas inspired by wonderful people, and plan what is next on the to-do list.) Plus!- Start blogging all the projects that were completed before I forget and they end up stuck in the drafts folder forever, like so many others!
This was a really well attended event, with overseas visitors and a large and prestigious list of contenders. The event ran really well, everyone seemed to have a great time, and was full of beautiful and moving moments. (Plus lots of silly and fun ones.) I got to see old friends and make new ones. And regret not having time to catch up with many others, but such is the nature of big events, I guess.
There was a wealth of beautiful arts and sciences on display, garb to drool over, and displays of courtesy and chivalry (on and off the field) to be inspired by. Innilgard is renowned for it's plentiful good food, and the cooking team did not disappoint, with feast goers being seen in the evening walking around rubbing their bellies and moaning happily that they 'ate too much'.
There were two Peerage ceremonies, a Protege ceremony, presentation of gorgeous scrolls, and other lovely forms of recognition for well-deserved people. I got to see two friends step up as Heirs to the Throne after an exhilarating battle. And laughed as Knights in the stocks got pelted by sponges to raise over a thousand dollars for a cancer charity in remembrance of lost friends. There was beautiful dancing and a range of excellent bardic performances. I got given a personalised performance of interpretive dance in lieu of a rose in the Rose Tourney. And did I mention the drool-worthy garb?
All in all, it really was the sort of event that renews in every way.
.JPG)
Saturday, September 3, 2022
Mending and mundane projects
I have been consistently busy over the last couple of weeks with SCA paperwork and little tasks like mending and mundane crafts and sewing. I've also had tonsilitis, a tooth infection and a chest infection over the last month, so not feeling my best or most productive.
I got these nice wooden beads really cheaply at an op shop that was selling new craft materials, and made myself some mundane necklaces which I am pretty happy about.

Tuesday, August 16, 2022
Black Linen Summer Gown in the Italian Front-Lacing Style
I recently went through old posts looking for a recipe redaction that I had done, and found dozens of draft posts from 2019. I'm not sure why I didn't finish them and post them at the time? A lot of them aren't relevant any more, but there are some that you might find interesting.
Here is one:

I made this gown over the Christmas break for an event in January 2019. It gets very hot where I live (40 degrees Celcius +), and although events are usually postponed when it gets too hot, sometimes the show must go on.
This was a quick project with some modern sewing techniques used to save time. I modified one of my other gown bodice patterns to drop the waist a bit, make the shoulders a little wider and put a bit more depth into the point of the bodice.
The gown bodice was an experiment with no boning. The linen was lined with heavy cotton canvas and the two pieces 'bagged out' or sewn together with the machine and then turned right side out.
I hand sewed the bottom edge of the bodice and the armholes.
The trim is just simple ribbon, sewn on by hand.
The eyelets were all done by hand with an awl and sewing thread. I decided to add some bias binding along the font edges and slip bones in for a bit of rigidity and to stop the eyelets puckering. Once I tried the completed bodice on, I felt that it needed some extra boning, so I added bias binding strips at the centre side seams and across the back of the bodice, and put four more bones in.
The skirt is simply a series of rectangles of fabric sewn together. I let the skirt hang for a long time to let the hem drop and reduce distortion due to the weight of the fabric.
I pleated the skirt on by turning the top edge under and then marking out regular dots along the skirt top edge. I ran a heavy thread through to draw the skirt up into cartridge pleats. Normally you would use a double row of thread to do this, but I cheated and only did one. The risks with one thread are that it may break and you will have to start all over again, and that the pleats may be slightly uneven if you are not very careful with your dot marking and needle placement. I usually do a two-part line of pleating; on a front opening gown, I run one line of pleating thread from centre-back to centre- front on one side, and do the same on the other. I find that it makes adjusting the pleats more manageable, especially if the skirt is very full and bulky.
Ones the lines of pleating thread are in, I put safety pins in to mark the centre-back and centre-sides of the skirt panel. I line the safty pins up with the corresponding side seams, centre-back point and centre-front point of the bodice. Then I carefully draw up my pleating thread, adjusting the pleats to sit evenly in their quarter. Then I adjust a quarter at a time to make sure the pleats are all evenly spread out and looking nice. A quarter panel at a time, I use heavy thread to sew each pleat onto the bottom edge of the bodice. I usually use four strands of sewing thread that has been waxed for strength. I also knot the thread off unobtrusively at about every 10 cm point, so that if I were to rip some pleats out by accident when wearing the dress, the whole skirt will not fall off.
Once the skirt is on, I cut the pleating thread. This is optional; if you want defined cartridge pleats, leave it in. I prefer less defined pleats so I cut the thread on mine. I hand finish the front opening gap of the gown and add a buttonhole bar at the bottom of the skirt opening for extra strength. I did not add hooks and eyes on the opening of this gown - I left a bit of extra fabric at the front of the dress that I could pin shut and would be adjustable. I then let the gown hang for several more days to let the skirt drop if necessary and to let the pleats fall properly.
I had help from my dear Mum with the hemming, and I added some ribbon trim around the bottom when hemmed as well.
Finally, I used some scraps from gown construction and another project to make the pouffy sleeve heads that I like so much. I sewed strips of fabric together to make a panel approximately 2.5 times the size of the sleeve cap pattern that I drafted as a base. I pinned the puffs into place by eye, until I got roughly the look I was going for. This is a tedious task, but I can't think of a better way to do it. Once pinned, I hand sewed down all the puff pieces in sections to keep it secure. Then I make all the bulky fabric puffs point to the centre of the sleeve cap and then put the lining piece on top and machine sew most of the way around (without catching any of the puffs in the seam.) Then I trimmed the seams, turned the puff the right way out and hand sewed the gap shut. I also hand sewed around the edge of the entire puff to stop the bulky puff section moving or turning in. It is important to have a stable base for these puffs or they move around and stick up.
I added some lucet ties underneath so I can wear the dress with removable sleeves.
The dress was reasonably cool, but I unfortunately made the bodice a smidge too long and wide, so there is some wrinkling that I am not happy with. I will make the next one a bit shorter so it sits better and I wont have to worry about my sash riding up or down. This one needs taking up so it sits better.
 |
| I spent a good proportion of the day adjusting my sash because the bodice is too long |

Thursday, July 28, 2022
Baronial Archery Champion Cloak
Cold weather is here in South Australia, and I have been thinking about warm clothing options for winter months. As I was considering options, I came across pictures of this cloak I made several years ago and forgot to post about.
The cloak is made of heavy wool, and the style is inspired by this extant piece:

The cloak was created for the Baronial Archery Champion of my local SCA group to wear. The plan is for every Archery Champion's heraldry to be displayed on the cloak in chronological order of winning the Championship.

Cape of Garzia Medici -held at the Pitti Palace. See more info here:The clothes of Cosimo I, Eleonora di Toledo and don Garzia - Auris Lothol (auris-lothol.info)
(A big thank you to Salome for this reference!)
The wool is fulled and slightly felted, and so doesn't fray, which meant that it did not need to be lined.
There are currently two other Champion cloaks in use in my group; red for the Heavy Champion and blue for the A&S Champion.
The neck is bound with yellow twill tape which also serves as ties. All the sewing was done by hand, and the little arrows were embroidered.


Thursday, July 7, 2022
Embroidered Heraldic Patches
I recently finished the second of two heraldic patches for a Championship cloak. I wasn't super pleased with how this one turned out, but it was my third try, so it was time to quit and accept it for how it worked out. The embroidery is done in silk thread in split and chain stitch.


Monday, May 9, 2022
Green Linen Tie-On Sleeves In The Italian Style
Are you getting bored with sleeves yet?!
I recently finished another pair, this time in a pretty green linen.
They are constructed in the same way as the rest. I cut out my favourite roomy sleeve pattern in the lining and fashion fabrics and edged them with zigzag stitch on the machine. The seams were sewn on machine with straight stitch and opened out and stitched down.
I sewed the green linen fashion fabric and lining together at the sleeve head (wrong sides out), and clipped the curves to reduce bulk before turning the right way out.
I hand stitched around the top of the sleeve to stop the lining rolling out.

I sewed the wrist hem by hand and then whipped the lining in with another row of stitching. This seems like extra work, but if the lining ever stretches, it means I can re-hem it without affecting the hem on the green fashion fabric.
I worked eyelets around the top of the sleeve for tying on and then put my trusty 'L' on the inside of the left sleeve.

Thursday, April 21, 2022
Khaki Tie-On Sleeves in the Italian Style
Another pair of sleeves finished!
These are made out of a cotton fabric remnant that I found in an op (thrift) shop.
They are constructed in the same way as all the others; the lining and fashion fabrics were cut out using my favourite sleeve pattern and edged with zigzag stitch. The seams were sewn on machine with straight stitch and opened out and stitched down. Then the fashion fabric and lining were sewn together at the sleeve head (wrong sides out), curves clipped and then turned right way out. The top of the sleeve was top stitched by hand to stop the lining rolling out. The wrist hem was sewn by hand and the lining whipped into place. Eyelets were worked by hand at the top of the sleeve and an 'L' was sewn into the left sleeve to make lacing the sleeves on in a hurry easier.


Sunday, April 17, 2022

Sunday, April 10, 2022
'Baronial Beautification' Group Project
I'm currently involved in our Barony's efforts to prepare items for a future royal visit. Lots of projects are planned to improve our infrastructure and increase the pageantry at the event.
I haven't been well enough to attend weekly meetings, but the project manager (Sir Eva), is very empathetic and likes to give everyone a chance to be a part of these sort of projects if they would like to. So I had the opportunity to work on some sewing for the project at home.
It felt good to be able to contribute to a group project, and nice to have a change from the UFO pile. Who would have thought that 'sewing homework' would be such a breath of fresh air?!

Wednesday, April 6, 2022
Red-Gilt Tie On Sleeve in the Italian Renaissance Style
I finished another pair of sleeves this week, and boy! are they pretty. The fabric was purchased from etsy several years ago. A miscellaneous fibre content includes gilt threads. They were sold as silk brocade but I would be very surprised if they actually contain silk.
.JPG)
I made these sleeves to the same pattern and in the same way as the others I have blogged about recently. The lining is purple broadcloth.
 Putting a small running stitch along the inside of the top edge to stop the lining rolling out with wear.
.jpg)
.jpg)
.jpg)
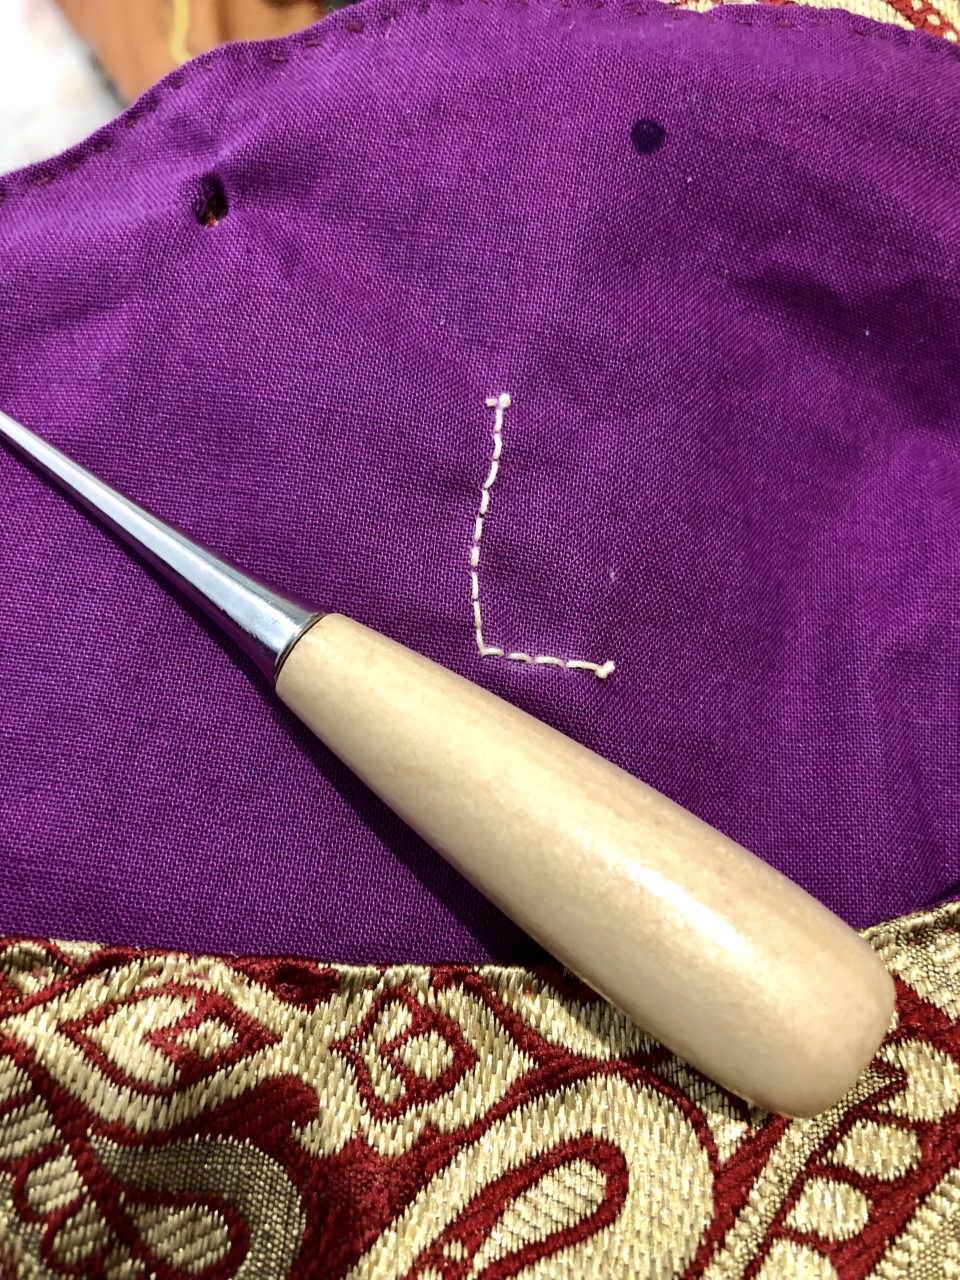
Working the eyelets. (I've added an L for Left to save time getting ready before events.)
The finished product. The pictures fail to capture the richness of the fabric.


Subscribe to:
Posts (Atom)