Showing posts with label eyelets. Show all posts

Friday, July 28, 2023

Red Velveteen Tie-On Italian Style Sleeves

Sleeves again this week, and boy! am I happy with these! So rich and soft - I love them. I got the velveteen before the quality of cotton velveteen being offered by my local Spotlight dropped, and the fabric is lush.


These were created in the same way as previous iterations: the pattern is my roomy, self-drafted pattern that is super comfortable and very wearable. The centre back seam of velveteen and stash fabric lining was machine sewn and hand felled. Then the pieces were put together, wrong way around, and machine sewn. The arc at the top of the sleeve was clipped, and then the sleeve turned right way out ("bagged out"). I generally choose to do a small whip stitch around the top of the sleeve to stop the lining rolling out with wear, and I did that with these. I usually embroider an 'L' on the left sleeve lining before hemming also, just to help with speedier dressing on those days when I am in a rush or brain foggy.

I hemmed the outer sleeve first, anchoring it with small stab stitches. Then I hemmed the lining; turning the lining under quite a bit more so that it won't show when I move my arms.

The final step is to slog through one of my hated jobs - eyelets. I am getting faster at them, but they are very hard on my sore hands. I generally use 4 strands of waxed sewing thread, and use an awl to make a hole. I then do a double running stitch around the hole and then cover the edges with what is essentially a satin stitch.

I am super happy with this pair of sleeves; they feel so wonderful to touch.

Thursday, July 20, 2023

Purple Tie-On Italian Style Sleeves

I'm still working on the UFO pile, and this week's completed item is a pair of Italian style tie-on sleeves in linen. 
They are lined in black cotton remnants, with hand worked eyelets. I had to ease in the linen on one of the sleeves, which has led to a small amount of wrinkling around the wrist on one of the sleeves. Hopefully it will settle with wear, or at least not be noticeable, because I don't feel inspired to unpick the sleeve and lining hem and re-sew the inner seam of the lining (especially since the inner seams on sleeve and linings are felled).


Friday, June 16, 2023

May Day Challenge - Tie-On Italian Style Sleeves #3 (Purple)

 Last year Duchess Constanzia Moralez of Lochac set a Challenge to all those interested -The May Day Challenge (a personal challenge on 'how to improve your SCA in any way by May Day, AS LVII'). 

Image credit: R. Vess

My Challenge was to work on that UnFinished Object pile and get some items finished. My friend won Crown during the Challenge, and so some of my energy was diverted into helping create garb for Them and Their Household, but I did manage to get some items finished before the Challenge ended.

This pair of sleeves had been languishing in the UFO pile, cut out but unsewn. I machine sewed the centre back seam on the lining and outer fabrics, and stab stitched the seams open. Then the sleeves were joined at the shoulder seam and the lining and outer parts were hemmed individually. I then whip stitched around the top of each sleeve to prevent any movement in the lining, and worked five eyelets at the top of each sleeve.


These sleeves look blue in the picture but are actually purple.


Sunday, June 11, 2023

May Day Challenge - Tie-On Italian Style Sleeves #2 (White with gold trim)

 Last year Duchess Constanzia Moralez of Lochac set a Challenge to all those interested -The May Day Challenge (a personal challenge on 'how to improve your SCA in any way by May Day, AS LVII'). 

Image credit: R. Vess

My Challenge was to work on that UnFinished Object pile and get some items finished. My friend won Crown during the Challenge, and so some of my energy was diverted into helping create garb for Them and Their Household, but I did manage to get some items finished before the Challenge ended.

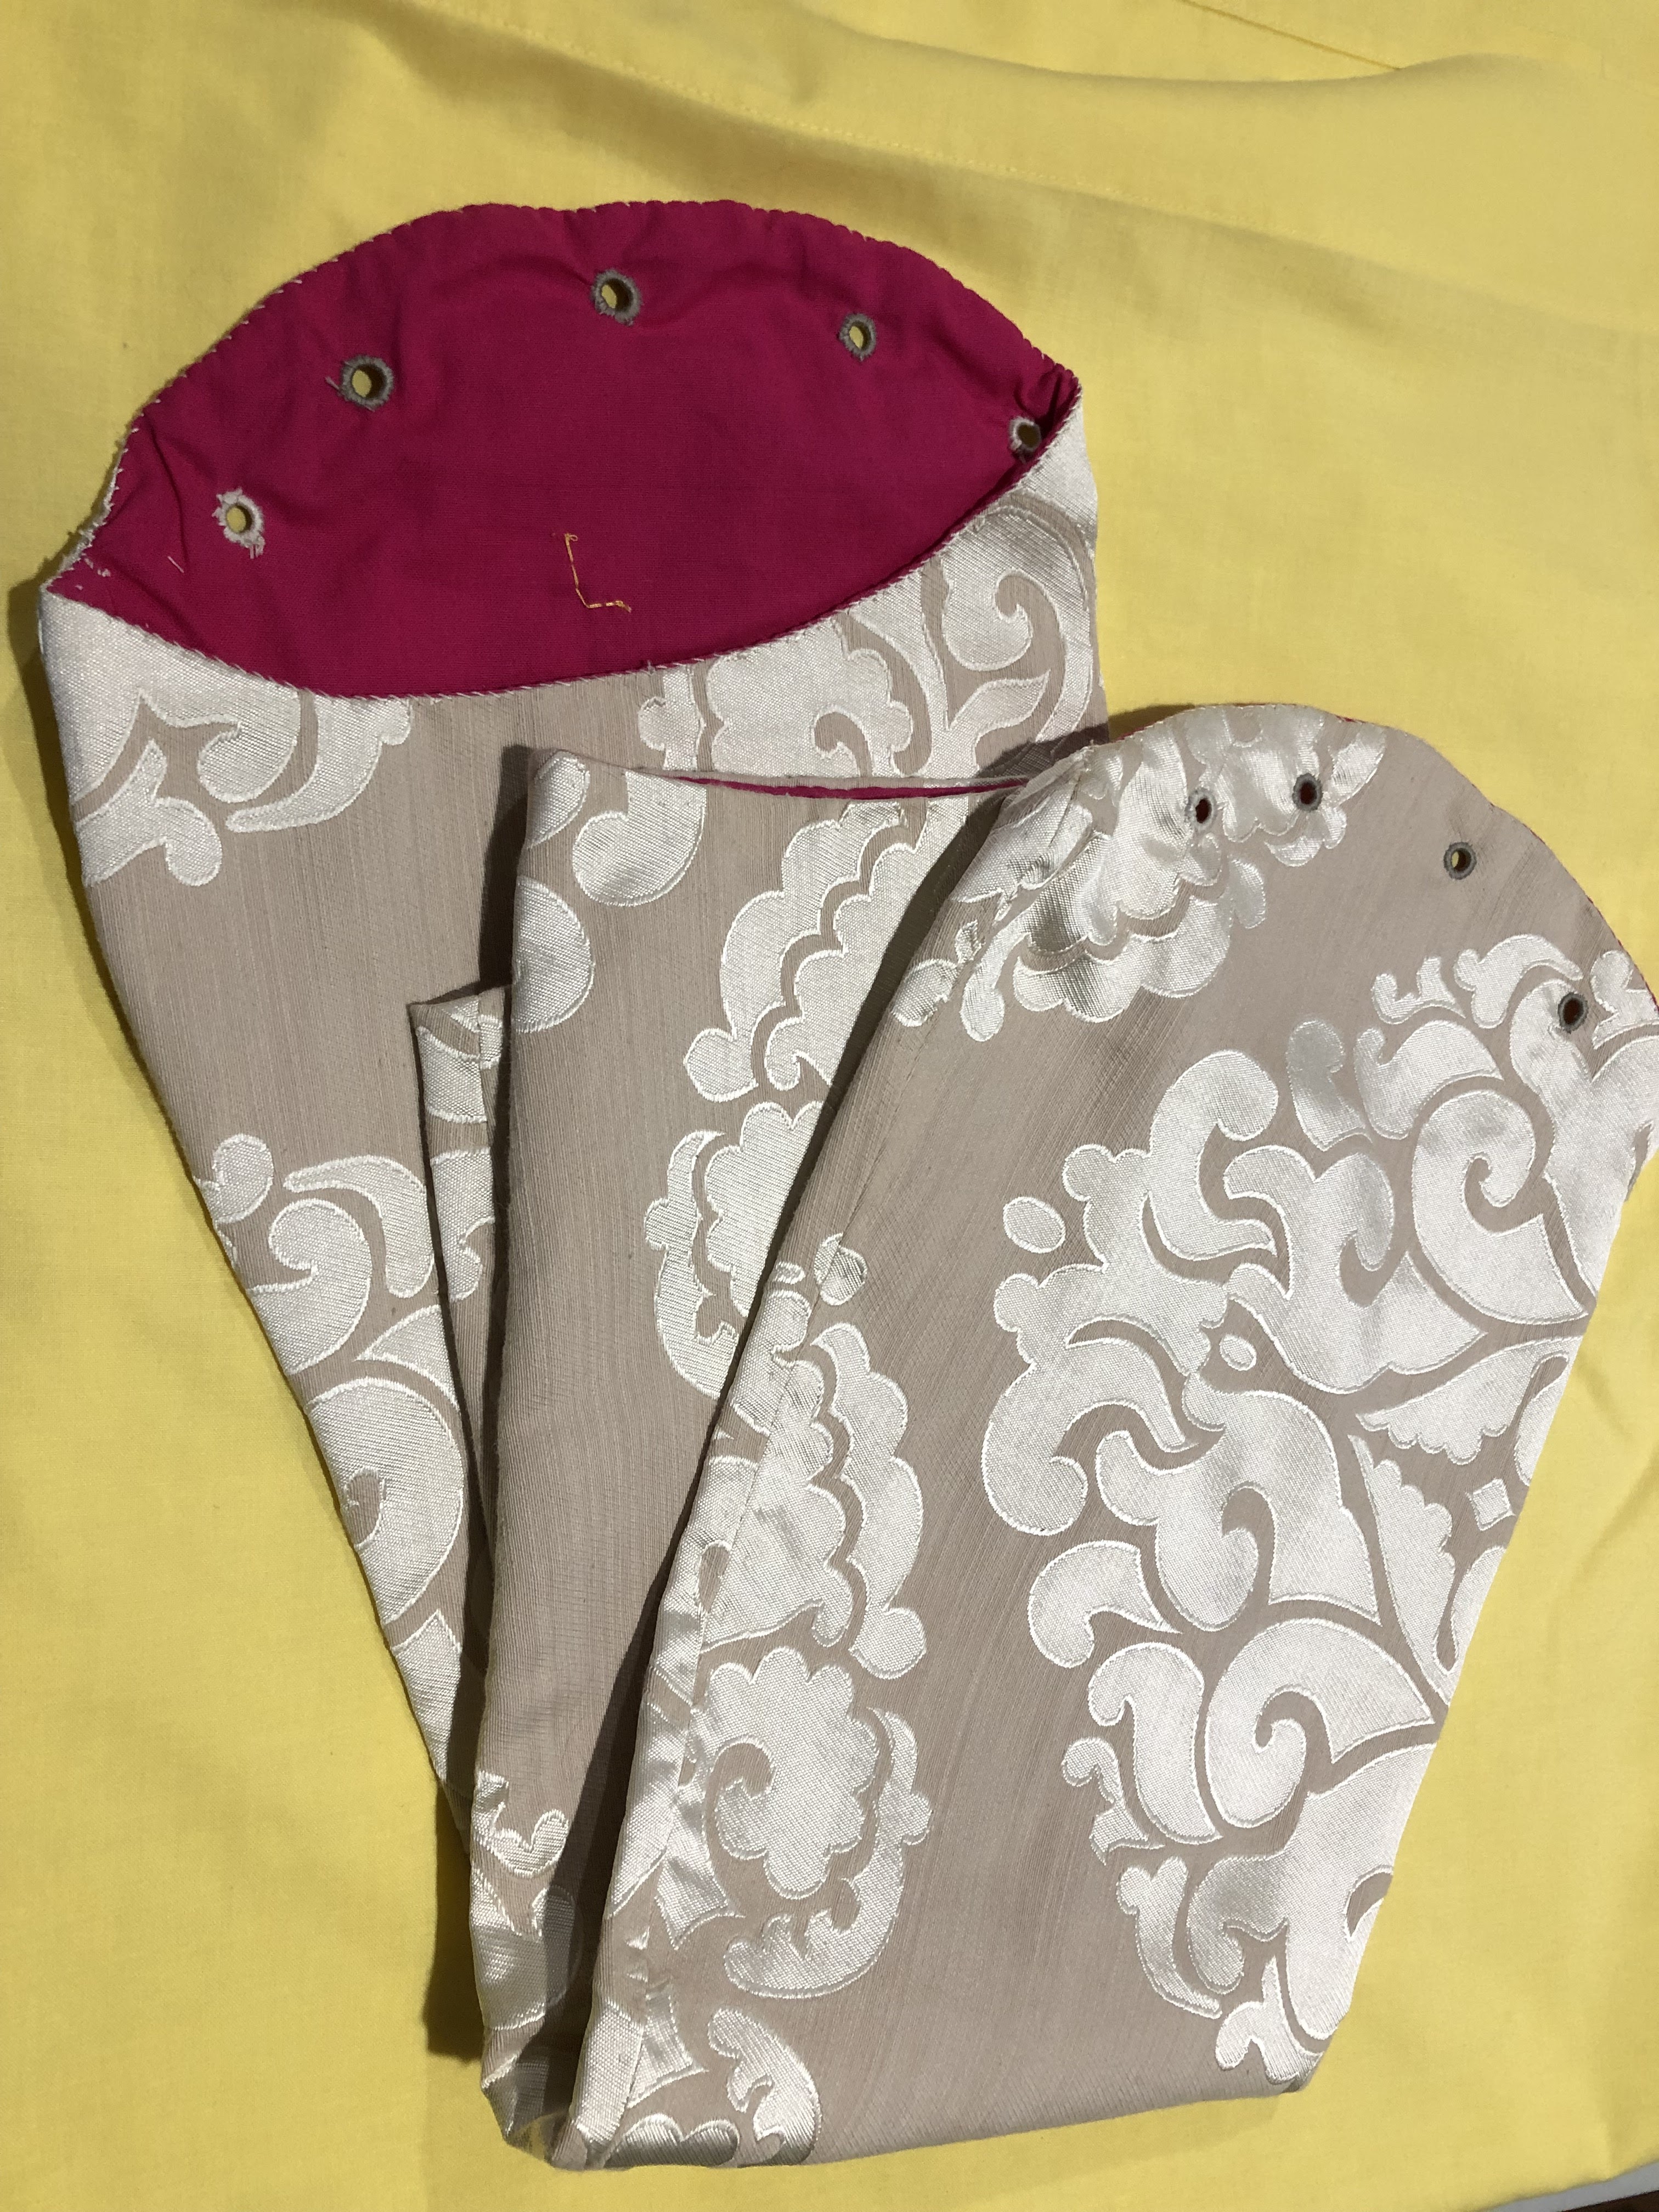
Second is another pair of sleeves that just needed two more eyelets added on each sleeve and the top edge whip- stitched to be wearable.


Tuesday, June 6, 2023

May Day Challenge - Italian Style Tie-on Sleeves #1 (Cream damask)

Last year Duchess Constanzia Moralez of Lochac set a Challenge to all those interested -The May Day Challenge (a personal challenge on how to improve your SCA in any way by May Day, AS LVII). 

Image credit: R. Vess

My Challenge was to work on that UnFinished Object pile and get some items finished. My friend won Crown during the Challenge, and so some of my energy was diverted into helping create garb for Them and Their Household, but I did manage to get some items finished before the Challenge ended.

First up is a pair of sleeves that just needed two more eyelets added on each sleeve. (An easy task to put off, because I hate doing eyelets!)


Sunday, March 13, 2022

Pale Blue Tie-on Sleeves in the Italian Style

Another pair of sleeves complete and out of the UFO pile! This pair is made from a light blue brocade type fabric that I found in a remnant bin at a thrift store and is based on the Italian tie-on style.


The camera has was washed the colour out a bit:

The sleeves were created in the same way as outlined in my previous post. 

As usual, the eyelets were what was holding me up.


I've embroidered an 'L' on the left sleeve because I always seem to be in a rush when it is time for events, and nothing wastes more time or adds more stress than struggling into a big dress only to find out you laced your sleeves on wrong - and then have to struggle back out of it, unlace them and then re-lace them on the correct sleeves. Ask me how I know, haha.


Wednesday, February 9, 2022

Mending and Adjustments

 Hello friends! I hope this new year is finding you safe and well. 

I haven't posted in a while because my illness(es) flared up over Christmas and I have had a hard time getting back to normal. I have not been doing much of craft-related interest except for mending and alterations, and working on the Perpetual Pile of Sleeves. 

As you would probably know by know, I loathe a sewing do-over, and that is exactly what mending (and associated activities) feels like, so it is very easy to put the chore off and do more exciting projects. So I have been working to whittle down the list of things waiting to be fixed or adjusted - with varying degrees of success. It does seem like a Magic Pudding type situation, but I am plodding along.

Adjusting a slip

(For those of you who are not familiar, The Magic Pudding is an Australian children's book about - you guessed it - a magic pudding that you cut a piece from and it magically restores itself. Apparently much like my sewing to-do pile.)

The characters from The Magic Pudding. (Image from: https://www.sl.nsw.gov.au/exhibitions/magic-pudding-celebrating-100-years)

The Perpetual Pile of Sleeves is starting to look more manageable, as I have just kept at it; a little bit every day. 

Predictably, I have left all the eyelets til the end.


Tuesday, July 24, 2018

Order of Grace Frette Pouches

I finished these two pouches a couple of weeks ago. They are the sort of project that doesn't look that involved but which actually takes a lot of time.

These are token pouches for my Barony's Order of Grace. The silver frette is what takes the time. Because recipients  wear them with pride to events, they need to be very durable. And anyone who has worn garb trimmed with gimp braid will tell you that it is often not terribly durable.

The pouches are made from wool and velveteen. The lining is cotton or linen. The pattern is just a simple rectangle with seam allowances added. To make the pouches more likely to stand up to wear and tear, I hand sewed the trim into place down the centre of the ribbon. Then I went along both sides and sewed down all the little loops.


Once the trim was secured, I sewed the side seams of the pouches and linings and trimmed the corners. Simple tassels were created and then sewn along the bottom of the pouch.


Next the lining was inserted into the pouch, so that all seams were hidden. A whip stitch along the top edge secured them together.

I use five eyelets per side for pouches of this side. I use pins to mark their position and then make a hole with an awl. (I have an eyelet tool that I made from a wooden knitting needle that I use to enlarge the hole.) I do a double running stitch around each hole to secure it, and then reinforce with a thick satin stitch.

The pouch ties are threaded through the holes in opposite directions so that when they are pulled, they draw the mouth of the pouch shut. I used commercially produced cord for this project to save time.

The last thing to do is to add ties onto the pouch so that it can be hung from a belt. I usually aim to have it sit at around mid-thigh height, although this is only a guess because I have no idea who these pouches will be awarded to.


My little friend offering moral support while working those tedious frettes.

Wednesday, May 3, 2017

A&S 100 Challenge - Day 5 - Eyelets


Today I am tackling eyelets on an unfinished front-lacing gown. I struggle with eyelets because I have a lot of pain in my hands and fingers. I tend to put buttonholes off because they hurt so much - so I always have plenty to do.


Why does only the last eyelet ever turn out the way you want it?!