Muffs known as Manizzas in Italy and Snoskyns in England,
were a handy way of keeping hands warm as well as a status symbol and sign of
conspicuous consumption in the sixteenth century. The fur pelts, fine fabrics
and craftsmanship all reflected that the wearer was someone who could afford
luxury and was aware of fashion
Queen Elizabeth I had several muffs (also called countenances) and there is a record of Amyas Paulet purchasing a
muff on her behalf in Paris in 1579 (Queen Elizabeth's Wardrobe Unlocked by
Janet Arnold, p. 97). Ladies posed with manizzas or zibellini ('flea furs') are common in both Italian and English portraiture from the sixteenth century. Some of the portraits that I found inspiring can be seen on
my earlier blog post about my earlier attempt at making a manizza or muff: http://broidermebethan.blogspot.com.au/2012/06/new-manizza-or-snoskyn.html
In January and February 2014, I was part of the Italian Renaissance Costuming Min-Challenge - "Fabulously Fashionable Fur (http://realmofvenus.renaissanceitaly.net/challenges/IRCMC-Jan2014.htm).
The weather here in South Australia was the hottest in recorded history, so it was not a good time to be sweating and working with fur. The competition's organiser Lady Bella graciously extended the challenge to allow for the weather. As usual, I went into the challenge with high hopes and huge plans. The more portraits I looked at, the more I wanted to make. I started with a muff because I had a small rabbit pelt that a friend had given me after finishing a pair of fur lined sleeves. (I do not support the fur industry in any way, but I do believe that if an animal is killed humanely for food then we should do our best not to waste anything. I have no issue with re-using or recycling vintage furs or the skins of animals slaughtered for food.)
All the materials that I used, I had in stash or had purchased for other projects. I made this muff quite small because the last muff that I made was quite a bit larger and can be a bit heavy and unwieldy. Also, I saw a gentlewoman at an SCA event last year with a small one hanging from her girdle, and I thought it looked very elegant.
My first step was to assemble materials and then make a rectangular paper pattern that would fit my hands and accommodate the pelt that I had.
The upholstery fabric that I had was a nice pattern but prone to thread separation. This would make it tricky to sew later on.
I am not a keen sewer, so my favourite part of any sewing process (apart from wearing the resulting pretty item!) is playing with trim and fabric options and dreaming of possibilities.
After trimming my fabric and pelt to size, I edged the fabric, pinned the fabric (wrong side out) and pelt (skin side out) together and sewed around the edges, leaving a small area unsewn for turning.
Once the pelt and fabric were sewn together, I had the tricky task of turning the 'bag' right side out.
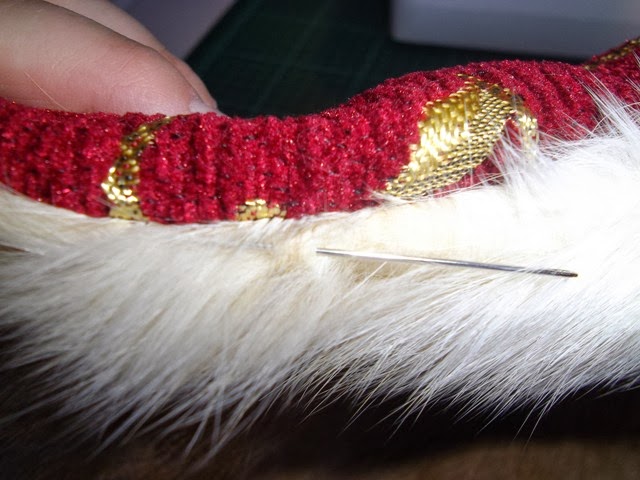
Once the manizza or muff was the right side out, I made sure that all the seams were pushed out and the hair pulled out of the seams before sewing on some maroon satin ribbon.
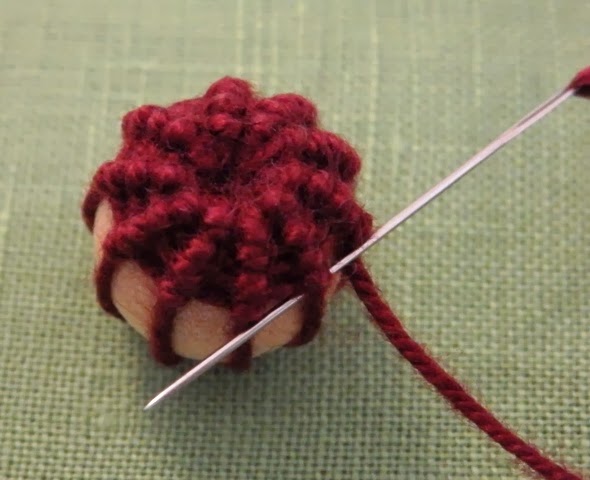
The next thing I decided to work on was the woven buttons. You can see the tutorial on how I did it here: http://broidermebethan.blogspot.com.au/2014/01/woven-button-tutorial-back-stitched.html
I added loops of gold DMC floss to the completed buttons and a decorative little knotted lump in the middle at the top. Next time I will use a bead, because I was not very happy with how this element worked out.
I made five of these buttons and stitched them to one side of the manizza.
I liked the way the ribbon looked by itself, but wanted to try out some trims. The plain gold upholstery trim was too much, but I had a small amount of maroon and gold trim that was purchased for the edge of a French hood. It looked pretty good on the ribbon, so I sewed it down in the centre of the satin ribbon.
I had some lovely little gold accents that I bought for a Tudor bodice from http://dragonsbloodcreations.com.au/
I thought that they looked nice, and would be a good way of hiding the join in the trim.
The last task was to make buttonhole loops for the button closures and to make an anchor point to hook my girdle chain to. I made a couple of loops of crochet cotton and then button hole stitched all around them before anchoring the thread and knotting off. This was a tedious task because the hairs from the fur kept getting stuck in the loops and pulling through with the thread. Also the fabric was quite loosely woven, so I had to be careful how hard I pulled the thread. Next time I will try lucet cord loops sewn into the seams because I found that the crochet cotton stretched quite a bit.
Once the loops were finished, I joined some lobster clasps and a key chain ring to a length of chain so I can hang the manizza from my girdle.
Although I didn't get all the other items that I had planned done (as usual!) I am satisfied with what I achieved in the challenge. I have a pretty accessory and I plan to make another for a friend at some later date.
I found these pages after I had finished my manizza, when I
was looking for supporting pictures. I would recommend them to readers:
https://thepragmaticcostumer.wordpress.com/tag/album-amicorum/
http://webspace.webring.com/people/lo/oonaghsown/curves/muff_in_sixteenth_century_dress.htm
http://jeannedepompadour.blogspot.com.au/2012_03_01_archive.html
The ‘Portrait of Anna Radziwell’ 1583 shows what looks like
a fur capelet. Hmmmm…. Ideas for the future!
Here is the link to see what the other entrants in the challenge have created:
http://realmofvenus.renaissanceitaly.net/challenges/IRCMC-Jan2014-Results.htm
Many thanks to Lady Bella of Realm of Venus (http://realmofvenus.renaissanceitaly.net/) for organising this fun challenge.


No comments:
Post a Comment