The lovely Megan supplied me with a coif pattern to suit Queen Branwen. This is very important when designing a coif, as not all styles suit all faces, and the amount/thickness of hair a lady has also affects how the coif will sit. Megan used an existing coif as a pattern so that we would know the new coif would be the correct style and shape, and then sent me the pattern so I could start.
Once I had the correct basic shape, I could settle down to create the design. I chose the traditional coiling foliage design which is so common in Elizabethan coifs. I prefer to design original patterns, but use motifs taken from extant pieces and Elizabethan portraits. Roses were an essential inclusion for a Queen. I used flower and insect motifs.
Some extant pieces can be found on my earlier post: http://broidermebethan.blogspot.com.au/2014/11/elizabethan-whitework-coif.html
and
http://broidermebethan.blogspot.com.au/2013/05/new-world-elizabethan-coif.html
Once I had sketched the design, I traced the pattern and design onto tracing paper with a permanent marker. Using tracing paper or greaseproof paper allows the light to shine through, and the permanent marker makes the design easier to see. The design can be traced using a light box or by taping the foundation fabric over the pattern on a large glass window or door.
In period, ink was often used to mark designs onto white foundation fabric. I used 100% linen for this piece, and chose to use a modern alternative to ink: the Frixion pen. This type of pen irons away, is widely available where I live, comes in a range of colours and is available as a pen or marker. Very convenient for the modern embroiderer, and much more forgiving of unsteady hands than dip pen and ink.
I began the embroidery in silk, but was unhappy with the way it was working out, so I unpicked the stitching and began again with cotton floss (DMC 310). Silk is a more authentic option (as it was used in period) but the cotton worked better for this project as well as being more affordable and easily available.

A variety of period stitches were used including stem stitch and double running stitch. I like combining different stitches on this type of project. It makes the finished product texturally more interesting, makes working the embroidery more interesting, and is also entirely period. I used a double thread for the main motifs, and I used a hoop because it is more portable than a frame.


Once all the stitching was complete, I ironed the design to remove any traces of the Frixion pen. Then I gently hand washed the piece in wool wash, rinsed, dried and ironed it again.


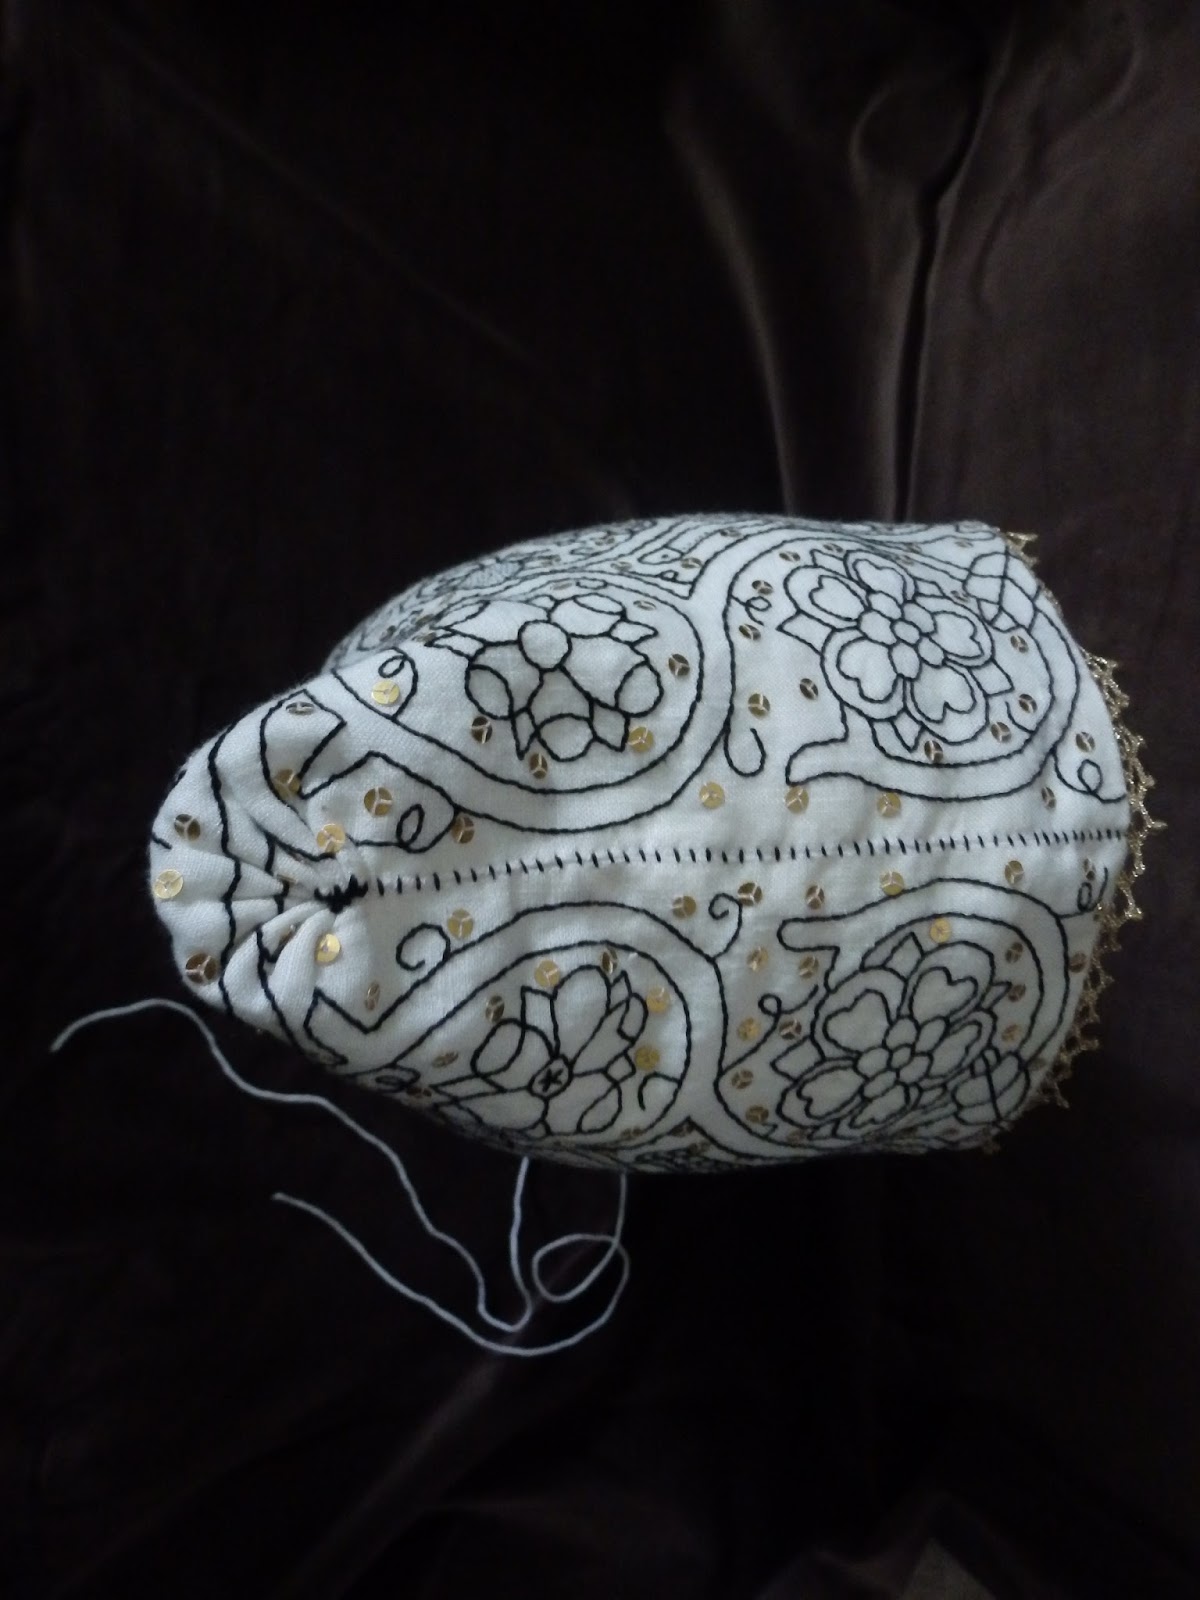
The next step was sewing down pressed metal spangles. I used three stitches of single thread to secure the spangles, and knotted each one off after securing. Once the spangles were sewn on, I ironed the coif again and cut it out from the foundation fabric.


The cord channel was hand sewn as was the top seam which runs over the top of the head. Only the first two thirds of the seam was sewn up; the last third was gathered with very small stitches to produce tiny cartridge pleats. The pleats were drawn up to gather the back of the coif into a circle and the pleats were secured with buttonhole bars. My earlier coif article below shows an extant example of how the back of the coif is gathered:
http://broidermebethan.blogspot.com.au/2012/01/article-on-red-striped-coif.html
This pleating rounds off the back of the coif and makes a space for the hair underneath. I added a single thread decorative stitch in embroidery floss to ornament the seam.

I did a small whip stitch around the edge of the coif to stop the lining moving about. I threaded lucet cord (made by the talented Heather Carter) through the casing. I hand-stitched some commercially made gilt metal lace along the face edge.


The coif was presented on the weekend just gone and I heard that the recipient was very pleased with it.
Yay! Lovely! Beautiful. I do love blackwork coifs. Fionna
ReplyDeleteNice post, learned something new today.
ReplyDelete