Another banner device ticked off the list. Like most that I have done, it is made of felt and uses applique and embroidery techniques. The felt is wool felt, and I have used DMC cotton floss, DMC perle floss, and a faceted glass bead for the eye.
Stitches include whip stitch, split stitch, chain stitch, satin stitch and stem stitch.
I marked the triskellion design in Frixion brand marker, then worked them in chain stitch. Then I went over the top of the chain stitch with satin stitch. This gives a nice raised effect.
Elizabethan, Tudor and Renaissance inspired embroidery, clothing and accessories - historical costuming, embroidery and re-creation
Showing posts with label stem stitch. Show all posts
Monday, February 29, 2016
Sunday, February 28, 2016
Banner Device Project- White Dragon Device
Here is a recently completed device for our Baronial device banner project. It is made of wool felt, and has embroidery, silver cord and applique. Stitches include couching, whip, stem, chain and split stitch. The eye is made from a red glass bead. DMC cotton floss, rayon floss and cotton crochet thread have been used.
Saturday, July 18, 2015
Reclaimed Seahorse Napkin
I recently found a linen napkin in an op shop that had a very worn cross stitch flower motif in one corner. It also had a nice decorative pulled hem. I bought it for two dollars, unpicked the motif and washed it. Then I embroidered the heraldic seahorse from my device in stem stitch in one corner.
| The napkin after the motif was unpicked |
I also ran a purple thread along the decorative pulled hem for a subtle highlight.
| Detail of the finished embroidery |
Monday, March 30, 2015
Wool cloak embroidery
I recently have been involved in a project to decorate some wool cloaks for friends. Another friend made the cloaks up in this lovely brown wool, and I decorated them with simple geometric embroidery, with the designs based on the recipients' heraldic devices.
The left side shows the first stage of embroidery - mid-green crochet cotton. The right side shows the darker green bar being added in stem stitch.
Although it doesn't show up well in the photo, there is a small stitch in light green added to the points of the triangles.
This one has a simple geometric design worked in crochet cotton (stem stitch).
Because the cloaks were unlined, I used bias binding to cover the back of the embroidery.
Sunday, April 29, 2012
Heraldic embroidered badge
Today I had the opportunity to present a piece that I finished a couple of months ago. It is a heraldic badge to go on a doublet. The project got off to a very rocky start as I had to begin over because I couldn't get the tension on the ground fabric right and the stitches kept pulling and warping.
I realised that the ground fabric was too flimsy, and started again on heavier fabric. This was much more successful.
The inner white section is DMC blanc cotton (2 strands) worked in split stitch. The tree has padded leaves and is worked in DMC black 310 cotton in satin stitch (also 2 strands).
Once the stitching was complete and the device had been trimmed, rinsed and edged, I whipped the edges under and added a felt backing.
I realised that the ground fabric was too flimsy, and started again on heavier fabric. This was much more successful.
The outer white edge was done in white crochet cotton in stem stitch. The blue was done in cotton perle thread in stem stitch. I used stem stitch because I wanted this area to stand out and be clearly defined.
Once the stitching was complete and the device had been trimmed, rinsed and edged, I whipped the edges under and added a felt backing.
I wanted the badge to stand out and not be too flat, so I added an extra, smaller piece of felt on the back. Then I edged the whole shield-shape with some silver gilt thread.
Here is the badge sewn on the recipient's new garb. The recipient is the perfect example of all the courtly graces, so I was very pleased that the badge looked so nice and was received so well.
Saturday, February 11, 2012
Red Monochrome Shaped Coif
Today's picture is another shaped coif, this time with a red monochrome design. The base fabric is a cotton/linen blend, and the design was worked in stem stitch in DMC cotton floss. The design is one of my favourites, and one that crops up again and again in sixteenth century pattern books, including Modelbuch Aller Art.
I worked a simple needle lace around the front edge of the coif. Thankyou to Heather for the hand made lucet cords.
My previous post on my Elizabethan red striped coif has much more information about Elizabethan coif use, decoration and construction.
Tuesday, January 31, 2012
Speckled Holly Leaf Coif
Today's post is on a coif that I started a really long time ago and only finished in about 2010. I had grown disenchanted with the project because the pattern was not cut in an accurate way. For a long time I debated about whether I should continue the embroidery or whether it was a waste of time to finish the garment if it was not accurate.
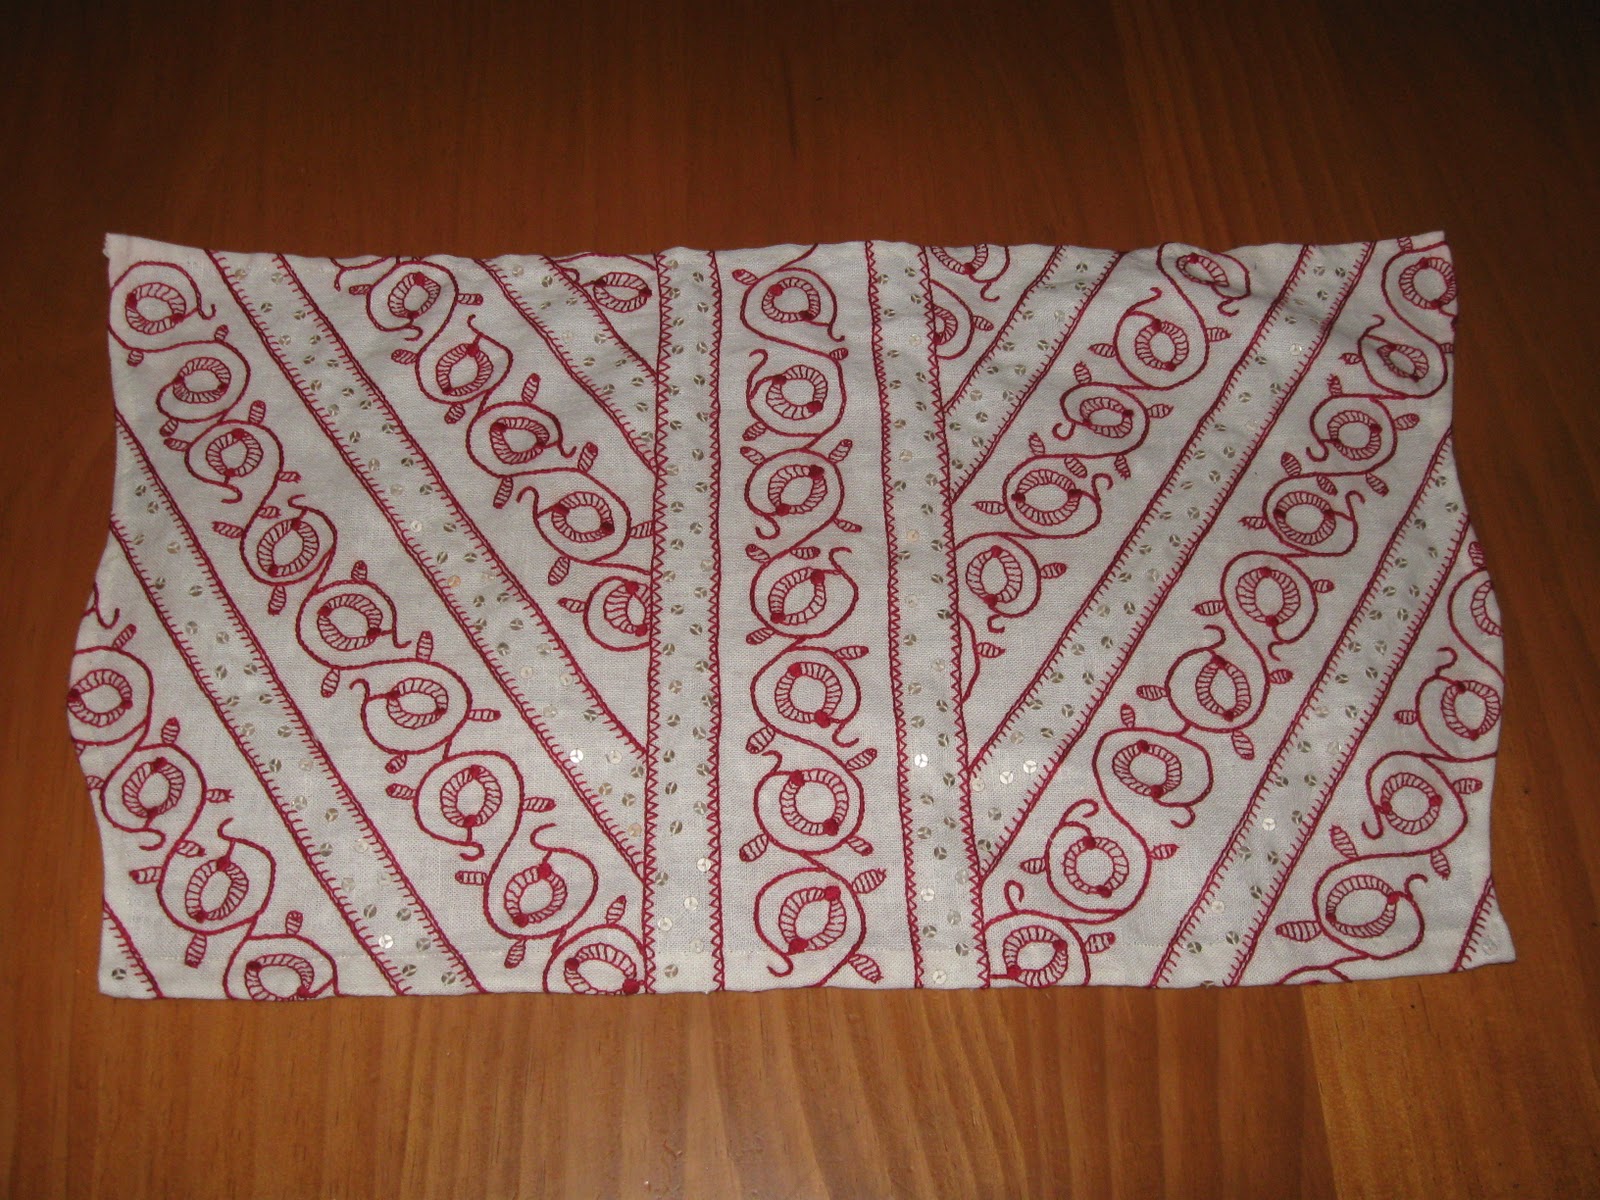
| The finished coif |
In the end, I modified the pattern to make it more accurate for the sixteenth century and decided to finish the garment. The piece was good practice in speckling stitch, which was popular with Elizabethan embroiderers for adding depth and texture to monochrome embroidery. I found it quite a tedious and time consuming stitch also, but I liked the end result.
Here you can see the original coif pattern modified to make it more accurate for a sixteenth century English style coif. Note the join down the middle of the garment. I have never seen an extant coif with a join, but that was the only way to modify this coif from it's original 'Jorvik hood' style shape into a more appropriate shape.
There are many examples of floreate patterns in extant English monchrome and ploychrome embroidery from the sixteenth century - the Elizabethans loved them! I particularly wanted a holly pattern and was inspired by patterns from 'A Scholehouse for the Needle' and the images below.
The spiky leaves from this Elizabethan man's nightcap in the V&A Museum (c1600-1629/Museum # 814-1891) reminded me of holly leaves although I suspect they are supposed to be thistle leaves.
A really excellent collection of images of extant coifs can be found at the Blackwork Guild 'Blackwork Headwear' page - http://www.theblackworkguild.com/COSTUMES-MEMBERS%202.html
![]() |
| Stylised holly design in silk and gilt from a sixteenth century English coif in the V&A Museum collection |
| The finished coif worn by a model with very short hair. It does fit better over a bun or hair taping. |
Spangles were attached with three stitches, and the centre seam was decorated with chain stitch. All the embroidery was done in DMC cotton thread with two strands of black. Cotton floss and fabric were used for this project instead of silk and linen to save money. The spangles are silver metal.
| Centre top seam decorated with chain stitch. |
The centre top seam was decorated with chain stitch and the edges with a slanting whip stitch. In period, an Elizabethan braid stitch would most likely have been chosen for the top centre seam, but when I tried it, it just didn't fit with the embroidery. If I started this project again, I would make the embroidery design more crowded and full. When I drew this design out, I was less familiar with Elizabethan style than I am now, and I think I was looking at the design with a modern eye. It needs a lot more spangles and have less bare areas.
I gathered the central seam in an approximation of the same technique that I used on the Red Stripey Coif (posted previously). It doesn't look quite right due to the adjusted shape of the coif. The main embroidery stitches used were stem and speckling stitches, and a funny little knot I use in lieu of french knots. (It is close to a colonial knot.)
The finished coif is lined with a light cotton lining to protect the embroidery from hair oils etc. The lucet cords were hand made by Heather - thank you Heather! Also thanks to Alisondre who helped with some of the speckling stitches.
Friday, January 20, 2012
Orange-red Geometric Band Partlet
Today's post is a picture of one of my early monochrome embroidered partlets. It is embroidered in two strands of an orange-red DMC cotton floss. In period, silk would probably have been used. I used cotton fabric for the body of the garment, whereas in the sixteenth century linen was a much more commonly used fabric. Both these substitutions were made for financial reasons. The garment is hand sewn and was completed in early 2007.
Stitches include stem stitch, running stitch and an ornamental buttonhole stitch.
I rely very heavily on reprints of sixteenth century pattern books to source my embroidery designs and gain inspiration. This partlet embroidery design is a direct copy of a popular sixteenth century band design that crops up in several pattern books.
Here is a book that I use very often 

I purchased it here http://www.coloniallakebooks.com.au/catalogue/needlework.html
Thursday, January 19, 2012
Red striped coif
Here are some more photos to go with the article on the red striped coif (below).
Here is the coif with completed embroidery but before spangles were added.
The back of the coif showing embroidery and spangling threads. I knot off my spangling threads after each spangle so that if a thread should break, I will not lose all the spangles.
Here is the coif all finished and ready to be made up. If I could do it over, I would add more gold metal spangles. This was one of my first spangling projects, and I completely under-estimated just how long that part of the project would take! I would also make the vine design fill the band more completely.
A close up shot of the edge of the coif before the decorative edge stitching was added.
The finished coif and the view from the inside so that the underside of the embroidery can be examined.
Wednesday, January 18, 2012
Blue vine partlet
Here's another one from the 'finished' pile. It is an Elizabethan style high necked blackworked partlet made out of cotton fabric with dark blue DMC cotton floss embroidery that I made to go with my blue loose Elizabethan coat/gown.
Here is a photo of the embroidery on the body of the garment prior to making up, The pattern runs in four bands down the back of the partlet too.
The collar has a very small ruffle pleated into it. The ruffle was cartridge pleated and hand sewn into place. The garment was hand sewn. The lucet cords which tie at the neck were made by Heather (Queen of Luceters), and the pattern for this partlet was adapted from one that I created under advice from THL Katerina da Brescia. (You can see her site at http://katerina.purplefiles.net/). Many thanks to both ladies.
Sunday, January 15, 2012
Collarless Italian Partlet
For my second post today I am posting a picture of a previously completed project. This is a collarless Italian partlet. The ground fabric is a natural fibre; I suspect a cotton blend. The fabric came from the remnant bin and looks like a coarse linen. The embroidery is taken from a sixteenth century reprinted pattern book. The design was traced out with a water soluble pen with the fabric taped to a window. In period, a common method of transferring embroidery designs onto light fabric was to draw them on with ink. We know this because examples of unfinished sixteenth century embroideries still exist. Check out the V&A Museum's collections for some lovely examples: http://collections.vam.ac.uk/
I prefer the soluble pen because my hand is not that steady!
| The embroidery at just past half way |
I worked the embroidery in a hoop. The plant stems (in black) were executed in stem stitch, and the flowers (in gold) were done in a double running stitch.
This is the finished partlet, which has been hand sewn and hand finished. I added some commercially available, machine-made metallic bobbin lace to finish the garment off.
Subscribe to:
Posts (Atom)
.jpg)
.jpg)
