Tuesday, September 27, 2022

Post-Spring Crown Reflections

My home Barony just hosted Spring Crown Tournament, and I played a very minor role in the stewarding team, so my time for some weeks has been taken up with paperwork and projects for that.

The big event is over and now it is time to go 'splat' and recover. (And go through the photos, jot down all the ideas inspired by wonderful people, and plan what is next on the to-do list.) Plus!- Start blogging all the projects that were completed before I forget and they end up stuck in the drafts folder forever, like so many others!

This was a really well attended event, with overseas visitors and a large and prestigious list of contenders. The event ran really well, everyone seemed to have a great time, and was full of beautiful and moving moments. (Plus lots of silly and fun ones.) I got to see old friends and make new ones. And regret not having time to catch up with many others, but such is the nature of big events, I guess.

There was a wealth of beautiful arts and sciences on display, garb to drool over, and displays of courtesy and chivalry (on and off the field) to be inspired by. Innilgard is renowned for it's plentiful good food, and the cooking team did not disappoint, with feast goers being seen in the evening walking around rubbing their bellies and moaning happily that they 'ate too much'.

There were two Peerage ceremonies, a Protege ceremony, presentation of gorgeous scrolls, and other lovely forms of recognition for well-deserved people. I got to see two friends step up as Heirs to the Throne after an exhilarating battle. And laughed as Knights in the stocks got pelted by sponges to raise over a thousand dollars for a cancer charity in remembrance of lost friends. There was beautiful dancing and a range of excellent bardic performances. I got given a personalised performance of interpretive dance in lieu of a rose in the Rose Tourney. And did I mention the drool-worthy garb?

All in all, it really was the sort of event that renews in every way. 


Saturday, September 3, 2022

Mending and mundane projects

I have been consistently busy over the last couple of weeks with SCA paperwork and little tasks like mending and mundane crafts and sewing. I've also had tonsilitis, a tooth infection and a chest infection over the last month, so not feeling my best or most productive.

I got these nice wooden beads really cheaply at an op shop that was selling new craft materials, and made myself some mundane necklaces which I am pretty happy about.


Tuesday, August 16, 2022

Black Linen Summer Gown in the Italian Front-Lacing Style

I recently went through old posts looking for a recipe redaction that I had done, and found dozens of draft posts from 2019. I'm not sure why I didn't finish them and post them at the time? A lot of them aren't relevant any more, but there are some that you might find interesting.
Here is one:
I made this gown over the Christmas break for an event in January 2019. It gets very hot where I live (40 degrees Celcius +), and although events are usually postponed when it gets too hot, sometimes the show must go on.

This was a quick project with some modern sewing techniques used to save time. I modified one of my other gown bodice patterns to drop the waist a bit, make the shoulders a little wider and put a bit more depth into the point of the bodice.

The gown bodice was an experiment with no boning. The linen was lined with heavy cotton canvas and the two pieces 'bagged out' or sewn together with the machine and then turned right side out.
I hand sewed the bottom edge of the bodice and the armholes.

The trim is just simple ribbon, sewn on by hand.

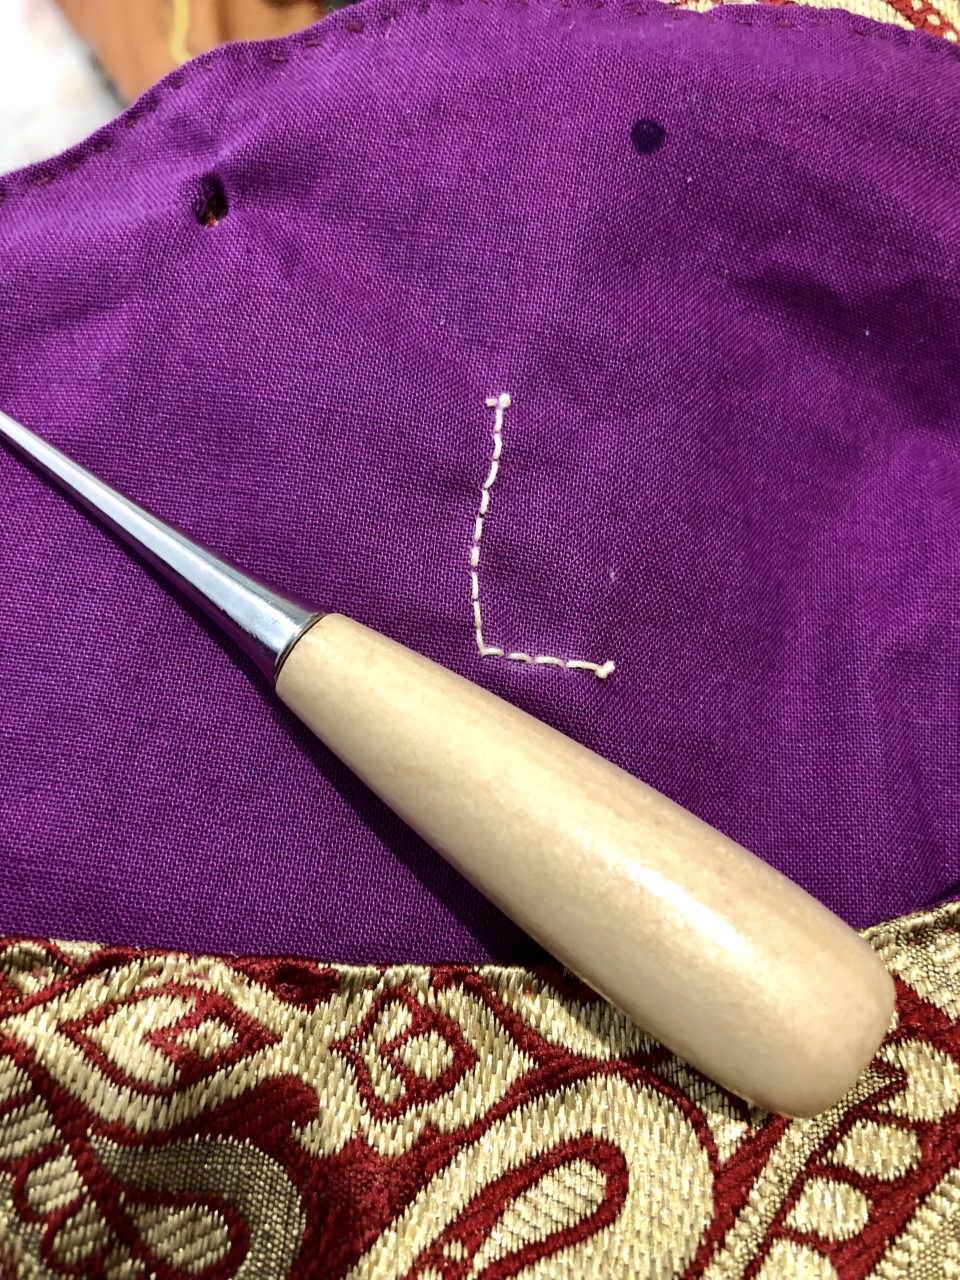
The eyelets were all done by hand with an awl and sewing thread. I decided to add some bias binding along the font edges  and slip bones in for a bit of rigidity and to stop the eyelets puckering. Once I tried the completed bodice on, I felt that it needed some extra boning, so I added bias binding strips at the centre side seams and across the back of the bodice, and put four more bones in.

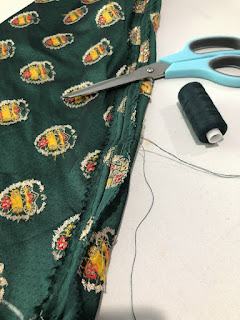
The skirt is simply a series of rectangles of fabric sewn together. I let the skirt hang for a long time to let the hem drop and reduce distortion due to the weight of the fabric.

I pleated the skirt on by turning the top edge under and then marking out regular dots along the skirt top edge. I ran a heavy thread through to draw the skirt up into cartridge pleats. Normally you would use a double row of thread to do this, but I cheated and only did one. The risks with one thread are that it may break and you will have to start all over again, and that the pleats may be slightly uneven if you are not very careful with your dot marking and needle placement. I usually do a two-part line of pleating; on a front opening gown, I run one line of pleating thread from centre-back to centre- front on one side, and do the same on the other. I find that it makes adjusting the pleats more manageable, especially if the skirt is very full and bulky.

Ones the lines of pleating thread are in, I put safety pins in to mark the centre-back and centre-sides of the skirt panel. I line the safty pins up with the corresponding side seams, centre-back point and centre-front point of the bodice. Then I carefully draw up my pleating thread, adjusting the pleats to sit evenly in their quarter. Then I adjust a quarter at a time to make sure the pleats are all evenly spread out and looking nice. A quarter panel at a time, I use heavy thread to sew each pleat onto the bottom edge of the bodice. I usually use four strands of sewing thread that has been waxed for strength. I also knot the thread off unobtrusively at about every 10 cm point, so that if I were to rip some pleats out by accident when wearing the dress, the whole skirt will not fall off.

Once the skirt is on, I cut the pleating thread. This is optional; if you want defined cartridge pleats, leave it in. I prefer less defined pleats so I cut the thread on mine. I hand finish the front opening gap of the gown and add a buttonhole bar at the bottom of the skirt opening for extra strength. I did not add hooks and eyes on the opening of this gown - I left a bit of extra fabric at the front of the dress that I could pin shut and would be adjustable. I then let the gown hang for several more days to  let the skirt drop if necessary and to let the pleats fall properly.

I had help from my dear Mum with the hemming, and I added some ribbon trim around the bottom when hemmed as well.

Finally, I used some scraps from gown construction and another project to make the pouffy sleeve heads that I like so much. I sewed strips of fabric together to make a panel approximately 2.5 times the size of the sleeve cap pattern that I drafted as a base. I pinned the puffs into place by eye, until I got roughly the look I was going for. This is a tedious task, but I can't think of a better way to do it. Once pinned, I hand sewed down all the puff pieces in sections to keep it secure. Then I make all the bulky fabric puffs point to the centre of the sleeve cap and then put the lining piece on top and machine sew most of the way around (without catching any of the puffs in the seam.) Then I trimmed the seams, turned the puff the right way out and hand sewed the gap shut. I also hand sewed around the edge of the entire puff to stop the bulky puff section moving or turning in. It is important to have a stable base for these puffs or they move around and stick up.

I added some lucet ties underneath so I can wear the dress with removable sleeves.

The dress was reasonably cool, but I unfortunately made the bodice a smidge too long and wide, so there is some  wrinkling that I am not happy with. I will make the next one a bit shorter so it sits better and I wont have to worry about my sash riding up or down. This one needs taking up so it sits better.
I spent a good proportion of the day adjusting my sash because the bodice is too long


(Postscript: no prizes for guessing that this dress is still in my mending pile to have the bodice fixed. I loathe mending and re-dos anyway, and throw covid lockdowns into the mix and it just hasn't happened yet.)

Thursday, July 28, 2022

Baronial Archery Champion Cloak

Cold weather is here in South Australia, and I have been thinking about warm clothing options for winter months. As I was considering options, I came across pictures of this cloak I made several years ago and forgot to post about.

The cloak is made of heavy wool, and the style is inspired by this extant piece:
Cape of Garzia Medici -held at the Pitti Palace. See more info here:The clothes of Cosimo I, Eleonora di Toledo and don Garzia - Auris Lothol (auris-lothol.info)
(A big thank you to Salome for this reference!)

The cloak was created for the Baronial Archery Champion of my local SCA group to wear. The plan is for every Archery Champion's heraldry to be displayed on the cloak in chronological order of winning the Championship.

The wool is fulled and slightly felted, and so doesn't fray, which meant that it did not need to be lined.
There are currently two other Champion cloaks in use in my group; red for the Heavy Champion and blue for the A&S Champion.

The neck is bound with yellow twill tape which also serves as ties. All the sewing was done by hand, and the little arrows were embroidered.


Thursday, July 7, 2022

Embroidered Heraldic Patches

 I recently finished the second of two heraldic patches for a Championship cloak. I wasn't super pleased with how this one turned out, but it was my third try, so it was time to quit and accept it for how it worked out. The embroidery is done in silk thread in split and chain stitch.


The seahorse was done in cotton floss in split stitch.


Monday, May 9, 2022

Green Linen Tie-On Sleeves In The Italian Style

 Are you getting bored with sleeves yet?!

I recently finished another pair, this time in a pretty green linen.

They are constructed in the same way as the rest. I cut out my favourite roomy sleeve pattern in the lining and fashion fabrics and edged them with zigzag stitch on the  machine. The seams were sewn on machine with straight stitch and opened out and stitched down. 

I sewed the green linen fashion fabric and lining together at the sleeve head (wrong sides out), and clipped the curves to reduce bulk before turning the right way out. 

I hand stitched around the top of the sleeve to stop the lining rolling out. 

I sewed the wrist hem by hand and then whipped the lining in with another row of stitching. This seems like extra work,  but if the lining ever stretches, it means I can re-hem it without affecting the hem on the green fashion fabric.

I worked eyelets around the top of the sleeve for tying on and then put my trusty 'L' on the inside of the left sleeve.


Thursday, April 21, 2022

Khaki Tie-On Sleeves in the Italian Style

 Another pair of sleeves finished!

These are made out of a cotton fabric remnant that I found in an op (thrift) shop.

They are constructed in the same way as all the others; the lining and fashion fabrics were cut out using my favourite sleeve pattern and edged with zigzag stitch. The seams were sewn on machine with straight stitch and opened out and stitched down. Then the fashion fabric and lining were sewn together at the sleeve head (wrong sides out), curves clipped and then turned right way out. The top of the sleeve was top stitched by hand to stop the lining rolling out. The wrist hem was sewn by hand and the lining whipped into place. Eyelets were worked by hand at the top of the sleeve and an 'L' was sewn into the left sleeve to make lacing the sleeves on in a hurry easier.


Sunday, April 10, 2022

'Baronial Beautification' Group Project

I'm currently involved in our Barony's efforts to prepare items for a future royal visit. Lots of projects are planned to improve our infrastructure and increase the pageantry at the event. 

I haven't been well enough to attend weekly meetings, but the project manager (Sir Eva), is very empathetic and likes to give everyone a chance to be a part of these sort of projects if they would like to. So I had the opportunity to work on some sewing for the project at home.

It felt good to be able to contribute to a group project, and nice to have a change from the UFO pile. Who would have thought that 'sewing homework' would be such a breath of fresh air?!


Wednesday, April 6, 2022

Red-Gilt Tie On Sleeve in the Italian Renaissance Style

I finished another pair of sleeves this week, and boy! are they pretty. The fabric was purchased from etsy several years ago. A miscellaneous fibre content includes gilt threads. They were sold as silk brocade but I would be very surprised if they actually contain silk.

I'm very pleased with these sleeves. Eyelets are still very hard on my hands but I am getting faster at working them.

I made these sleeves to the same pattern and in the same way as the others I have blogged about recently. The lining is purple broadcloth.

Putting a small running stitch along the inside of the top edge to stop the lining rolling out with wear.


Hemming the sleeves. I sewed down the fashion fabric hem with tiny stitches, and then hemmed the lining separately.

Working the eyelets. (I've added an L for Left to save time getting ready before events.)

The finished product. The pictures fail to capture the richness of the fabric.


Thursday, March 31, 2022

Red Tie-On Sleeves in the Italian Style

I finished another pair of sleeves this week. The majority of the sewing had been completed and it was just -you guessed it - eyelets needing to be done. On a positive note; I am getting faster at eyelets now, and hating them slightly less. (Good thing too, as no doubt have hundreds in my future!)

These sleeves were constructed in the same way as the others listed previously. I'm not sure what the fabric content is but they certainly have some metallic threads in them. They have a bit of a shine as the light moves over them. They are not a bright red, but are brighter in real life than the brown-red shade that they look like in the final pictures.

Whip stitching the lining wrist hem into place.

My trusty 'helper'


Sunday, March 13, 2022

Pale Blue Tie-on Sleeves in the Italian Style

Another pair of sleeves complete and out of the UFO pile! This pair is made from a light blue brocade type fabric that I found in a remnant bin at a thrift store and is based on the Italian tie-on style.


The camera has was washed the colour out a bit:

The sleeves were created in the same way as outlined in my previous post. 

As usual, the eyelets were what was holding me up.


I've embroidered an 'L' on the left sleeve because I always seem to be in a rush when it is time for events, and nothing wastes more time or adds more stress than struggling into a big dress only to find out you laced your sleeves on wrong - and then have to struggle back out of it, unlace them and then re-lace them on the correct sleeves. Ask me how I know, haha.


Monday, March 7, 2022

Italian Tie-On Sleeves Made From A Thrifted Green Sari Skirt

I finished a pair of sleeves that was sitting in my UnFinished Objects pile.

This pair has not been waiting to be finished as long as some others in the pile. (I only started them in 2021.) I picked up a pretty skirt made out of sari fabric at an op shop and thought it would made a nice pair of sleeves. The skirt was child size so there was some careful unpicking and placing to be done. 

I used my trusty pattern which makes a roomy and comfortable sleeve. Placement was key to try and get best use from the fabric and make sure the motifs were all going in the same direction.
Luckily, I have a great helper!
Edges were zigzag stitched on the machine and the seams ironed open and tacked down. Linings were given the same treatment.
The sleeve and lining was sewn wrong side out then I clipped the corners and turned the right sides out.
I whip stitched around the top of the sleeve head to stop the lining pulling to the outside over time as a bit of pressure is put on the sleeve head from the lacing.
I turned the hem under at the wrist and secured it with tiny stab stitches.
Then I folded the lining hem under and hand sewed it in place.
Finally, I added five eyelet holes at the top of each sleeve so it can be tied into place.
The finished sleeves. I am pleased with how these turned out. I only *just* had enough fabric to get sleeves out of the skirt. The gilt thread in the motif makes the sleeves look quite opulent. I don't expect that they will be the most durable sleeves ever, but they sure are pretty.