Showing posts with label heraldic device. Show all posts

Monday, August 4, 2025

Heraldic Split Stitch Badge

I made another split stitch heraldic badge this year, for a friend. Instead of working the white split stitches in an oval shape around the tree, I drew a sort of wave pattern across the background and worked the split stitches in waves. I did this to make the sewing a bit more interesting, and to create a feeling of texture across the background.

I wouldn't do this again. I don't feel it was particularly effective in creating texture and it also didn't make the process of stitching it any more interesting. (It was worth trying though.)

This patch will be sewn onto a Championship cloak. It is a cotton calico base fabric with split stitches worked in DMC cotton floss.


Wednesday, September 18, 2024

'Bunnies' Heraldic Device

I finished another heraldic device for the Baronial device banner a while ago. It has a felt base with applied felt on top.

I had a couple of tries at working the bunnies, with slips being my first idea. It was unsuccessful, and in the end I appliqued a bunny shaped felt base to add a bit of dimension, and then split stitched on top of it.
The central chevron was stitched in place and then gilt thread appliqued over the edges. The pink dots are guidelines for where ermines need to be embroidered.
I did the back legs of the bunny in a very pale grey to look a bit like shadow and add depth. I did a black outline for definition and added shiny black beads for eyes. I used smaller black beads for the centre parts of the ermines. They really catch the light.
The teeny cotton puffs came in a Christmas craft pack and I was just thrilled with them. 
Pinning and sewing another piece of felt on the back for extra stability (the banner gets rolled up).
The completed piece. I like how this one turned out.
Some of the banners from the Baronial Device Banner Project on display last year.


Thursday, July 7, 2022

Embroidered Heraldic Patches

 I recently finished the second of two heraldic patches for a Championship cloak. I wasn't super pleased with how this one turned out, but it was my third try, so it was time to quit and accept it for how it worked out. The embroidery is done in silk thread in split and chain stitch.


The seahorse was done in cotton floss in split stitch.


Monday, November 1, 2021

Heraldic Painted Bags

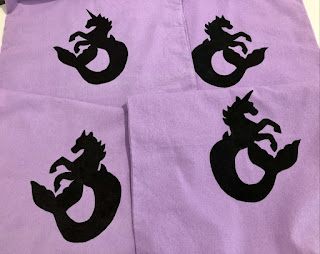
Here is a project that I finished last month- bags with a painted heraldic device. 

I strive to cover up mundanities at events, but sometimes, when I'm in a rush, I have forgotten to bring cloths to cover up with. To help remedy this problem, I decided to paint some bags with a version of my heraldic device.

The 'stencil' was one of a set of birthday decorations that my sister bought me last year. I just love it. The bags are commercially produced cotton bags available from Spotlight stores.

I traced around the seahorse stencil carefully with pencil. I used pencil rather than frixion marker just in case the paint made the marker ink run. I suggest pre-washing your fabric also.
I used black acrylic paint mixed with a textile medium to create fabric paint. The design needed two layers (and touch ups) to get a nice even coverage.

I cut open plastic shopping bags and slid them inside the fabric bags to stop the paint from running through to the other side. I would not recommend paper for this, as is will stick to the inside of the fabric and can be almost impossible to remove. (Ask me how I know 😏 )
When the first side was complete and dry, I put the bag up against a glass door and traced the design in reverse on the other side. I then followed the same process as above.
Follow the manufacturer's instructions on the textile medium, and wash out your brush often as the paint builds up and hardens quite quickly.
The textile medium that I was using is heat set, so when the paint was dry and the plastic bag insert was removed, I laid a large paper bag on the ironing board. I put my painted bag on top and then put another paper bag on top of the painted area. I just used a cut open (clean) lunch bag. The paper stops any paint residue from being spread around and protects the painted area from burning. I also turned the steam option on my iron off, but make sure to follow the instructions on the textile medium, because there are several different brands around.
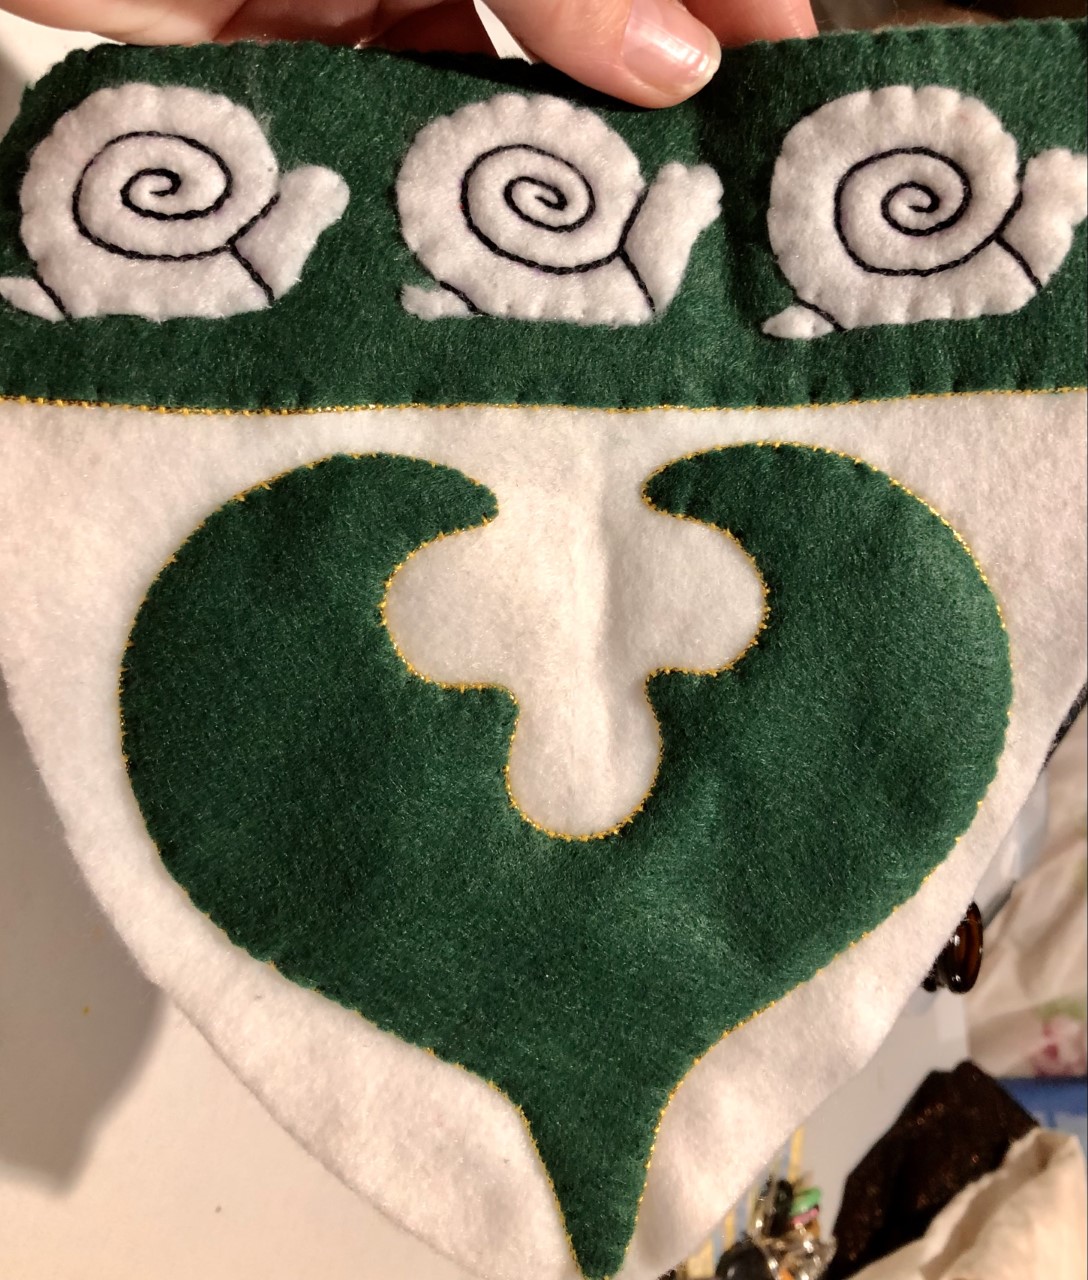
This project took longer than I expected, but was fun. I plan to do more painted fabric projects in the future. Painting fabric provides a good visual impact without the time commitment of applique or embroidery.

Painting on fabric is a period technique; Cennino d'Andrea Cennini discusses it in section X of  'Il Libro dell'Arte'. Modern acrylics and textile medium are much easier and faster to use than gesso and lead paints, and certainly safer. Time will tell how well  the textile medium wears and stands up to washing.


Dover Publications 'The Craftsman's Handbook (Il Libro dell'Arte) translated by Daniel V Thompson Jr (1960) [https://store.doverpublications.com/048620054x.html] is an inexpensive reproduction which will be of interest to SCA painters and craftspeople. It gives an insight into artistic practices common in Italy in the Renaissance.

Thursday, September 30, 2021

Heraldic Device Banner - Device with Snails

I finished another banner device in September. I used felt again; it is so durable and doesn't fray, and I like working with it.

The motifs were sewn on first with tiny stitches. I went around the big motif with couched gilt cord and also added the same style of couching under the green panel at the top.


I used DMC cotton in split stitch to do the detail on the snails. I considered googly eyes, but added eyes on stalks in white cotton done in split stitch. I outlined the snails with black DMC floss, also in split stitch.


I added a white piece of felt on the back to cover the stitches and make the panel stronger.


These banners are a baronial project for my local SCA group. They have been created by members of the Barony to record the registration of heraldic devices by the populace. They look nice when put up at events, remind us of past members and old friends, encourage newer members to get their heraldry registered, and can be part of a fun 'guess the person' game.
Devices are listed under the devices of the Baron and Baroness in power at the time of registration. The blue panels are the oldest, followed by red and then white.


Friday, March 13, 2020

Making Heraldic Bunting

This week I have been testing out paints for a group project to make heraldic bunting for events.
I've been testing how different paint types cover and how rich the pigments are.
Even though I have been in a big rush to get the samples done in time for the next SCA meeting, I have really enjoyed the painting. I am thinking that I might try making a painted banner - when I have a bit more time.

Friday, May 10, 2019

Lamb-vegetable Device for the Baronial Heraldic Banner

My SCA Barony has a series of banners that display the devices of members with registered arms in chronological order. Over the years I have made a lot of devices for people who can't sew or who don't have the time.
Some of the banners on display at a feast in 2018
I started this device last year; it is one of a pair intended as temporary place holders until the member has time to finish the more complex versions intended for the banner.

I wanted to experiment with texture on this device as the colour scheme is quite simple. I attached the felt plant and coronet shapes with small stitches. The coronet has a cord couched over it for edging and details. The lamb-vegetable plant is embroidered with chain, split and speckling stitches in a variety of white threads. The larger lambs have cream beads added for eyes.
  I added a piece of felt on the back to make the piece stronger.
I'm quite pleased with the finished piece.