
Wednesday, October 17, 2018
Split stitch napkin
I've been really sick, and still struggling to get on with my work. I managed to finish another split stitch napkin. I added a running stitch around the hem as a little 'extra'.

Tuesday, October 16, 2018
Wardens in Sirrop
I am hoping soon to have more time to spend cooking medieval recipes. A glut of ripe pears inspired me to investigate different recipes for lightly stewed pears that might appeal to my family's very modern palate.

Here are some medieval recipes:
"To conserve wardens all the yeere in sirrop. Take your wardens and put them into a great earthenware pot, and cover them close. Set them in an oven where you have set in your white bread. and when you have drawn your white bread, and your pot, and they are so cold that you may handle them, then peel the thin skin from them over a pewter dish so that you may save all the syrup that falls from them. add to them a quart of the same syrup, and a pint of rosewater, and boil them together with a few cloves and cinnamon. When it is reasonably thick and cold, put your wardens and syrup into a galley pot and see always that the syrup is above the wardens, or any other thing that you conserve."
From The Good Huswife's Jewell (Second Part) 1597 - Thomas Dawson
The original recipe: 96 Peris in Syrippe. Take Wardons, and cast hem in a faire potte, And boile hem til ei ben tendre; and take hem vppe, and pare hem in ij. or in iij. And take powder of Canell, a good quantite, and cast hit in good red wyne, And cast sugur thereto, and put hit in an erthen potte, And lete boile; And then cast the peris thereto, And late hem boile togidre awhile; take powder of ginger, And a litell saffron to colloure hit with, And loke that hit be poynante/ And also Doucet/
A modern English translation: 96 Pears in Syrup. Take Wardons, and cast them in a fair pot, And boil them till they are tender; and take them up, and pare them in two or in three. And take powder of Cinnamon, a good quantity, and cast it in good red wine, And cast sugar thereto, and put it in an earthenware pot, And let boil; And then cast the pears thereto, And let them boil together awhile; take powder of ginger, And a little saffron to color it with, And look that it is poignant/ And also Sweet/


Stock footage from https://www.medieval-recipes.com/recipes/desserts/
Here are some medieval recipes:
"To conserve wardens all the yeere in sirrop. Take your wardens and put them into a great earthenware pot, and cover them close. Set them in an oven where you have set in your white bread. and when you have drawn your white bread, and your pot, and they are so cold that you may handle them, then peel the thin skin from them over a pewter dish so that you may save all the syrup that falls from them. add to them a quart of the same syrup, and a pint of rosewater, and boil them together with a few cloves and cinnamon. When it is reasonably thick and cold, put your wardens and syrup into a galley pot and see always that the syrup is above the wardens, or any other thing that you conserve."
From The Good Huswife's Jewell (Second Part) 1597 - Thomas Dawson
The original recipe: 96 Peris in Syrippe. Take Wardons, and cast hem in a faire potte, And boile hem til ei ben tendre; and take hem vppe, and pare hem in ij. or in iij. And take powder of Canell, a good quantite, and cast hit in good red wyne, And cast sugur thereto, and put hit in an erthen potte, And lete boile; And then cast the peris thereto, And late hem boile togidre awhile; take powder of ginger, And a litell saffron to colloure hit with, And loke that hit be poynante/ And also Doucet/
A modern English translation: 96 Pears in Syrup. Take Wardons, and cast them in a fair pot, And boil them till they are tender; and take them up, and pare them in two or in three. And take powder of Cinnamon, a good quantity, and cast it in good red wine, And cast sugar thereto, and put it in an earthenware pot, And let boil; And then cast the pears thereto, And let them boil together awhile; take powder of ginger, And a little saffron to color it with, And look that it is poignant/ And also Sweet/
From 1450 Harleian MS. 4016 available at https://cheftalk.com/ams/pears-in-syrup.6638/
88. Perys in Syrup
Boyle wardons that they be somdell tendyr pare hem cut hem yn pecys take canell a grete dele draw hit thorow a streynour iij or iiij tymys with good wyn in a pott do ther to sygure a grete dele poudyr of gynger anneys clovis & macys and yf thu wilte datys mynsyd & reysons of coraunce set hit on the fyre when hit boyleth cast yn the perys lete hem boyle to gedyr when hit ys boyled y nowghe loke hit be broun of canell & put ther to poudyr of gynger a grete dele loke hit be somdele doucet & serve hit forth.
From the Wagstaff Miscellany c 1460
This recipe is most like the following one for wardens in syrup from Two Fifteenth-Century Cookery-Books. The basic ingredients, steps, and spicing are all there. The Wagstaff recipe's optional addition of dates and currants makes it more like the "pears in compost" recipes.
x - Wardonys in syryp. Take wardonys, an caste on a potte, and boyle hem till they ben tender; than take hem vp and pare hem, an kytte hem in to pecys; take y-now of powder of canel, a good quantyte, an caste it on red wyne, an draw it thorw a straynour; caste sugre ther-to, an put it in an erthen pot, an let it boyle: an thanne caste the perys ther-to, an let boyle to-gederys, an whan they haue boyle a whyle, take pouder of gyngere an caste therto, an a lytil venegre, an a lytil safron; an loke that it be poynaunt an dowcet. [Two Fifteenth-Century Cookery-Books (England, 1430)]
From http://medievalcookery.blogspot.com/2014/01/recipes-from-wagstaff-miscellany-88.html
Since I wasn't actually preserving hard pears, but just cooking ripe pears for dessert, they didn't require much cooking.
The Closet of Sir Kenelm Digby Knight has a recipe for Preserved Wardens which is very similar and uses red wine. I had white wine available, and felt that it might be more appealing to my family who are not very used to or comfortable with medieval food. I took aspects from all these recipes and created something that has medieval elements but would also be appealing to the modern palate.
I added about 750g of peeled and trimmed pear pieces to a heavy splash (probably 1/2 cup) of sweet white wine. The pears were juicy and I had saved and added the juice when cutting as suggested in the Good Huswife recipe. I added 100g of sugar, 2 tsp of cinnamon powder, 1/4 tsp of nutmeg, some cloves, 2 tsp of rosewater and let it simmer gently til the pears were soft and warmed through.

The simmering liquor was absolutely fragrant and delicious and would make a wonderful mulled white wine.
 Just before serving, I stirred through a little cream.
The dish was lovely, and very well received with requests to do it again. I might add an egg or two next time and turn it into a sort of baked custard.

The dish was lovely, and very well received with requests to do it again. I might add an egg or two next time and turn it into a sort of baked custard.
Sunday, October 7, 2018
Elizabethan Forehead Cloth for A Friend's Birthday
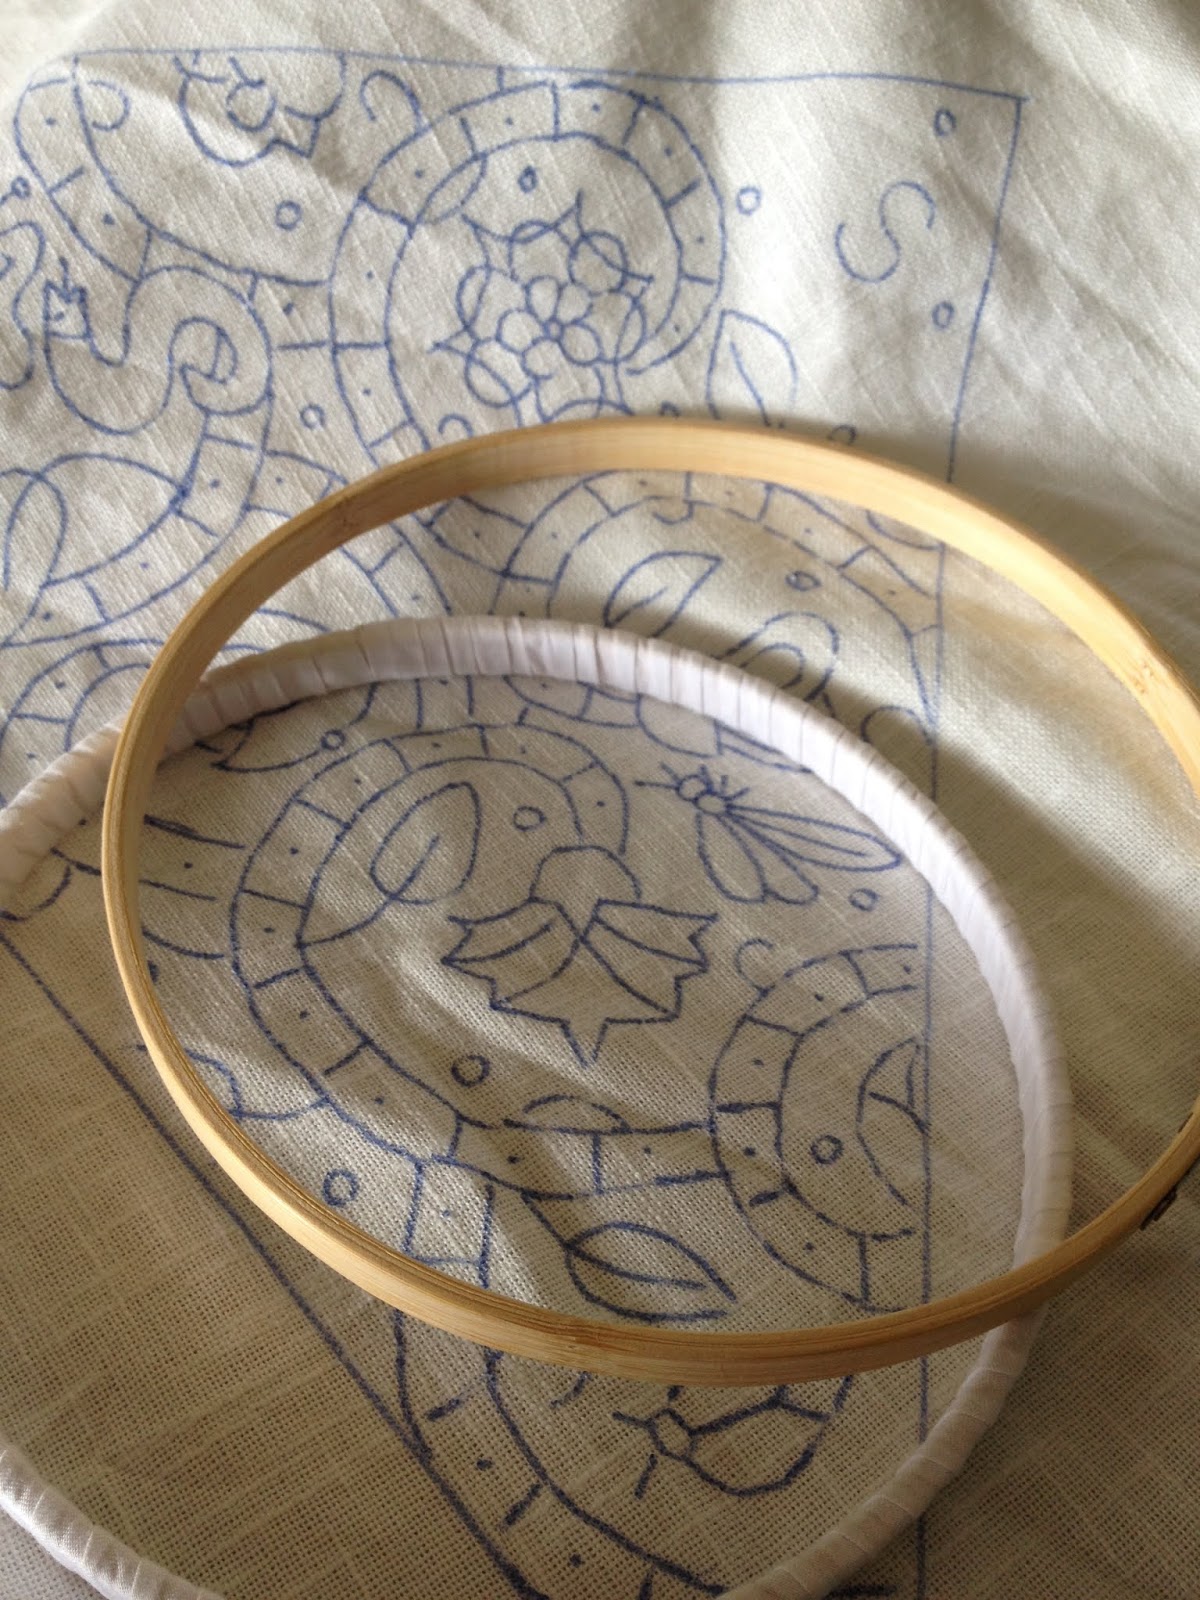
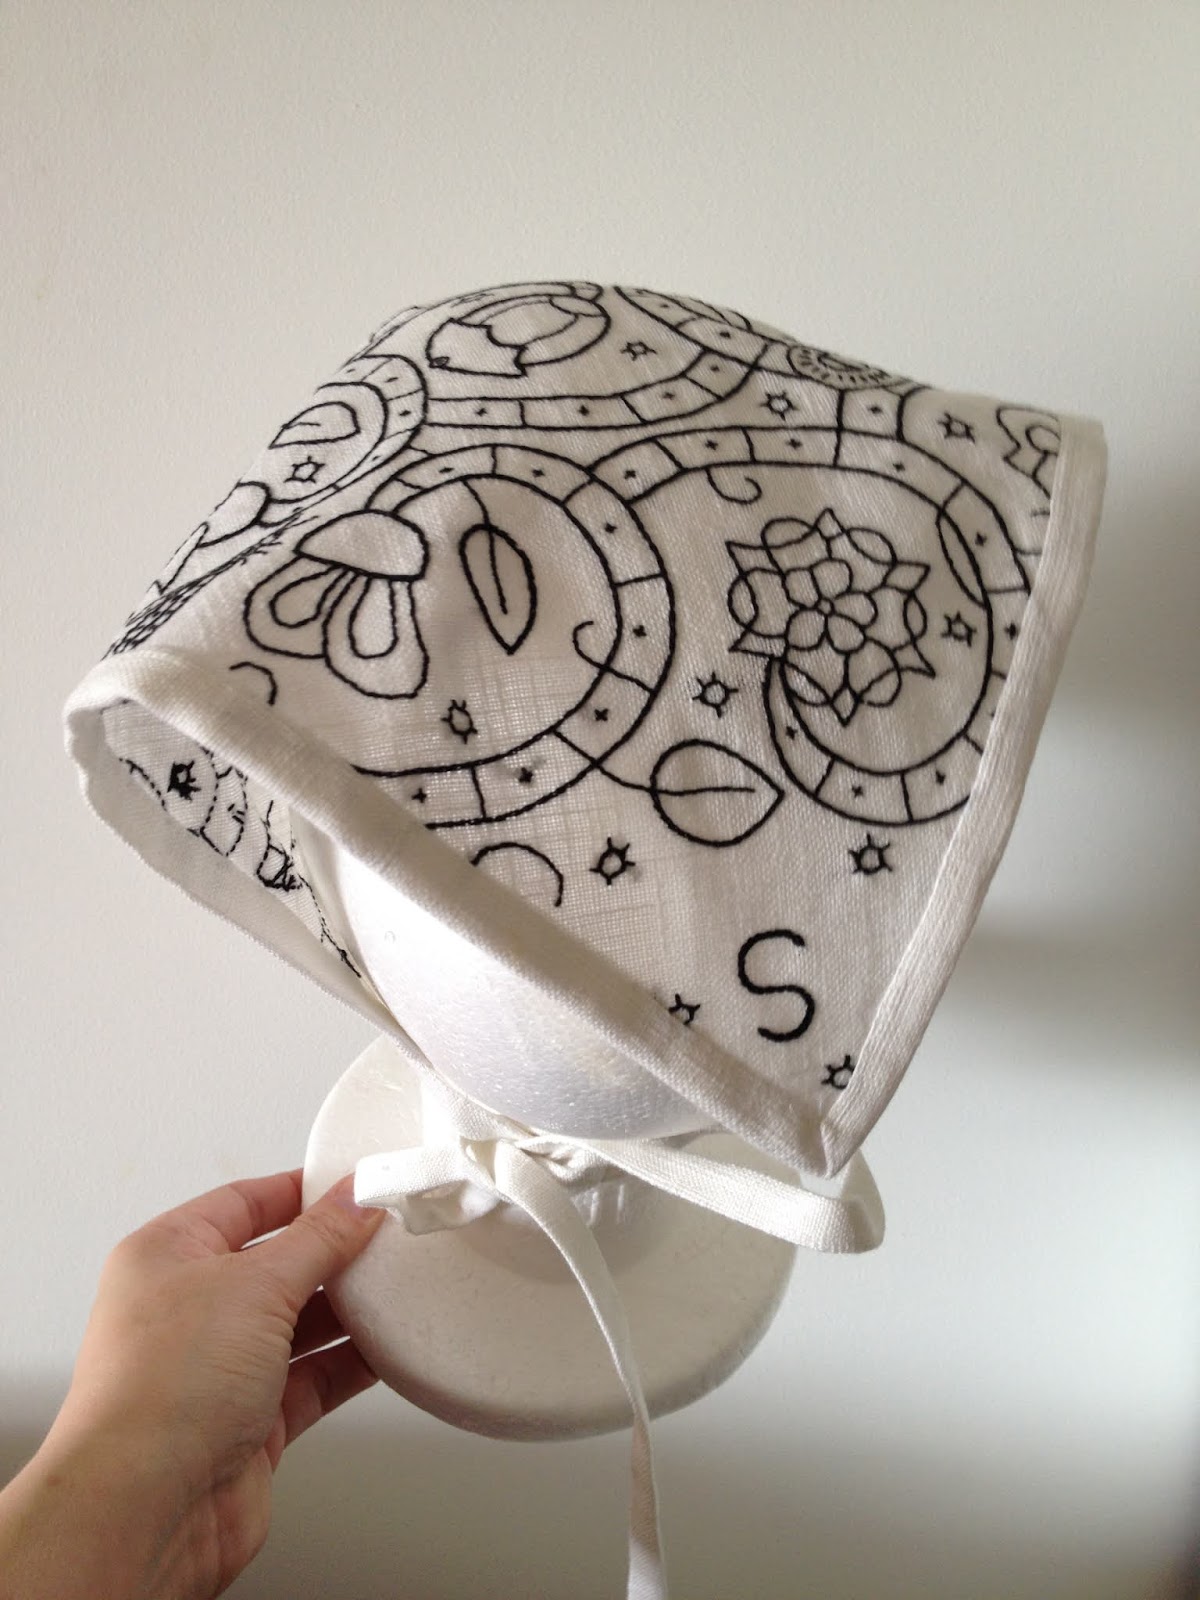
I normally love giving projects away, but I confess that this one was a bit of a wrench. It was the last project that Bitey and I 'worked on' together, and I finished sewing it after she had gone.

It was designed to go with an Elizabethan monochrome coif I embroidered many years ago. The design was very slightly different to that on the original coif because I no longer had the pattern for the original piece, only an enlarged design based on it that I had planned to decorate a partlet with.
My post about the original coif can be found here: http://broidermebethan.blogspot.com/2013/05/new-world-elizabethan-coif.html
Here are some photos of the original piece-


The forehead cloth was sewn with black DMC floss on linen base fabric with a mix of double running stitch and stem stitch.

Designing the pattern

The design traced out with Frixion marker
I left it unlined to reduce bulk and heat, and omitted the spangles so that it sat flatter and closer to the forehead and had nice, clean lines without the edges of spangles sticking out on odd angles.
A strip of the base linen was bound to the un-hemmed edges and used as the cords to tie it on.

Machine zig-zagging the edges of the embroidered piece for extra durability.

Ruling out the binding strips/ties.

Binding/ties pinned on and ready to be hand sewn.

The finished piece.


The not-so-neat back!


My dummy head is quite small so the forehead cloth looks a little big on her.


A gift for a friend made with the help of a friend.
Saturday, October 6, 2018
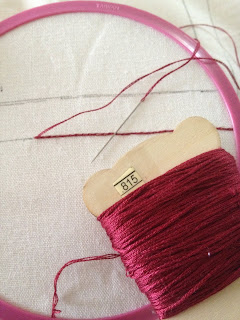
Tackling UFOs - A Split Stitch Heraldic Napkin
I've been trying to keep myself distracted with small projects that keep me busy but don't really matter. I have a lot of work to do for other people at the moment, but don't really trust myself to do a good job.... so out comes the huge pile of Un Finished Objects (UFOs).

Embroidering versions of my device looks a bit nicer than just putting my name on the napkins, and I think contributes a bit to the over-all feel of the event.


This is a simple commercially produced cotton napkin I picked up in a thrift shop somewhere. I tend to buy a lot of them when they are really cheap because they are so handy for events; wiping hands, covering food and cups etc. I never seem to have enough.
Embroidering versions of my device looks a bit nicer than just putting my name on the napkins, and I think contributes a bit to the over-all feel of the event.

I usually just trace a version of my device onto the cloth with a Frixion removable marker over a window or other light source, then embroider round the design in the stitch of choice. I like a small hoop because it is easy to use on the go or in front of the TV and keeps the tension even. I tend to prefer split stitch (as with this one) because it gives a nice even line, good coverage and goes around corners well. Here I have used two strands of DMC cotton floss for budget reasons. Silk would be a very nice alternative and is more authentic for the period. Similarly, a hand hemmed linen cloth would be more accurate for a sixteenth century noble lady.

Another one done and ready to add to the pile.
Monday, September 24, 2018
The Saddest Day Ever
My furry helper's condition worsened rapidly overnight and this morning we had to make the hard decision to hasten her departure. I miss her terribly already. She has been helped me on every project since 2003, and I have lots of un-posted pictures and projects to share. I hope that you won't mind if I hold off on posting for a little while. I can't imagine any sort of sewing or handwork without her, and it's too raw to relive the memories just at the moment.

Thursday, September 20, 2018
Repurposed Tatted Lace Partlet
One of the projects I have on the go at the moment is a bit of an experiment. I found a fabulous but tatty vintage lace runner at a thrift shop and snapped it up. It has a diamond pattern with little roses and I think it is tatted (which is out of period) but passes for neeedle lace.
The piece had a few rust stains, but with some careful laundering I managed to brighten it up. I cut the piece to use the two parts as the front panels of a collarless partlet. I managed to use the pretty edging on the central parts and avoid most of the remaining rust marks.
I made the back part of the parlet up in linen and hand hemmed it with a small hem. I pinned the tatted panels in place. I will trim the excess tatting on the outer edge (which will be hidden by my gown) and trim with binding. I have a couple of colour options waiting to be tested for the binding as matching the colour is difficult.
I have been pretty busy with projects for other people lately, so this one is sitting in the to-do pile, but I am looking forward to getting it finished as I really love the tatted piece and it makes me happy to think that some other ladies' hand work is getting a new lease on life and will be admired rather than languishing in a bin of ugly doilies.


Tuesday, September 11, 2018
A quick update after a long absence
Wow, I knew it had been a while since I posted, but I wouldn't have said it was over a month!
Obviously I've been busy. I have been sick on and off, but also crazy busy with projects.
A lot has happened, SCA wise. Big changes; all for the good. Time for a bit of self reflection on how I play the game and which direction I want to head in. A real appreciation for my SCA group who are really good friends and who support me and make me feel valued.
Some projects finished, new ones started, and a few that just seem to go on and on and on!
I have been taking photos as usual and I will get some new posts up very soon.
Wednesday, August 8, 2018
Camicia Embroidered with Bird Designs
One of the projects I chose to undertake as part of my local A&S Pentathlon challenge is a linen camicia embroidered with birds and flowers. I have worked out a design taken from period sources and cut out my pieces. I am using DMC cotton floss in (predominantly) split stitch for the designs.


Although I am keen to get this project done as I really need a heavier camicia for cooler weather, it is a very large undertaking. I will be disappointed but not surprised if I don't get it finished by early 2019. Hopefully as the weather warms up I will get mobility in my fingers and be able to sew faster!
Monday, August 6, 2018
Public demo at new venue
Yesterday I Attended a public demo at a new venue. It was an interesting day with wild weather which probably put off a lot of potential visitors. Our arts and sciences display table looked good, and I got to chat with lots of interested people while working on my embroidery.


Saturday, July 28, 2018
A&S Pentathlon Display Table
I mentioned in an earlier post that I am running an A&S Pentathlon in my local group to get people motivated to do Arts and Sciences and to develop new skills. At a recent event we held a display table where people could show what they have been working on. I only had two of my five entries available for display; I am working a coif with purple embroidery, and I also displayed my second piece of braid woven on the rigid heddle loom.
An A&S display table is an excellent way to let people showcase what they have been working on in a no-pressure environment. People can come and have a look at people's projects and documentation and hopefully get inspired to try something new or develop an existing skill or knowledge area.

Hand sewn tunic by Lord Faelan and my braid and embroidery

Class notes and sundial by Master William and embroidered game board by Lord Faelan

Hand-sewn doll's dress by TH Baroness Linet

Klosterstitch angel by Lord Faelan
Thursday, July 26, 2018
Partlet Embroidered with a Design of Grotesques
Adding to my pile of unfinished projects, I started a new partlet recently.
I am running an A&S Pentathlon challenge in my Barony to encourage people to get involved in the arts and sciences and to learn new skills. One of the challenges involves monsters and grotesques. I decided to make a partlet decorated with grotesques for this challenge. I love monsters and grotesques - they are my favourite things to paint for Scribes - and I would love to have a wardrobe full of coifs, partlets and camicias decorated with them. I thought these little snake-dragon wyrms were pretty cute.

The design for the embroidery


 One side of the design marked out
The design is from Thomas Trevelyon's Miscellany manuscript of 1608. These strange snake-dragon like creatures are a reccuring theme in modelbuchs and design books of the previous century, and are very common in Italian and German artworks and embroideries. I had to change the design slightly to allow for the slight curve in the front of the partlet. I plan to work this design in a flat gold split stitch, probably using only one thread as an outline for a finer finished look. I'll let you know how it goes.

The manuscript can be accessed here: https://www.wdl.org/es/item/11292/#q=thomas+trevelyon+miscellany+1608
I am running an A&S Pentathlon challenge in my Barony to encourage people to get involved in the arts and sciences and to learn new skills. One of the challenges involves monsters and grotesques. I decided to make a partlet decorated with grotesques for this challenge. I love monsters and grotesques - they are my favourite things to paint for Scribes - and I would love to have a wardrobe full of coifs, partlets and camicias decorated with them. I thought these little snake-dragon wyrms were pretty cute.
The design for the embroidery
The partlet cut out with shoulder seams sewn and hems being tacked down.
Normally, I would embroider my fabric first, and then cut out the panels, but with my partlets, I will often do it the other way around. I make up the partlet pattern first, and either finish or tack the seams down. Then I mark out the design, often with a frixion or removable ink pen. (Or a pencil if I am feeling confident.) When one side is embroidered, I trace the embroidery in reverse on the other side so that the placement is a mirror image. This matters less on a chemise or coif, but is important on a partlet where both sides are up ''front and centre'' so to speak, and very visible.


The design is from Thomas Trevelyon's Miscellany manuscript of 1608. These strange snake-dragon like creatures are a reccuring theme in modelbuchs and design books of the previous century, and are very common in Italian and German artworks and embroideries. I had to change the design slightly to allow for the slight curve in the front of the partlet. I plan to work this design in a flat gold split stitch, probably using only one thread as an outline for a finer finished look. I'll let you know how it goes.

Image from: https://www.pinterest.com.au/pin/390546598932945248/
The manuscript can be accessed here: https://www.wdl.org/es/item/11292/#q=thomas+trevelyon+miscellany+1608
Wednesday, July 25, 2018
Cloved Lemon Soltelty
At our recent Royal Visit, I made a surprise gift for a friend who HATES cloved lemons. It is a novelty cloved lemon made of marzipan.

The presentation was greatly enjoyed by the populace, and the ''treat'' accepted with mixed emotions by the recipient :-)

I made a lemon shape out of marzipan and made little indentations in the skin with the small side of a cheese grater. I painted the lemon with commercial food colouring, studded it with cloves and dusted it with caster sugar.
The presentation was greatly enjoyed by the populace, and the ''treat'' accepted with mixed emotions by the recipient :-)
Tuesday, July 24, 2018
Order of Grace Frette Pouches
I finished these two pouches a couple of weeks ago. They are the sort of project that doesn't look that involved but which actually takes a lot of time.

These are token pouches for my Barony's Order of Grace. The silver frette is what takes the time. Because recipients wear them with pride to events, they need to be very durable. And anyone who has worn garb trimmed with gimp braid will tell you that it is often not terribly durable.
The pouches are made from wool and velveteen. The lining is cotton or linen. The pattern is just a simple rectangle with seam allowances added. To make the pouches more likely to stand up to wear and tear, I hand sewed the trim into place down the centre of the ribbon. Then I went along both sides and sewed down all the little loops.


Once the trim was secured, I sewed the side seams of the pouches and linings and trimmed the corners. Simple tassels were created and then sewn along the bottom of the pouch.


Next the lining was inserted into the pouch, so that all seams were hidden. A whip stitch along the top edge secured them together.
I use five eyelets per side for pouches of this side. I use pins to mark their position and then make a hole with an awl. (I have an eyelet tool that I made from a wooden knitting needle that I use to enlarge the hole.) I do a double running stitch around each hole to secure it, and then reinforce with a thick satin stitch.

The pouch ties are threaded through the holes in opposite directions so that when they are pulled, they draw the mouth of the pouch shut. I used commercially produced cord for this project to save time.

The last thing to do is to add ties onto the pouch so that it can be hung from a belt. I usually aim to have it sit at around mid-thigh height, although this is only a guess because I have no idea who these pouches will be awarded to.


My little friend offering moral support while working those tedious frettes.
Subscribe to:
Posts (Atom)