Some pictures of the new bonnet with one of my embroidered coifs. (My actual head is a lot bigger than this foam hat form, so the bonnet and coif sit better.)
Elizabethan, Tudor and Renaissance inspired embroidery, clothing and accessories - historical costuming, embroidery and re-creation
Showing posts with label embroidered coif. Show all posts
Thursday, May 27, 2021
Bonnet and Coif
Some pictures of the new bonnet with one of my embroidered coifs. (My actual head is a lot bigger than this foam hat form, so the bonnet and coif sit better.)
Sunday, December 1, 2019
Embroidery Designs
I've been unwell again of late and so haven't been as productive as I would have liked. One thing that I have enjoyed though, is doing some blackwork designs. I really enjoy the design process, and love looking at portraits and extant pieces and drawing up designs based on what I have seen. I recently drew up a coif design (that I absolutely adore!) for a friend, as well as a couple of partlet designs and some Elizabethan coif designs. I find it very soothing. (Tracing the design out - not so much! But a gift of a lightboard has made that part of the process a bit smoother too.)
Thursday, August 30, 2012
Elizabethan Small Coif Progress Update
I have still been plugging away at the blue Elizabethan small coif pattern. Here is how it was looking today:
Thursday, August 9, 2012
Elizabethan Coif Pattern
Here is one of my Elizabethan coif patterns. It is a larger one, designed to be worn over unpadded hair, not behind padded rolls. I have a large head, so I would describe this pattern as large to extra large. The long ruler is about 60 cm long, and the smaller about 30 cm.
The motifs are all taken from extant examples in Patterns of Fashion and also period pattern books like A Scholehouse for the Needle. This is not a very shaped coif, that is, the flaps over the ear areas are not very pronounced. This is a purely personal thing, as very shaped coifs don't really suit my round face.
The top edge of the coif is sewn together about two thirds of the way along and the last third is gathered up into a little knotted bunch. This makes a 'pouf' to allow for your bun or hair taping. The bottom edge is sewn into a channel for a cord which is used to slightly gather the bottom edge and tie up and over the hair to secure the coif. If you are planning on making this type of coif, I would suggest tapering the sides in so that the gathering channel is a bit less wide. Just how far you go will depend on where your bun or hair tapes sit. I misjudged on this pattern and the ties are too far forward which means that the coif doesn't sit properly over my hair. I would recommend making a test pattern up in waste fabric to test out different variations that will suit your face. It really can make the difference between a flattering and unflattering coif, especially if you are planning to wear it alone rather than under a flat cap or hat.
The embroidered coif that I am currently working on is smaller because I plan to wear it behind padded hair rolls and also because I have been gradually modifying my coif pattern to make it sit better and flatter my face more.
I draw my patterns out on tracing paper or lunch paper which I then tape to a window. Then I tape the linen or base fabric over the pattern and use the window as a big light box to transfer the patterns.
The motifs are all taken from extant examples in Patterns of Fashion and also period pattern books like A Scholehouse for the Needle. This is not a very shaped coif, that is, the flaps over the ear areas are not very pronounced. This is a purely personal thing, as very shaped coifs don't really suit my round face.
The top edge of the coif is sewn together about two thirds of the way along and the last third is gathered up into a little knotted bunch. This makes a 'pouf' to allow for your bun or hair taping. The bottom edge is sewn into a channel for a cord which is used to slightly gather the bottom edge and tie up and over the hair to secure the coif. If you are planning on making this type of coif, I would suggest tapering the sides in so that the gathering channel is a bit less wide. Just how far you go will depend on where your bun or hair tapes sit. I misjudged on this pattern and the ties are too far forward which means that the coif doesn't sit properly over my hair. I would recommend making a test pattern up in waste fabric to test out different variations that will suit your face. It really can make the difference between a flattering and unflattering coif, especially if you are planning to wear it alone rather than under a flat cap or hat.
| The pattern cut out and ready to be spangled |
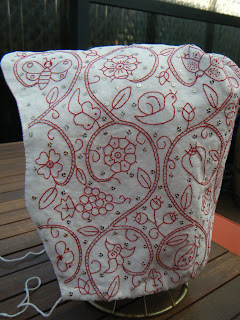
| The coif made up |
The embroidered coif that I am currently working on is smaller because I plan to wear it behind padded hair rolls and also because I have been gradually modifying my coif pattern to make it sit better and flatter my face more.
I draw my patterns out on tracing paper or lunch paper which I then tape to a window. Then I tape the linen or base fabric over the pattern and use the window as a big light box to transfer the patterns.
Subscribe to:
Posts (Atom)


