
Wednesday, August 7, 2019
Fingerloop Braiding Progress
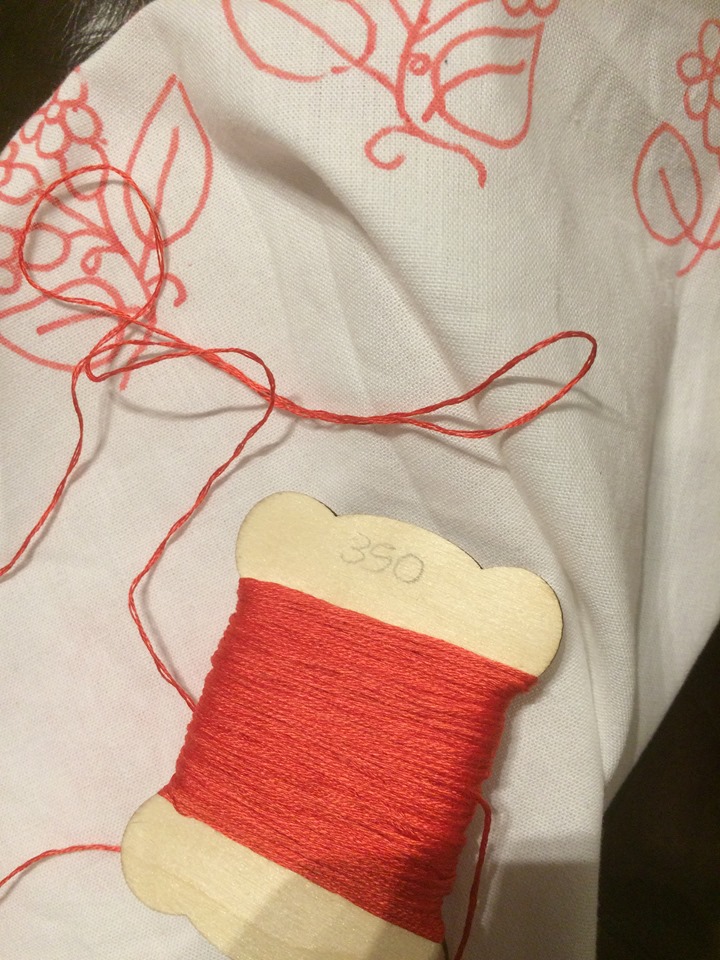
I have continued to experiment with 5 bowe fingerloop braiding, and have been trying different thicknesses of thread and different tensions. I am really enjoying it and have been surprised at the different results little differences to tension can make.

Tuesday, August 6, 2019
Fealty Contract for Pelican Elevation
Please enjoy this 2-part Fealty contract created by my talented friend Lord Federyc de Herle of Lochac. He managed to do this in less than a day (!). It is done in Winsor and Newton inks on pergamenta.

The wording was created by another talented friend Baroness Annys Blodwell.
Monday, August 5, 2019
Heraldic Embroidery on MoD Cloak
I recently was honoured to add a friend's device to the Cloak of the Masters of Defence in honour of his elevation to that Order. The Order of Defence is given to those who excel in the field of Rapier and or Cut and Thrust in Lochac. Peers must also support the Crown and kingdom, display courteous and noble behaviour, share their knowledge and skills with others, practice hospitality according to their means, and those skills and behaviours appropriate to the court. (https://lochac.sca.org/canon/award.php?id=517)
The regalia is a white livery collar, but the Members of the Order are also garbed in a special cloak upon their elevation.
The cloak is made of black wool lined in white linen, and is decorated with an elegant and subtle line of black-on-black embroidery. The devices of the Masters are embroidered on the inside in back -stitch with DMC floss 310.
Back stitch is not a stitch that I use regularly, so I had to concentrate on what I was doing.


Friday, August 2, 2019
Partlet with Embroidered Flower and Bee Motifs
Partlets (also called bavari and gorguera) are an element of sixteenth century clothing which were commonly worn by both high and lower class ladies, although ladies of nobility tended to wear more elaborately decorated versions which often had lace and/or embroidery on them.
I have been embroidering a partlet. My partlet with bees and flowers was inspired by the chemise and partlet set worn by the sitter in the Portrait of Helena von Snakenborg by the British School circa 1569-

Image from: Wikipedia https://upload.wikimedia.org/wikipedia/commons/thumb/8/8a/British_School_16th_century_-_A_Young_Lady_Aged_21%2C_Possibly_Helena_Snakenborg_-_Google_Art_Project.jpg/547px-British_School_16th_century_-_A_Young_Lady_Aged_21%2C_Possibly_Helena_Snakenborg_-_Google_Art_Project.jpg
The top edge of the chemise can be clearly seen under the edges of the partlet, which suggest that this is a set of garments rather than a high necked smock (although both styles were worn in the sixteenth century). The garments have a boldly coloured floral decoration, which may be painted but is more likely to have been embroidered. I did not have the time to do a completely filled embroidered motif, but also prefer a more subtle design for most of my clothing. My persona has ties to both the English and Italian courts, and I wear both styles of clothing, but Italian is my favourite.
This Italian allegorical portrait by Francesco Melzi shows Flora wearing a chemise embroidered with motifs
 Image from: https://en.wikipedia.org/wiki/Flora_(Francesco_Melzi)
The design on this extant 16th century camicia held by the Met museum was also an inspiration in choosing my design-
 Image from Pinterest: https://www.pinterest.com.au/pin/366058275939624940/
Many examples of portraits of noble ladies of both the Italian and Elizabethan courts show exquisitely embroidered partlets. Monochrome and polychrome embroidery became increasingly popular from the 1510s to the end of the sixteenth century as a way of displaying wealth and rank. Portraits from artists as diverse and geographically widespread as Anthonis Mor, Hans Holbein, Guillim Scrots, Moroni and Veneto show sitters with lavishly decorated embroidered garments. Portrait evidence shows a great deal of versatility; some ensembles have the partlet matching another costume element such as sleeves, ruff or stomacher, and others show a partlet decorated in a completely different style to the sleeves. The underlying desire seems to have been to display wealth and show off beautiful garments.
Monochrome and polychrome embroidery was popular on chemises and smocks, partlets, collars and cuffs, ruffs, coifs and caps and other linens. It was executed in counted form (usually in running stitch or double running stitch) or in non-counted form, in stitches such as stem, braid, chain, speckling, feather stitch, backstitch, long and short stitch, herringbone stitch and split stitch. Extant items can be seen with all these stitches. Addition of spangles, gold or silver threads, plain or metallic lace, and pearls and beads all added to the lavish effect.
Portrait of Lady Dacre by Hans Eworth (1540) shows the sitter wearing an elaborately embroidered (monochrome) partlet and smock. This is an English style.
 Image from http://www.wga.hu/frames-e.html?/html/e/eworth/l_dacre.html
In contrast, the images below show Italian styles:
 Tintoretto’s Portrait of a Lady (1570s) from http://realmofvenus.renaissanceitaly.net/wardrobe/JTintorettoPOALady.jpg
 Veronese’s Portrait of a Woman (1570s) from http://realmofvenus.renaissanceitaly.net/wardrobe/VeronesePOAVenetianWomanBarnes.jpg
 Bernadino Licinio’s c1550 Portrait of a Family from
http://realmofvenus.renaissanceitaly.net/wardrobe/LicinioPOAFamily2.jpg
I have created a collarless partlet in the Italian style (shown above) as this style is very comfortable, is not restrictive, and matches the style of Italian gown I prefer. The three pattern pieces were sewn together with enclosed seams by machine, and then the seams were sewn flat by hand. A small folded hem was sewn by hand on all raw edges. I decided to embroider the partlet after it was sewn together to ensure accurate design placement, although this does make it more difficult to embroider.


Floral designs were very popular for embroidery in the sixteenth century, due in part to the proliferation of printed pattern-books and the discovery of the strange flora of foreign lands and the New World. Designs were often copied from pattern-books, as well as bestiaries and herbals. Other designs such as geometric designs, grotesques and allegorical emblems were very popular and can be seen in portraits from across Europe. There was no notion of or way of enforcing copyright during this time, so designs were lifted and adapted, and versions of the same designs can be seen in design model books from the 1530s and into the seventeenth century. The same designs crop up in books published in England as well as in Europe.

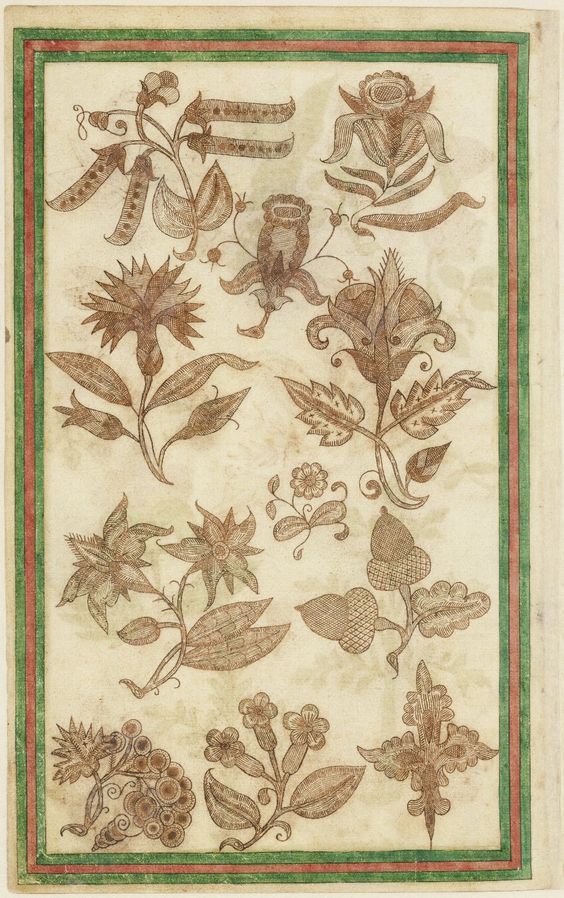
The flower design that I have used comes from the 1608 Trevellyon Miscellanny-
 Image from Pinterest: https://www.pinterest.com.au/pin/384283780703543752/
A similar version of the same motif is also seen in Shorleyker’s 1603 (and reprints) publication of “A Scholehouse for the Needle”-

The bee design also comes from “A Scholehouse for the Needle” from 1608

Image from Pinterest: https://www.pinterest.com.au/pin/515099276116821937/
(This image is a reproduction of a page of the 1632 reprint)
but there are many bee designs as well as extant examples from the late sixteenth century, mainly due to the popularity of bugs and flower designs in Elizabethan embroidery (such as the piece below)

Textile of block-printed linen, England, 1600-1649. Museum Number T.174B
Image from Pinterest: https://www.pinterest.com.au/pin/6262886952240249/
The design was traced out in removable pen and worked predominantly in split stitch and double running stitch in orange DMC cotton floss with two threads, and some running stitch with a single thread (bees). In period, silk floss would most likely have been used for embroidery but I can’t afford silk. The background fabric is cotton linen blend. Linen was mostly commonly used for undergarments in the sixteenth century, as it was widely available (being produced from flax plants) and easy to launder. There are many extant examples of linens for use as underwear (both embroidered and plain) in museums and textile collections worldwide. Linen was relatively easy to launder in our time period; un-embroidered linen bleaches easily in the sun and becomes softer with wear, wicks away sweat and is long lasting. Linen blends offer some of these benefits, but are more in line with my budget than pure linen, as well as being more readily available.
 Polychrome embroidery and decoration on a late sixteenth century extant linen shirt held by the Met Museum showing the use of bold colours in Italian embroidery, Accession Number 10.124.1 from https://www.metmuseum.org/art/collection/search/83861
I have not yet finished the embroidery, but I plan to add more decorative elements when I have. I am considering adding some smaller motifs along the front edge, and I think some bobbin or needle lace in orange and white threads will finish the piece off nicely. Some of my inspiration pieces are below:
 Extant 16thC Camicia held by the Met Museum
Image from: https://www.pinterest.com.au/pin/532269249682155573/
 Extant 16thC Camicia held in Prato, Museo Del Tessuto
Image from Pinterest: https://www.pinterest.com.au/pin/567594359271816517/
The pattern of the partlet I made differs from those used in period ; I wear a 'dickie' style that I can get into by myself as I don't have anyone to help me dress. The side seams under the arms are sewn rather than being loose and having the partlet tied on. Patterns for and images of partlets from the sixteenth century mainly seem to involve pinning or tying them in place under gowns (although some are pinned on over gowns also).
Partlets (with ties) hanging on the line in this scene painted by Allori in the Palazzo Pitti (c. 1598)
 Image from https://www.uffizi.it/en/artworks/loggetta-dell-allori
Extant Spanish partlet which has ties:
 Extant sixteenth century partlet held by Instituto Valencia de Don Juan
Image from Pinterest: https://www.pinterest.com.au/pin/513410426253249839/
 An Italian style of partlet (which would be pinned on), from Elisabetta Parasole's book of partlets (bavari) patterns from 1604 “Ornamento nobile per ogni gentil matrona, dove si contiene bavari , frisi d'infinita bellezza, lavori, per linzuoli traverse, e facuoli” at https://gallica.bnf.fr/ark:/12148/btv1b10526091w/f10.item
Reproduced at https://www.facebook.com/modelbuchmuse/
Bibliography
Arnold, J. 1988, Queen Elizabeth’s Wardrobe Unlock’d, W S Maney and Son Ltd, London.
Arnold, J; Tiramani, J; and Levey, S. 2008, Patterns of Fashion 4, Pan Macmillan Ltd, London.
Compleat Anachronist 115: Wrought with flowers of Black Silk, Prudence Catesby
Compleat Anachronist 31: An introduction to Blackwork, Shoshonnah Jehanne ferch Emrys
Dress at the Court of King Henry VIII, Maria Hayward (2007, Maney Publishing, UK).
The Encyclopedia of Embroidery Techniques, Pauline Brown (1994, Simon and Schuster, Australia).
Geddes, E and McNeill, M. 1976, Blackwork Embroidery, Dover Publications, New York.
Mikhaila, N and Malcom-Davies, J. 2006, The Tudor Tailor, B T Batsford Ltd, London.
Orsi Landini, R and Niccoli, B. 2005, La Moda a Firenze 1540-1580, Pagliai Polistampa, Florence.
Synge, L. 1982, Antique Needlework, Blandford Press, New York.
With many thanks to Modelbuch Muse for inspiration and for conveniently posting images in one place so I don’t need to search through my books for designs - https://www.facebook.com/modelbuchmuse/
I have been embroidering a partlet. My partlet with bees and flowers was inspired by the chemise and partlet set worn by the sitter in the Portrait of Helena von Snakenborg by the British School circa 1569-

Image from: Wikipedia https://upload.wikimedia.org/wikipedia/commons/thumb/8/8a/British_School_16th_century_-_A_Young_Lady_Aged_21%2C_Possibly_Helena_Snakenborg_-_Google_Art_Project.jpg/547px-British_School_16th_century_-_A_Young_Lady_Aged_21%2C_Possibly_Helena_Snakenborg_-_Google_Art_Project.jpg
The top edge of the chemise can be clearly seen under the edges of the partlet, which suggest that this is a set of garments rather than a high necked smock (although both styles were worn in the sixteenth century). The garments have a boldly coloured floral decoration, which may be painted but is more likely to have been embroidered. I did not have the time to do a completely filled embroidered motif, but also prefer a more subtle design for most of my clothing. My persona has ties to both the English and Italian courts, and I wear both styles of clothing, but Italian is my favourite.
This Italian allegorical portrait by Francesco Melzi shows Flora wearing a chemise embroidered with motifs

The design on this extant 16th century camicia held by the Met museum was also an inspiration in choosing my design-

Many examples of portraits of noble ladies of both the Italian and Elizabethan courts show exquisitely embroidered partlets. Monochrome and polychrome embroidery became increasingly popular from the 1510s to the end of the sixteenth century as a way of displaying wealth and rank. Portraits from artists as diverse and geographically widespread as Anthonis Mor, Hans Holbein, Guillim Scrots, Moroni and Veneto show sitters with lavishly decorated embroidered garments. Portrait evidence shows a great deal of versatility; some ensembles have the partlet matching another costume element such as sleeves, ruff or stomacher, and others show a partlet decorated in a completely different style to the sleeves. The underlying desire seems to have been to display wealth and show off beautiful garments.
Monochrome and polychrome embroidery was popular on chemises and smocks, partlets, collars and cuffs, ruffs, coifs and caps and other linens. It was executed in counted form (usually in running stitch or double running stitch) or in non-counted form, in stitches such as stem, braid, chain, speckling, feather stitch, backstitch, long and short stitch, herringbone stitch and split stitch. Extant items can be seen with all these stitches. Addition of spangles, gold or silver threads, plain or metallic lace, and pearls and beads all added to the lavish effect.
Portrait of Lady Dacre by Hans Eworth (1540) shows the sitter wearing an elaborately embroidered (monochrome) partlet and smock. This is an English style.

In contrast, the images below show Italian styles:


http://realmofvenus.renaissanceitaly.net/wardrobe/LicinioPOAFamily2.jpg
I have created a collarless partlet in the Italian style (shown above) as this style is very comfortable, is not restrictive, and matches the style of Italian gown I prefer. The three pattern pieces were sewn together with enclosed seams by machine, and then the seams were sewn flat by hand. A small folded hem was sewn by hand on all raw edges. I decided to embroider the partlet after it was sewn together to ensure accurate design placement, although this does make it more difficult to embroider.


Floral designs were very popular for embroidery in the sixteenth century, due in part to the proliferation of printed pattern-books and the discovery of the strange flora of foreign lands and the New World. Designs were often copied from pattern-books, as well as bestiaries and herbals. Other designs such as geometric designs, grotesques and allegorical emblems were very popular and can be seen in portraits from across Europe. There was no notion of or way of enforcing copyright during this time, so designs were lifted and adapted, and versions of the same designs can be seen in design model books from the 1530s and into the seventeenth century. The same designs crop up in books published in England as well as in Europe.

The flower design that I have used comes from the 1608 Trevellyon Miscellanny-
A similar version of the same motif is also seen in Shorleyker’s 1603 (and reprints) publication of “A Scholehouse for the Needle”-

The bee design also comes from “A Scholehouse for the Needle” from 1608

Image from Pinterest: https://www.pinterest.com.au/pin/515099276116821937/
(This image is a reproduction of a page of the 1632 reprint)
but there are many bee designs as well as extant examples from the late sixteenth century, mainly due to the popularity of bugs and flower designs in Elizabethan embroidery (such as the piece below)

Textile of block-printed linen, England, 1600-1649. Museum Number T.174B
Image from Pinterest: https://www.pinterest.com.au/pin/6262886952240249/
The design was traced out in removable pen and worked predominantly in split stitch and double running stitch in orange DMC cotton floss with two threads, and some running stitch with a single thread (bees). In period, silk floss would most likely have been used for embroidery but I can’t afford silk. The background fabric is cotton linen blend. Linen was mostly commonly used for undergarments in the sixteenth century, as it was widely available (being produced from flax plants) and easy to launder. There are many extant examples of linens for use as underwear (both embroidered and plain) in museums and textile collections worldwide. Linen was relatively easy to launder in our time period; un-embroidered linen bleaches easily in the sun and becomes softer with wear, wicks away sweat and is long lasting. Linen blends offer some of these benefits, but are more in line with my budget than pure linen, as well as being more readily available.

I have not yet finished the embroidery, but I plan to add more decorative elements when I have. I am considering adding some smaller motifs along the front edge, and I think some bobbin or needle lace in orange and white threads will finish the piece off nicely. Some of my inspiration pieces are below:

Image from: https://www.pinterest.com.au/pin/532269249682155573/

Image from Pinterest: https://www.pinterest.com.au/pin/567594359271816517/
The pattern of the partlet I made differs from those used in period ; I wear a 'dickie' style that I can get into by myself as I don't have anyone to help me dress. The side seams under the arms are sewn rather than being loose and having the partlet tied on. Patterns for and images of partlets from the sixteenth century mainly seem to involve pinning or tying them in place under gowns (although some are pinned on over gowns also).
Partlets (with ties) hanging on the line in this scene painted by Allori in the Palazzo Pitti (c. 1598)

Extant Spanish partlet which has ties:

Image from Pinterest: https://www.pinterest.com.au/pin/513410426253249839/

Reproduced at https://www.facebook.com/modelbuchmuse/
Bibliography
Arnold, J. 1988, Queen Elizabeth’s Wardrobe Unlock’d, W S Maney and Son Ltd, London.
Arnold, J; Tiramani, J; and Levey, S. 2008, Patterns of Fashion 4, Pan Macmillan Ltd, London.
Compleat Anachronist 115: Wrought with flowers of Black Silk, Prudence Catesby
Compleat Anachronist 31: An introduction to Blackwork, Shoshonnah Jehanne ferch Emrys
Dress at the Court of King Henry VIII, Maria Hayward (2007, Maney Publishing, UK).
The Encyclopedia of Embroidery Techniques, Pauline Brown (1994, Simon and Schuster, Australia).
Geddes, E and McNeill, M. 1976, Blackwork Embroidery, Dover Publications, New York.
Mikhaila, N and Malcom-Davies, J. 2006, The Tudor Tailor, B T Batsford Ltd, London.
Orsi Landini, R and Niccoli, B. 2005, La Moda a Firenze 1540-1580, Pagliai Polistampa, Florence.
Synge, L. 1982, Antique Needlework, Blandford Press, New York.
With many thanks to Modelbuch Muse for inspiration and for conveniently posting images in one place so I don’t need to search through my books for designs - https://www.facebook.com/modelbuchmuse/
Thursday, August 1, 2019
Worshipful Company of Broiderers Information
I have recently been chatting to several people about embroidery and the Broiderer's Guild. Here is some general information on the Lochac embroidery guild for your interest......
New Guild web address is
http://wcob.lochac.sca.org/…
There is also a Facebook page which is a great way to find resources and have questions answered:
https://www.facebook.com/groups/wcobguild//
The WCoB promotes any form of needlework which can be demonstrated to have been known and performed in Europe and the Middle East before 1600 AD. This includes but is not limited to the following techniques (which may overlap):
Couching, Laid work
Beading, Pearling
Metal thread work, Purl work
Canvas work, including Slips
Cross stitch, including Voided work (Assisi)
Counted Thread work
Raised work, Padded work
Quilting
Whitework (not Hardanger)
Blackwork
Construction sewing
Needlemade lace
Non-counted thread embroidery
Applique
Styles of needlework covered by the Company shall include, but are not limited to
Coptic embroidery and pre 1000 AD work.
Woolwork e.g. Bayeux Tapestry
Opus Anglicanum
Or Nue, Lazurtechnik
German counted work
Heraldic Embroidery
Elizabethan Embroidery
Canvas work, Table carpets, Slips
Polychrome Elizabethan Embroidery
Costume Embroidery
Embroidery for Household Linens
Embroidery for Regalia
There are four competitions a year, with different themes or techniques, which are held at the major Kingdom events. You can submit a piece (complete or not) in person (ideal) or by email as detailed photos, together with your supporting documentation, and an Entry form. The best overall entrant also wins an annual prize.
- There is no minimum number of entries
- Entries do NOT need to be complete (but more marks if they are)
- Documentation - words and pics which show your inspiration, plus info on materials, methods, techniques and what choices you made and why
- Your entry can be 'work in progress' (although finished pieces score higher)
- If you can't get your entry to the event, you can submit online - we need clear pictures of front (and back, if possible) and any documentation.
There is no obligation to enter competitions or even have your work graded for ranking. If you decide to pursue ranking within the guild the system is outlined below.
Grading system -
1 piece at apprentice level or above = Apprentice.
3 pieces at journeyman level or above in different techniques = Journeyman.
5 pieces at Master level in different techniques = Master.
Upcoming competitions-
November Crown (9-10 November, Stowe) - Fruit (any technique)
12th Night - Elizabethan polychrome
May Crown 2020 - Household item (any technique)
Midwinter – Blackwork
November Crown - Cats great and small (any technique)
12th Night - Whitework
More information also on the old WCoB website (somewhat out of date, but still contains much of interest):
BROIDERERS.SCA.ORG.AU
The Guild also is involved in making step-down gifts for Royalty, LOG and Mouse pouches, Pelican and Laurel cloaks, and special group projects.
I posted this information to my local group to provide advice to new embroiderers. In the future I would like to focus more on developing my embroidery skills and diversifying my embroidery projects, so the list of embroidery styles will be useful.

Monday, July 29, 2019
Over-Partlet made from Remnants and Op Shop Materials

The construction of this over-partlet was inspired by a remnant purchase and the recent bout of very cold weather in my local area.

The wool blend remnant
As you know, I am very passionate about women’s dress accessories; I love the variety in sixteenth century dress accessories and the inventive and beautiful ways sixteenth century women had of displaying their wealth and creativity. Dress accessories are usually the first thing I notice about women’s garb, and I find the history and construction endlessly fascinating. I also believe that good accessories are a way to separate real clothing from a costume. I put a fair bit of effort into dress accessories for my persona, but it wasn’t until I started to get quite chilly at events that I realised that my wardrobe lacked an over-partlet/gollar.
As someone who does not enjoy sewing and who lacks patterning skills, the reasons behind the lack are fairly obvious. I recently picked up a pretty wool blend remnant for $12, and this inspired me to try making an over partlet.
Over-partlets are a good way to be able to layer clothing to stay warm, while still having the garment be easily removable. Tudor ladies wore small outer partlets that could be pinned or tied on. They were made in contrasting or matching colours to gowns, and some were fur lined. Variations of over-partlets/gollars are seen across Europe in the sixteenth century, and figure strongly in Tudor and German portraiture.
Even within the same region and time period, there seems to be a lot of variety in style and cut of gollars or over-partlets. A quick review of German fashions in the first half of the sixteenth century shows wealthy women as well as trossfrau and camp followers wearing over-partlets in a range of styles. Decoration varies (fur-lined, figured silks, applique decoration, applied trims etc.) but the actual cut of the garment varies a lot as well. Some are worn closed at the front, some have are wider and extend past the shoulders- others are quite narrow. Some are roughly the same length front and back, others have extended panels at the front which hang down further than the back section. I chose to make my partlet quite wide as I wanted to keep the tops of my arms (where there is a gap in my sleeves) warm. I also chose to make the front panels roughly the same as the back section. I decided to save any extremes of fashion for later experiments.

Portrait of a Lady with Playing Cards by Urs Graf 1515
Image from: https://www.pinterest.com.au/pin/236157574187882145/

Image from: https://www.pinterest.com.au/pin/546061523544879141/

Portrait of a Lady by Master A. W. (active from 1536) held by The Courtauld Gallery
Image from: https://artuk.org/discover/artworks/portrait-of-a-lady-207305

Image from: https://commons.wikimedia.org/wiki/File:AnnaRegulaSch%C3%A4rer.jpg

Image from: https://www.pinterest.com.au/pin/459859811934181911/

Image from: https://www.boijmans.nl/en/collection/artworks/151647/an-old-woman-offering-money-to-a-young-man

Once I had the pattern, I placed the pieces on my wool remnant. I was happy with the placement, and I still have enough wool left to make a matching hand warmer or snozkyn. Next I had to place the pattern pieces on the fake fur. This was more challenging, as the fur remnant had pieces cut into it and there was not a lot there. I had four attempts before I got it right. I wanted the hair strands to all be flowing away from the neckline. One of the pieces had to be positioned slightly diagonally to make it fit, but the difference was not noticeable. I cut the wool pieces out. I had to be careful with the fur pieces, attempting to cut the base fabric rather than the hairs because cutting the hair itself makes it look shorn and unnatural.
 Pattern lay out on wool
 Pattern Layout on fur - attempt 1
 Pattern Layout on fur – attempt 2
 Pattern Layout on fur – attempt 3
The next step was to pin the wool piece and the fur piece together, right side to right side. I tried not to catch too much hair inside the seam, but inevitably a lot of hair got caught. I used the sewing machine to sew a continuous seam around all the edges, leaving about fifteen centimetres unsewn to be able to turn the garment right side out.
Once the seam was sewn, I cut into the seam allowance on the corners and tight areas, giving the fabric some ease to stop bunching. I also cut away the bulk on the front centre corners. Then I turned the partlet right side out. I used a bone turner to poke the edges out and make sure the seam was sitting cleanly.
The two fabrics were quite thick, and with the seam allowance turned under the edges were quite bulky. To reduce the bulk and make the edges sit neatly, I went around the edges with a needle and thread and tried to invisibly catch all the pieces together with a stab stitch. When this was completed, I whip stitched the hole where the garment was pulled right side out closed.


Pinned and ready to stab stitch
I had some cotton bias binding leftovers that I got in a bulk pack from an op shop, and picked a cream coloured one that was similar in colour to the fake fur. I had previously washed it to make sure it was colour fast, and it needed to be ironed to make the hems sit properly. Once this was done, I marked out where I wanted the bias trim to sit, and pinned it all down. The trim started at the centre back of the neck and travelled around all the edges before finishing at the centre back neck. I hand sewed down both sides of the bias trim with cotton thread. In the sixteenth century, the tailor or seamstress would have had to make their own bias strips and join it with hand sewing. I have made my own bias before, and I am very glad to have the luxury of commercially prepared bias binding.

Portrait of a city woman with haube by Hans Baldung 1520 showing a single line of trim decoration
Image from: https://www.pinterest.com.au/pin/236157574187886064/

Image from: https://www.pinterest.com.au/pin/449726712762196713/


Marking placement and attaching bias trim
There are portrait examples of ladies wearing over-partlets with one line of trim, two lines of trim, and multiple lines of trim. I decided to go with elegant simplicity and do a single line of bias trim. I mitred the corners to make them neat; I haven’t been able to see the portraiture closely enough to make out details on whether that was done in period, but as it is a neat and logical way to make the trim sit properly, I don’t think that it is unlikely that a seamstress thought to do it in period.
The hairs that were caught in the seams had to be coaxed out gently in small amounts with a needle. There are still areas that need more hair removed from the seams- it is a tedious business.
I toyed with the idea of adding decorative wooden thread wrapped buttons to the partlet, but I don’t think it needs the extra decoration. I do have a coat hook stashed away somewhere which might be useful to add to the centre bottom of the front panels to invisibly secure the garment – only wearing it for an event will suggest whether this is necessary or not.
Prices
Wool/nylon blend remnant $12
Fake fur op shop remnant $2
Bias binding remnants (op shop) 8 pack for $2 =25c
Op shop sheet for toile $1
Lunch paper for patterning approx. $1.50/roll
Threads – already in stash
I was very happy that this garment came in under $20AU total – and probably closer to under $15. I also have enough wool left over to make a matching hand warmer, although I will need to keep my eye out for another remnant of fake fur.
Bibliography
Arnold, J; Tiramani, J; and Levey, S. 2008, Patterns of Fashion 4, Pan Macmillan Ltd, London.
Barich K and McNealy, M. 2015, Drei Schnittbucher, Nadel and Faden Press, USA.
Mikhaila, N and Malcom-Davies, J. 2006, The Tudor Tailor, B T Batsford Ltd, London.
Saturday, July 27, 2019
Experimenting with Finger Loop Braids
I've been sick for the last four weeks or so with a persistent chest infection, tracheitis and ear infection. I've been feeling more lethargic than usual, and have taken the opportunity to continue my experiments with fibre arts. I have learned basic knitting stitches, basic crochet stitches, and finally conquered a simple finger loop braid.
Mistress Collette from Innilgard showed me how to do the 5-loop braid last year, but I just couldn't seem to get the hang of it. Cue Youtube, and I finally understand how to do it! I am really pleased with this new skill and look forward to continuing with finger loop braiding.

Mistress Collette from Innilgard showed me how to do the 5-loop braid last year, but I just couldn't seem to get the hang of it. Cue Youtube, and I finally understand how to do it! I am really pleased with this new skill and look forward to continuing with finger loop braiding.

My first attempt. Obviously my tension needs work, but I feel like I am on my way!
Monday, July 22, 2019
Making Tassels
I spent some time recently making tassels. It is another one of those quick little tasks that can really make the difference to an item. They are great on chairs, bags, clothing and banners and can really make an item look complete.


I always have grand plans to decorate the head of the tassel with detached needle lace - but there never seems to be enough time!
You can find a tassel making tutorial here: http://broidermebethan.blogspot.com/2017/05/a-century-challenge-simple-tassels.html
This portrait of a youth by the Florentine School, traditionally identified as Francesco I de'Medici, shows tiny tassels on the ends of the shirt ties:
 Image from: https://www.christies.com/lotfinder/paintings/florentine-school-late-16th-century-portrait-of-5287723-details.aspx


I always have grand plans to decorate the head of the tassel with detached needle lace - but there never seems to be enough time!
You can find a tassel making tutorial here: http://broidermebethan.blogspot.com/2017/05/a-century-challenge-simple-tassels.html
This portrait of a youth by the Florentine School, traditionally identified as Francesco I de'Medici, shows tiny tassels on the ends of the shirt ties:

Subscribe to:
Posts (Atom)