Showing posts with label caul. Show all posts

Thursday, September 3, 2020

Making the Purple patterned, Italian Style Caul

It has been a while since I posted a how-to on making a caul, so I thought I would share my technique. The photos and description refer specifically to the purple patterned caul that I finished recently, but my technique is pretty much the same for all my cauls, with minor changes to allow for different styles and head/hair sizes.

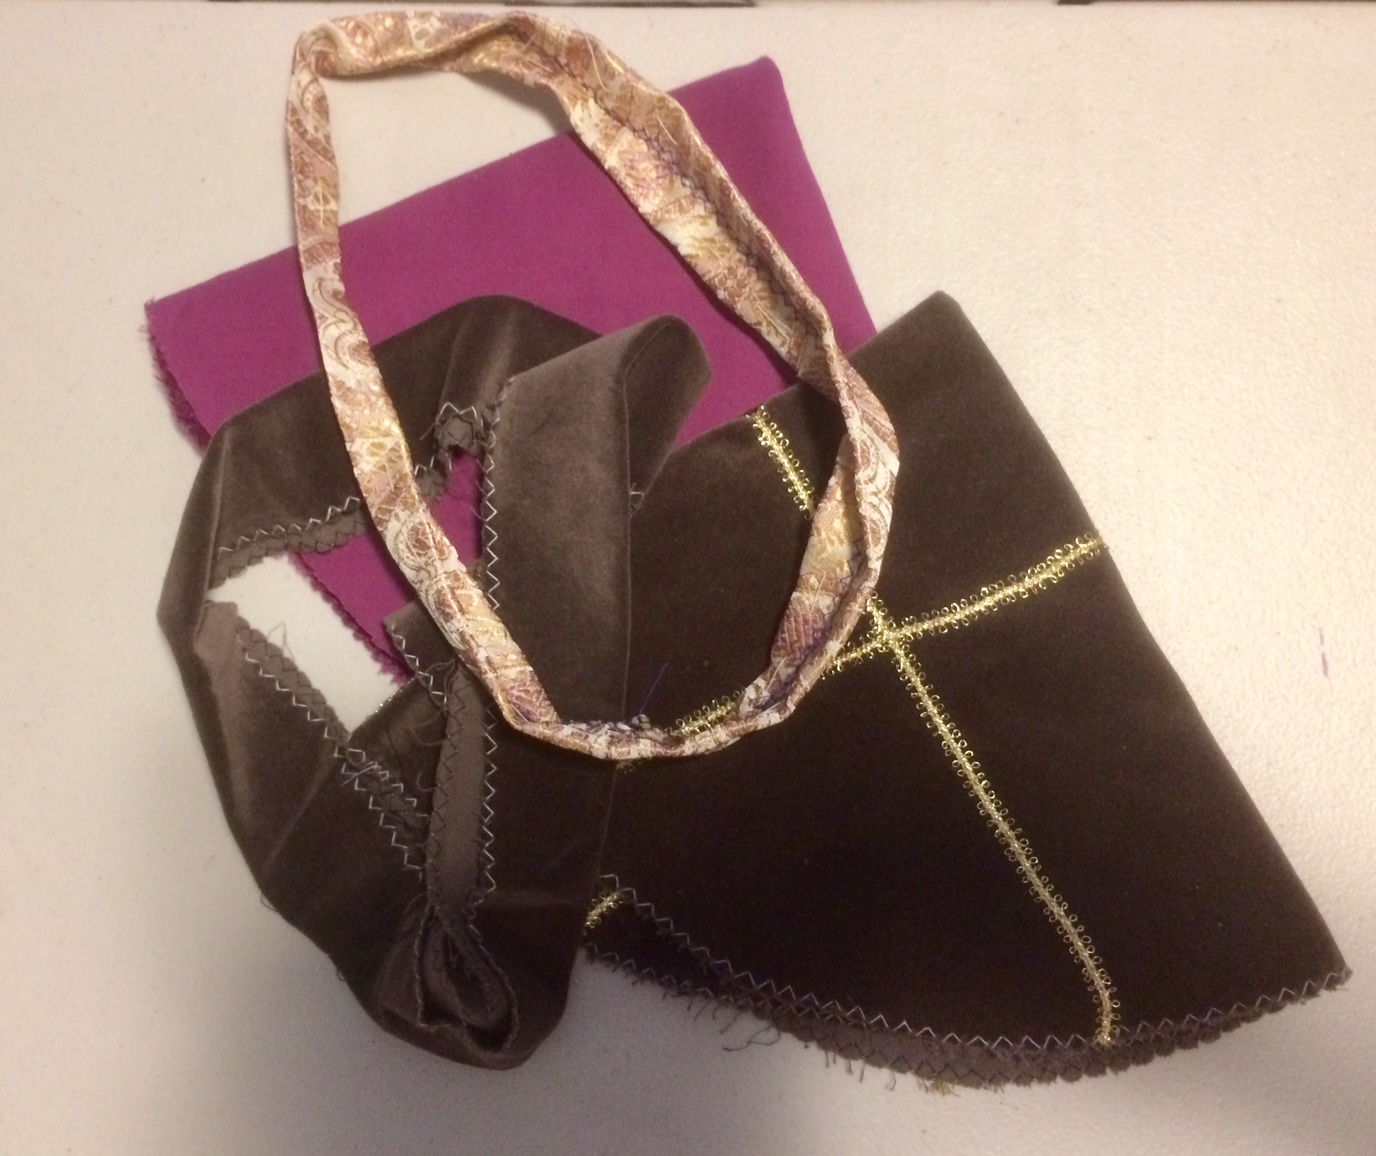
For this caul, I started out with a circle of pre-washed and ironed fabric. I prefer natural fabrics because they tend to breathe better than synthetics and are not as hot or as much of a fire risk. In period, this type of headwear would most likely have been silk, linen or possibly a fine wool or cloth of gold or silver. Budget is an issue for me, so sale cotton is my go-to. I prefer fabrics with a bit of body so that the hat won't look too limp. I love the way cotton velveteen sits when made up in this style. This particular fabric is a quilting cotton that I picked up on sale last year. The printed gold pattern adds a bit of stiffness.
Cutting out a plain fabric with the same pattern
The size of the circle that you use as your pattern really depends on three things:
How pouffy you want your caul to be
How big your head is
How much hair you have.
This image gives you an idea of the size circle I prefer for my large head
I tend to prefer a pouffy caul because I can just plait my hair and shove it in there without worrying about elaborate hair -dos. It also allows for when my hair is long or short, thick or thin. I have quite a bit of variation in my hair depending on which medications I am on etc. so a bit of extra space works for me. I usually use a large wire ring that I think is designed to be a wreath base.

You also have an option to make your base fabric an ova shape rather than a rectangle. Doing an oval shape tends to result in a bit more fabric around the ear area which reminds me quite a lot of the cauls that sixteenth century German ladies are shown wearing.
Once you have decided on shape, cut out your pattern piece. You will also need to cut out a piece of fabric to make the band, if you are making it out of the same fabric. I usually make my band the same length as the measurement around the head vertically, with 0.5cm allowed for ease plus seam allowance. I make the piece double the width that I want plus seam allowance and just fold it in half, but you could make the inside/lining part out of a different fabric if you wanted to. (For instance, making the lining piece out of velveteen might help it grip the hair better.)

At this point, you will need to add any decorations such as beads, ribbons, etc. I added a gold bead in the centre of each main motif,
If you are not adding extra decoration, give it the fabric a press. I usually run a zigzag stitch around the edge on the machine also, just to give it a bit more strength.

Next, run nice, even stitches all the way around your circle panel to allow you to gather it up into the headband. I actually do my gathering stitches in two separate lots to make it easier to get the gathers 'just right'. I usually mark the centre of the circle perimeter at top and bottom and run my threads between those points. On this particular caul I decided to try something different and to not gather the section on the top of my head in front of where my jewelled billiments sit, to reduce the pouf level at that point. Don't make your stitches too big or your gathers will be correspondingly large and the hat will not sit nicely. I prefer smaller gathers.

You will also need to sew the headband part. If you have cut a single piece, you'll need to sew the ends together so it is a joined piece like a ring of fabric. Then fold it in half and fold the seam allowances under, pressing or finger-pressing as you go. (Some people make the band a little shorter than they need and pop a piece of elastic in between the ends of the band. This is (obviously) not historically accurate. I don't find it necessary as I use clips to keep the caul on. I have also seen the ends of the band hemmed individually and ties or ribbons attached to tie it onto the head.)

Once your headband is sewn, gently pull up the gathering stitches until the circle (or oval) of fabric is the same size as the band. This is the part where you start adjusting the gathers so they look nice and even. Just gently move the gathers around until they look even and the bulk of fabric is evenly distributed.
I pin my gathers into place and handsew them on the inside and the outside. You could do this by machine if you prefer, I just don't like seeing visible stitching.
Once the band is on, you could call the hat finished. I thought it was lacking something at this stage though, and so experimented with different types of trim and ribbon. I chose this thin metallic ribbon and hand sewed it on to finish off the band.
 
The last thing that I do is add a metal hair comb at the centre front, sewn into the band. Some of my cauls have a wig clip sewn in at around the ear point. If you decide to do this, experiment to find out where it sits comfortably. On others I have made a little buttonole loop behind the ear to slip a bobby pin/kirby grip through to help it hold in place. You may not need this, but I have very slippery, fly -away hair, so this works for me. (I love a netted caul, but by the end of the day I have bits sticking out all over the place, despite how much product I use.) This is also why I make my bands quite wide. I have used bias binding for bands to more accurately match the portraiture, but the bigger bands work better with my difficult hair.

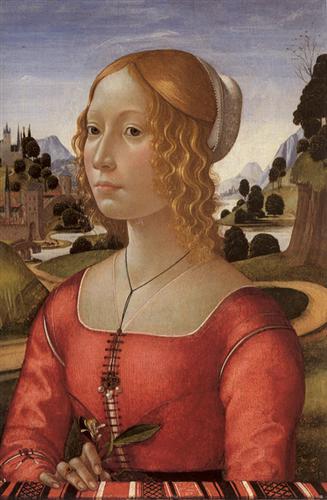
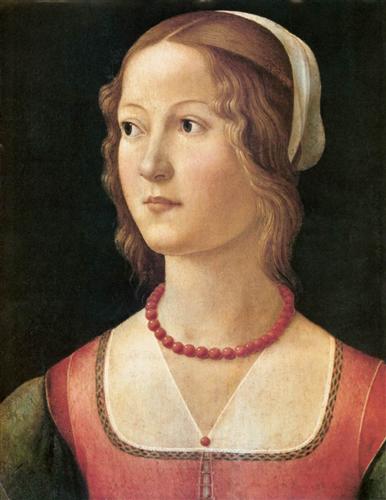
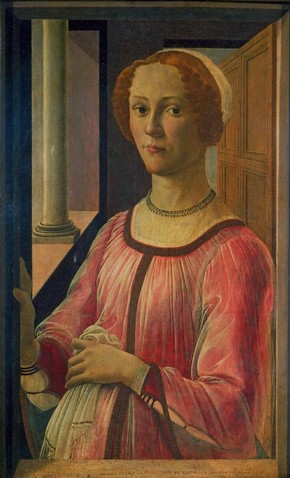
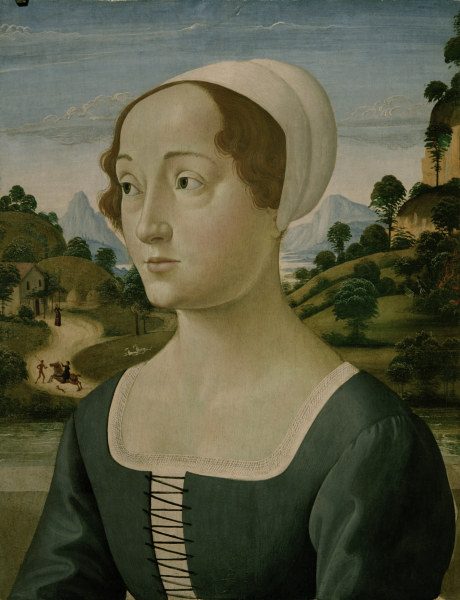
There is quite a lot of variation in the size of cauls depending upon the decade, as these portraits suggest:
 Titian's La Shiavona (Portrait of a Lady) 1510 held by National Portrait Gallery UK. Image from: https://en.wikipedia.org/wiki/La_Schiavona

Bellini's Portrait of a Naked Woman In Front Of Her Mirror c. 1515,  Image from: https://en.wikipedia.org/wiki/Naked_Young_Woman_in_Front_of_a_Mirror#/media/File:Giovanni_Bellini_-_Giovane_donna_nuda_allo_specchio.jpg


Portrait of a Woman by Vincenzo Catena c. 1520
Image from: https://www.italianways.com/the-venetian-portrait-painter-vincenzo-catena/


I've been tempted to make a caul that sits further back on my head like these, but I'm not sure how comfortable I would find it. I like having the bulk sit higher up on my head and not feel like it is pulling my head back.
Portrait of a Venetian Woman c. 1505 by Albrecht Durer
Image from: https://en.wikipedia.org/wiki/File:Albrecht_D%C3%BCrer_089b.jpg


Wednesday, August 5, 2020

Purple Italian-style Caul

I have been extremely busy with SCA Officer roles for the last several weeks so I've not had much time for any other SCA activities at home. One small thing that I managed to get finished was a purple caul that I started last year.


Wednesday, June 10, 2020

UFOs and Making Cauls

As you probably know, I have been trying to work through my UnFinished Objects pile(s) while I am in isolation. I have been trying not to start anything new unless it is vital. The last few weeks I have been feeling like my crafting mojo is starting to come back and I have been getting a few things finished. Well, this week I was going through my storage tubs looking for some scarves as it is getting quite cold here. My berets and scarves are in modular tubs under the tubs I keep tie on-sleeves, partlets and girdles in. Rearranging the pile of clear tubs, something caught my eye. I opened the tub and saw these caul pieces. I remembered I had taught a mini-class on caul construction at an A&S night in 2018, and I had obviously put the tub away after the class with the pieces still in it - and totally forgot all about it.
I had to laugh; I just can't seem to escape the UFO pile! Hopefully I can get these finished over the next few weeks and they can be put in the caul tub completed. Also, I suspect that the universe might be reminding me that I need to do a big spring clean and re-organise everything. Hmmm, might wait til it is actually Spring!

Friday, February 16, 2018

Red Velveteen Caul with Gold Trim

I was so pleased with the grey velveteen caul that I decided to do another one.

This one is made of a remnant of red cotton velveteen. I cut the basic circle pattern out last year when I cut out all those sleeve pieces. I tend to zig zag the edges of my patttern pieces for stability and protection, especially since it so often takes me a long time to finish these projects.

You may remember that my pattern is traced around the top edge of a bucket to get a nice circle. Another option is to use an oval shape to get more of a German-style caul with a bit more body at the back of the head towards the nape of the neck.
This embroidered caul that I finished in 2017 has an oval shaped bag pattern and is wider at the back of the head

On my circle bag/piece I marked out a grid pattern but only sewed down my ribbon where it intersected. I hoped that this would create a nice visual effect as the ribbon puffed up a bit.


At the intersections of the ribbon I added a glass bead.

I didn't think there was a need to line this caul; I tend to get overheated rather than cold and the velveteen is quite bulky.

I put gathering stitches around the edge of the circle/bag piece. I used to do one unbroken line of gathering stitches, but I now do two lines that each go roughly half way around the circle/bag piece. This allows me to better control the gathers and even up any areas where the gathers look a little bulky.

For the last few cauls I have been leaving an ungathered section across the top of my head. I think it is more flattering and looks more like the portraits from the time.

Once the gathering stitches are in the circle/bag part, I prepare the band. It is a rectangular piece the length around my head plus seam allowance on both ends. I join the short ends so that I have a continuous band. (I also usually stab stitch the seam allowance down flat to reduce bulk, especially when using thick fabrics like velveteen.) I then fold the band in half and iron a crease into it. Then I fold the two outside edges into the centre crease and tack them into place. This gives a narrow band with the raw edges fully enclosed inside the band.


Slide the edge of the circle/bag piece inside the band so that the edge of the circle bag piece butts up against the crease. I usually start by matching the centre top of the circle/bag piece and the centre top of the band and pinning it into place. Do the same at the bottom centre - it will help you to keep the gathers even.

Then start drawing up your gathering threads. I adjust my gathers by eye, and pin them into place as I go. I double check again before stitching to make sure that they look even. 
The next step is to start hand stitching the band into place. Stitch around the band on the outside (the part you will see); I use a small whip stitch.

Now turn the hat inside out and pin the gathers down on the inside of the band and stitch around again, securing the inside of the gathers as you go. Use very small stitches as you don't want any to show on the outside of the hat if you stitch beyond the band.

Your hat is done! At this stage  I add a metal comb in the centre front and a wig clip in the area of the band that sits behind my ear. This is not authentic and simply helps to keep the caul on my head and stop wispy bits of hair escaping as the day wears on.

On the red velveteen caul, I decided to add some commercial trim around the band at the last minute because it looked a bit bare. It is hand-stitched down. You could also add beads or embroider a design onto the band before sewing it to the circle/bag pattern piece.


The inspiration portrait-

Image result for judgment of paris by attributed to antonio da vendri
The Judgement of Paris (detail), Attributed to Antonio da Vendri
Image from https://www.rijksmuseum.nl/en/collection/SK-A-1296

This project has inspired more ideas, including a caul with different coloured panels like the one above, and one decorated with little tufts of thread (inspired by the inside of this caul)-

I'll keep you posted on the results!

Tuesday, November 22, 2016

Blue Caul


I managed to finish another caul last week. This one is very simple and is made of a remnant of fabric that I found in a bargain bin.

A caul is usually just an oval or circle of fabric gathered into a band. I tried to put less gathers over the top of the head and keep them around the side and back to make the top sit flatter on the head.
The gathers pinned into place evenly on the headband.

I baste the seams of the headband before whipping the gathers into place. This is to make sure that the headband stays evenly folded as I work.

This caul is a bit looser than the ones that I normally wear so I added wig clips for security as well as the usual comb in the centre top.


The pattern is slightly off-centre because I didn't have enough fabric on the remnant


Friday, November 4, 2016

Gold caul or Scuffia

Back in June, a friend gave me some gifts wrapped in a fabric remnant. The fabric was really pretty, and I managed to cut a circle caul out of it. There was just enough for the band (I have a big head) and the circular bag part that holds the hair.

I edge the circle shaped bag piece with zig zag stitch to control fraying. I prefer to make the headband part in one strip if I can. This strip is then folded in half and the edges tucked under to give a clean finish.

I put a running stitch evenly around the outside edge of the circle part so that it can be gathered up to fit inside the band. This time I did not gather the part that sits across the top of my head. I was hoping that it would sit flatter, as some of my other cauls have had some strange bagging in that area.

Pull the running stitches up gently to gather the circular piece until it fits inside the headband. Try and make sure that the gathers are sitting evenly and neatly. I like to baste the edges of my headband and also run a line of basting stitches along the middle fold of the headband because it can get a bit hard with all the pins holding everything together at this stage.


The caul all pinned and basted for hand sewing. I hand sew because it is easier to ensure that the pleats are in the correct position. I usually do the outside of the band first and then turn the caul inside out and stitch down the inside of the band too, just to make sure.

Once the band was secured, I carefully removed the basting. I sewed a line of large gold seed beads along the flat top edge of the caul.


I added a comb in the centre of the caul headband, and a wig clip on either side to keep it in place on my hair. I usually put a weight of some sort in the finished caul bag and let it sit for a week or two to set the pleats in place before I wear it.

Many thanks to Nicki for the lovely fabric.

Saturday, January 2, 2016

White Caul or Cuffia


I made this small white caul (cuffia) as  a gift for a dear friend. It is a simple circle of fabric gathered into a rectangle of fabric which had been sewed into a circular strip and folded over. I starched the 'circle' part of the caul to give it body. I added small white glass seed beads along the band and also added some wig clips and button hole loops for bobby pins.


This hat was inspired by this image:

Portrait of a Lady - Domenico Ghirlandaio
Portrait of a Lady by Domenico Ghirlandaio
Image Source: http://www.wikiart.org/en/domenico-ghirlandaio/portrait-of-a-lady


There are many Renaissance Italian portraits that show similar styles of headwear-


Portrait of a Young Woman - Domenico Ghirlandaio
Portrait of a Young Woman by Domenico Ghirlandaio
Image Source: http://www.wikiart.org/en/domenico-ghirlandaio/portrait-of-a-young-woman?utm_source=returned&utm_medium=referral&utm_campaign=referral


Some of these cauls have bands and some do not. From personal experience, I find the cauls with bands easier to pin onto my hair.


Portrait of a Young Woman by Lorenzo Costa
Image Source: http://realmofvenus.renaissanceitaly.net/wardrobe/ferrara/LorenzoCostaBostonMOFIneArts.jpg

I am tempted to have a go at making something like this caul- I like the beadwork.


Portrait of a Young Woman by Albrecht Durer
Image Source: http://realmofvenus.renaissanceitaly.net/wardrobe/DurerYoungVenWoman.jpg


Portrait of a Lady by Bernardino Licinio
Image Source: http://realmofvenus.renaissanceitaly.net/wardrobe/LICINIO1510s.JPG


Portrait of a Lady by Sandro Botticelli
Image Source: http://www.vam.ac.uk/__data/assets/image/0019/223714/2006bc8281_botticelli_lady_tempera_custom_290x478_05610925.jpg


Portrait of a Young Woman by Domenico Ghirlandaio
Image Source: https://www.pinterest.com/pin/103864335127722168/


Titolo dell'immagine :  (alias Domenico Tommaso Bigordi) Ghirlandaio Domenico - D.Ghirlandaio (?), Portrait young woman
Portrait of a Young Woman by Domenico Ghirlandaio (aka Domenico Tommaso
Bigordi)
Image Source: http://www.copia-di-arte.com/a/ghirlandaio-domenico/bildnisjungefrau.html


Portrait of a Lady of the Sassetti Family by Domenico Ghirlandaio
Image Source: https://www.scholarsresource.com/images/thumbnails/192/m/met3849.jpg