Showing posts with label beaded girdle. Show all posts

Friday, February 6, 2015

Multi-strand Elizabethan Girdle and Necklace

I really like the multi-strand necklaces which were so popular with the Elizabethans, and for quite a while I have been wanting to make a multi-strand Elizabethan girdle. And of course, the necklace to match!

The trend appears in late sixteenth-century portraits of both men and women, in England, France and Spain. Which is probably not surprising, given that the style is an excellent way of demonstrating that you have masses of jewels strung together in a very cosmopolitan style!


Portrait of a Woman 1567
Portrait of a Woman - 1567
Image from: https://www.pinterest.com/pin/390546598911944804/


LOUISE DE LORRAINE (1553 - 1601) Queen of France from 1575 to 1589 married to HENRI III. She 1st caught the eye of , Henry III, in 1574. . Louise was not only attractive & sweet-natured, but who also resembled the Princess of Condé, Marie de Clèves, whom Henry III was infatuated. He remembered Louise long after he left France. Louise worshipped her husband, who in response fussed over her.
Portrait of Louise de Lorraine
Image from: https://www.pinterest.com/pin/390546598911944751/


Portrait of a Lady from the Wentworth Family by Hans Eworth
Image from: http://goldenagedregina.blogspot.com.au/2011/11/tudor-portrait-identification-issues.html


Portrait of Margaret Gerard, Lady Legh, attributed to Marcus Gheeraerts the Younger. Accepted in lieu of inheritance tax by HM Government and allocated to the National Trust for display at Lyme Park, 2011. ©National Trust Collections
Portrait of Margaret Gerard, Lady Leigh, attributed to Marcus Gheeraerts the Younger
Image from: https://www.pinterest.com/pin/390546598911915416/

Portrait of Elizabeth Knollys, Lady Leighton, attributed to George Gower, 1577.  This lady, a first cousin once removed of Queen Elizabeth, was the sister of Lettice Knollys. She served as one of Elizabeth's Gentlewomen of the Privy Chamber.
Portrait of Elizabeth Knollys, Lady Leighton, attributed to George Gower, 1577.
Image fromhttps://www.pinterest.com/pin/438819557413982212/


King Charles IX, circa 1572, by or after Clouet. Palace of Versailles.
Portrait of King Charles IX, circa 1572, by or after Clouet
Image from: https://www.pinterest.com/pin/390546598911765376/


Portrait of Robert Dudley
Image fromhttp://en.wikipedia.org/wiki/Robert_Dudley,_1st_Earl_of_Leicester#mediaviewer/File:Robert_Dudley.jpg
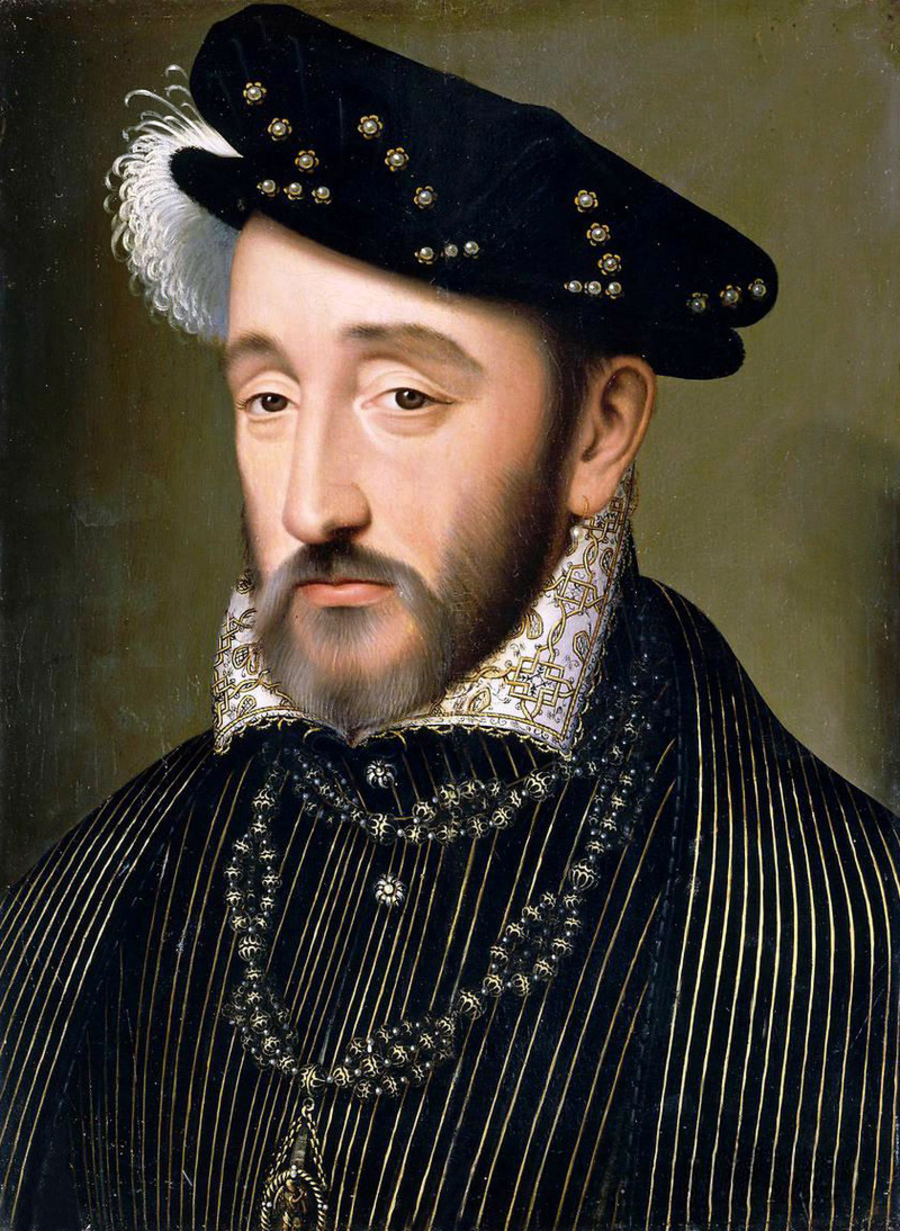

Henry II of France..jpg
Henry II of France
Image from: http://en.wikipedia.org/wiki/Henry_II_of_France#mediaviewer/File:Henry_II_of_France..jpg


Not being nearly as wealthy as a courtier or Royal (!) I ordered some white 4mm seed beads in bulk from an online supplier. I also got some red natural gemstone beads to use as the focus bead. I used four strands of tiger tail. The four strands went through a focus bead (the dark red ones) and then were strung separately with twelve seed beads. Then all four strings of tiger tail were threaded through a focus bead, and the whole process started again. Not a hard job, but a little tedious. It was certainly hard to hold all four of the tiger tail wires when they all wanted to go in different directions!


I put a clip on the bottom of the girdle piece that hangs down so I can change pomanders/accessories whenever I like. The two middle pieces and long middle hanging piece were all made separately and joined at the end because to do them as one joined piece would have meant there was too much wire trying to go through the tiny holes in the beads. I used crimps to close off the ends of the pieces and a hook and loop on the ends that go around the waist.

The trick at the end is to adjust the tension of the individual strands so they spread out a bit before closing up the crimps.


I am really happy with the end result!

Friday, January 31, 2014

Another new girdle

All my glass bead girdles are very heavy, so I decided to make a light-weight one. I already had some black wooden beads and some large bronze seed beads left over from another project. Then I found a bulk pack of bronze filigree spacer beads on special, so my colour combination was decided. Finally, I found some left-over pieces of black tiger tail wire in my beading box as well, so I was very happy.


Usually I play around with different combinations and patterns of beads before starting to string a girdle, but this time I knew what I wanted. I felt that three black wooden beads and then a bronze filigree bead would be ideal. The bronze seed beads would go in between each large bead.


I usually start at the ''dangly'' end of the girdle when stringing, and this time was no exception. I had two pieces of tiger tail which I threaded with three bronze crimps and a small bronze hook clasp. The hook clasp is at the bottom and allows the pomander or decorative element at the bottom to be changed to suit the garment or occasion. Once the crimps were closed, I started stringing the beads. The first part of the girdle was fiddly because the filigree beads had very small holes and the two pieces of tiger tail was a bit too much for them. I ended up using a bead reamer to enlarge the holes slightly.


This diagram shows the way I string my girdles. The bottom 'dangly' part of the girdle has two strings of tiger tail wire which separate at a central bead or finding to become the two 'arms' of the belt.

I was a little unsure what to do when I got to the junction part of the girdle as I did not have any more triangular bead findings. I didn't want to have to purchase anything specially for this project, so I raided my stash for usable items. I found these three options for the central bead/finding where the two pieces of tiger tail separate to go around the waist. I tried all three, but thought the agate bead looked the best.


Once the agate bead was strung and the two pieces of tiger tail separated, it was standard stringing again. When each waist piece was done, it was finished with a clasp or a piece of chain to allow adjustments in size.

I happened to have a bronze filigree heart charm that I salvaged years ago from a cheap necklace, and I added this to the bottom of the girdle. I hung the girdle up for a few days to get the kinks out of the tiger wire.


This was a quick and easy project and I am very happy with the result.

Sunday, January 5, 2014

Christmas Decoration Girdle

I generally try and avoid the post-Christmas sale frenzy, but last week I had to go into the city for an appointment. I came across a shop selling Christmas decorations for 75% off, and I picked up some bead garlands for just over $1 each with the intention of making a new girdle.


The bargain decorations that I picked up

I generally prefer gold to silver, so picking up such a bargain seemed like the garb gods wanted me to do something with silver (there were no gold bead garlands in the store.)

I started stringing the beads onto tiger tail beading wire, but I realised that the silver beads looked exactly like what they were - cheap plastic silver beads. They looked tarnished, and the gilt paint was wearing away in places. I knew that I would always look down and see that tatty tarnish and it would bother me. It would not be noticeable to others without a really close look, but I have learned that you always see the flaws in things you have made like they were framed in neon. So I pulled it all apart and started again.


My first attempt 


I am on a very tight budget, and I find that really good bargains are becoming harder and harder to find. So there is always a real dilemma with projects- do I cut that good fabric, or use those expensive beads, knowing that I will likely never be able to get any more? Factor in the error-factor (I always seem to bodge it up!) and it is very tempting to stick to the tatty beads and leave the 'good' ones for another project.

This time I decided to use the good beads. I had some lovely pinky-red glass beads embossed with little opaque dots in my stash, and thought they would be a nice contrast with the clear beads. I used large pearlised seed beads as spacers. I strung the beads at the tail end of the girdle onto two strands of tiger tail finished with crimps and a little hook. When the tail end was long enough, I added a silver triangular spacer bead of the type usually used to end those necklaces that have masses of beads all twisted together. The two strands of tiger tail wire went in the hole at the bottom and then separated out into two holes at the top. Then I kept stringing beads on either side and finished one side with a clip, the other with chain. This makes the girdle adjustable.

I am not sure what this type of bead/finding is called, but it is very handy for girdle making


I found a little filigree ball that I bought very cheaply previously at an outdoor market and clipped it on the end as the 'pomander'. The great advantage of having a hook or clasp on the end of the girdle is that you can change the decoration on the end to suit the occasion.

The end result

I love quick projects and I am really very happy with my bargain basement sparkly girdle!