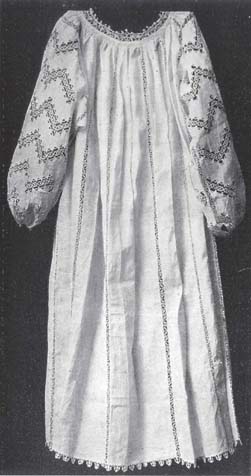
Image from: www.pinterest.com
Extant chemises suggest that piecing together of square and rectangular panels was a popular method of construction. This makes sense, given that it is an economical way of using valuable fabric, and makes good use of the fabric selvages.

Mid-Sixteenth Century Chemise
Image from: http://www.kostym.cz/Anglicky/1_Originaly/02_Renesancni/I_02_07.htm

Late Sixteenth Century Italian Chemise
Image from: https://www.pinterest.com/pin/353251164495637334/

Italian Chemise from the second half of the Sixteenth Century
Image from: https://www.pinterest.com/pin/353251164495637214/
I raided my stash and found several pieces of cotton that I could use to make the chemise. The front and back pieces were large rectangles, and the two sleeve pieces were smaller rectangles.
To try and make the gussets easier, I made the underarm square larger and then cut it in the middle to make two triangles. This worked quite well but made an extra seam under the arm. I used a zigzag stitch to edge all the raw panels first to reduce fraying.The side seams on the body pieces were on the selvage anyway, so didn't need edging.
 |
| The underarm gusset |
I sewed the panels together in this way:
 |
| Image from: http://www.festiveattyre.com/p/how-to-make-easy-italian-chemise.html |
I was hoping that I could finish the seams inside so that it would all be neat and tidy. Unfortunately, that was harder than it sounded. It is not too bad, but I think next time I would finish the edges on all the panels by hand and then whip stitch them together or use an ornamental joining stitch like a faggoting stitch.
I needed to take a little off the bottom to even up the bottom hemline, because I changed the height of the back panel to make it sit higher on my neck. I need to factor that in when I cut the panels for the next chemise.
 |
| My furry assistant always 'helps'when I am cutting out fabric |
Once the panels were sewn together and tidied up, I ran a running stitch of about 5mm around the neckline to gather it up. I put ties at the front and back for ease of adjustment.
I tried the chemise on and got someone to help me adjust the ties to get the neckline to sit where I wanted it.
Then I began the process of sewing the gathers into place with bias binding.
I went around and sewed the front of the binding down by hand, then went back and did the back (inside).
Even though I just used a cheap commercial bias binding, I was very pleased with how the neckline turned out.
I planned to make gathered sleeves for this chemise, as I always do. But when I tried the chemise on during the fitting of the neckline, I really liked the way the sleeves looked ungathered. I recently acquired a hemming foot for my sewing machine too, so I decided to play around with it.
It produced a really nice even hem, but it was a little lumpy at the join in the sleeve. I obviously need a lot more practice with it. In the end, I decided to sew the sleeve hem down by hand.
I was disappointed to find that the fabric had a couple of little holes in it. They looked quite a lot like pinholes. Luckily one lot was on the back panel and the other was low down on the front where no-one would see them.
I darned the holes with sewing thread. If I could do it over, I would use embroidery thread.
I am extremely happy with the result of my first attempt. This style of chemise is much more comfortable than the commercial pattern styles that I have used in the past. It sits better and there is less pulling under the arms when wearing a corset. I will make this style of chemise again, and at some stage I would like to experiment with an Elizabethan style smock and a fully hand sewn Italian chemise.
The finished chemise. Please ignore the bra, jeans and sneakers; I wasn't sure how transparent the cotton would be in the sun!


No comments:
Post a Comment