Wednesday, January 31, 2018

Making an Italian Style Renaissance Caul - Velveteen Caul with Applied Ribbon

Eleonora de Toledo by Bronzino 1543 (Image from Pinterest)
This image of Eleanora with her pretty ribbon caul inspired this project


Back in late 2016 when I was cutting out all those sleeves to sew up, I cut some caul bags out of the leftover fabric scraps. The Lochac Lids Hat Challenge seemed like a great opportunity to get one finished at last.  I trace around the top of a bucket to get the pattern for the caul bag shape (I have a large head).

I chose a circle of grey cotton velveteen and marked chalk lines in a diagonal pattern. Then I hand sewed some narrow commercially produced black ribbon in a large grid or net pattern. Once the ribbon was sewn down, I added some large wine coloured red glass beads and put four gold glass seed beads around them.
The outside of the caul bag (which is just a circle of fabric)

The inside of the caul bag

For the band of the caul, I measured around my head (in the area that you would wear a headband). I added 3cm extra for seam allowance (2 x 1.5cm). I worked out how wide I wanted the band and multiplied by four. This allows me to turn the two edges into the centre and then fold the band in half to enclose the edge of the caul bag. Once you have your band cut out, sew the ends together. I flatten the seams out and stab stitch down to reduce bulk, but this is a matter of personal preference.
The caul band with the ends sewn, raw edges turned in and tacked and pinned into place to reduce movement when sewing the caul band on
Once you are happy with the decoration and have your band prepared, you are ready to assemble the caul. If your caul bag fabric is very fine or needs lining for some reason, this is the stage where you would sandwich your two caul bag/circle pieces together and tack them so they don't move. I find that velveteen is stable enough not to need lining, and lack of lining also reduces heat. I live in an area which is very hot over summer, so this is a bonus. If you live in cold climes, adding a lining to keep in the heat might be a good idea.

To assemble the caul, you will need to put gathering stitches around the edge of the caul bag/circle piece. I set my stitches in about 5mm from the edge and make the stitches about 1 cm apart. A running stitch works well for this step. I usually mark the centre top and centre bottom of my circular piece and gather each side separately. I find that doing it this way makes it easier to manipulate the gathers and keep them even and neat. 

I have made several of these cauls, and I have recently been experimenting with not gathering the part that goes over the top of my head (roughly five centimetres above each ear.) With some of my cauls there is a lumpy bunching that sort of sticks up in that area, and I notice that in the Italian portraits from the sixteenth century the caul usually sits quite flat. Fabric choice and head shape probably has something to do with this - it is entirely personal preference how you do it and what suits your face/head. I prefer the flatter look.

Setting the running stitches for gathering

Once your gathering stitches are in (and knotted with loops at the end in case you get over enthusiastic and accidentally pull the stitches out), start gently pulling your running stitch tight. You need to gather the bag/circle part up until it fits into the band. If you are not gathering the area that goes over the top of the head, you can just pin that part into place. I put the edge of the circle/bag part up against the inside centre fold of the band. Once the caul bag has been gathered up to fit the band, start pinning it into place, making sure that the gathers are neat and even.
Then start hand stitching the band into place.
Sewing the band into place
Once the band is sewn down on the outside, turn the band and bag carefully inside out. Pin the band into place on this side, making sure all the edges of the caul bag are still tucked in neatly. Then sew it down. 
Sewing down the band on the inside of the caul

Once it is all sewn, remove any tacking stitches holding the band together and cut off the ends of your gathering threads.


Alright- at this point the caul is basically finished. You can add decoration to the band if you want to.  When I was making this one, I thought that the band was a bit bare, so I decided to add a few lines of the black and gold ribbon.
Adding ribbon around the band

I choose to finish off the caul by sewing a comb into the inside of the band in the centre, and adding two wig clips that sit a few centimetres behind my ears. You could omit this step and use pins if you would prefer a more period way to attach the caul, or even bobby pins. I have unruly wavy hair that always seems to escape near my ears, so wig clips work for me.


Some images of the finished project. The photographs make it look quite dark, but the velveteen is a mid-grey and the wine coloured beads are brighter than they appear in the images.


Sunday, January 14, 2018

Quarterly Hat Challenge

In the last couple of years I have been involved with two challenges that I have found to be great sources of motivation and inspiration. The first was the  Camino del Noble Pilgrimage Challenge, which focused on developing many aspects of one's persona and SCA game. It was a great challenge and I am still focusing on many of the aspects of the challenge because I didn't quite achieve everything that I hoped in the time frame I gave myself (- story of my life!)

The other was the A&S Century challenge, where one does a minimum of ten minutes of work on an aspect of SCA every day for one hundred days. This challenge was much easier for me because I was already in this habit anyway. Because of my health issues, I usually can only work on things for short amounts of time, so very short bursts of input on a regular basis is what works for me. I have to budget my energy to accomplish even small things. The real benefit and challenge to me from the A&S Challenge was getting into the habit of taking project progress photos and writing up (at least basic) notes on projects. This is a habit I could use help in getting back into; I hate the write up after the last stitch is done.

The new challenge for 2018 is the Quarterly Hat Challenge: make one item of headwear every three months. I am hoping that I will be able to achieve this goal. There is no set level of complexity, so at the very least I hope to complete some cauls that I have had cut out for quite a while. I would like to attempt something a little more complex and interesting, but I am not making any promises to myself. Cauls are practical, manageable on high pain days, fun to decorate and easy to store.

Some styles of headwear that I would love to make in the future:

Portrait of Bianca Maria Sforza - Attributed to Giovanni Ambrogio de Predis c. 1493
Image from: https://bjws.blogspot.com.au/2011/12/portraits-of-women-attributed-to.html


Portrait of Isabella of Naples, Duchess of Milan by Giovanni Antonio Boltraffio 
Image from: http://jeannedepompadour.blogspot.com.au/2012/08/house-of-sforza-muzio-attendolo-sforza.html?m=1


Portrait of A Lady  - Attributed to Giovanni Ambrogio de Predis  1490
Image from: https://bjws.blogspot.com.au/2011/12/portraits-of-women-attributed-to.html


Portrait of a Lady in Profile by  Bernardino dei Conti
From: http://www.artnet.com/artists/bernardino-dei-conti/portrait-de-jeune-femme-de-profil-%C3%A0-la-coiffure-0UH8PP-XqNpF-F2FIm_qyg2


Portrait of Bianca Sforza c.1500
Image from: http://jeannedepompadour.blogspot.com.au/2012/08/house-of-sforza-muzio-attendolo-sforza.html?m=1


Portrait of a Lady-- Attributed to Domenico Puligo
Image from: http://www.bonhams.com/auctions/20016/lot/51/

Friday, January 5, 2018

Apologies

Checking back through some older posts, I notice that many of the images in older posts are not visible. I'm not very tech-savvy, so it might take me a while to fix the problem.. but I'm working on it.

A Cotton Voile Camicia for Hot Weather

I have a lot of mobility and other health issues which can make dressing in late-period attire harder than it has to be. Putting on gowns with attached or pre-tied sleeves can be a real drama for me, especially if my camicia is particularly full. Recently, I had a challenging event coming up, and I had lent a friend my narrow sleeve camicia, so I was in a bit of a bind.

I raided my stash for some very fine voile (it was going to be hot, and heat tends to affect me very badly. Wise heads out there are probably wondering at this point why I haven't changed my persona to early period Roman.....) Luckily, I had some voile, and I cut it into the usual rectangles and triangles patterns  which I have explored earlier on the blog.

Image result for broider me bethan + chemise
The rough chemise pattern that I follow

Image from: http://www.festiveattyre.com/p/how-to-make-easy-italian-chemise .html


This cutting technique is accurate for many garments over hundreds of years (with some variations on size of pieces and gathering and finishing techniques.) It probably remained popular because it is simple and wastes almost no fabric, which would be ideal when fabric was hugely expensive and/or laboriously handwoven.

Because my hands are bad at the moment, I machine sewed the majority of the seams, leaving small gaps where the gores meet that I could neatly hand finish. This was to make sure the edges met up properly and the stitching was neat. I would have liked to turn all the seam edges under and whip them down for durability, but I did not have enough time, so that will be an ongoing project. I used selvages as edges where I could, and used a zigzag machine stitch on any raw edges for strength in the mean-time. Of course, in the sixteenth century, a fine linen such as handkerchief weight linen would probably have been used for this type of undergarment, but budget and availability make that option impossible for me at the moment, so cotton has to do.

I put some gathering stitches in around the neckline (basically just long running stitches done with durable thread) and gathered the neckline up, trying it on to adjust the width. At this point I measured the length band I thought I would need to keep the neckline at the desired width. I planned to use bias tape to finish the neck edge.

Once I started working on the neck edge, I realised that I didn't have enough wide bias tape (called 'hem bias tape' here). I didn't have time to make my own and wasn't well enough to go out and buy a packet, so I made do with what I had. I had the remnants of an old cotton quilt cover that I bought from a thrift store and used to make a nice soft round necked smock early in 2017. I cut a long strip four times the width that I needed. I ironed it in half and then tucked the raw edges up into the centre fold and ironed again. This gave me a nice soft but firm band.

I also decided that I didn't like the way the gathers looked, so I pulled them out and changed to small pleats. I divided the neckline edge into four even sections and then just pinned and adjusted the pleats by eye so that the neckline looked (reasonably!) even, and was the desired size.

Next I sewed the front edge of the neckband on with tiny whip stitches. Once the band was on (and I had tried it on to make sure the size was correct,) I ran a line of green embroidery floss along the edge in running stitch.) No-one will see the edge, but I liked the look of the tiny bit of decoration. It also makes it easier to find the correct camicia or smock when you are looking through a pile of underpinnings. I left the sleeve edges undecorated because the fabric is very fine and the stitches and knots would show through if I rolled up my sleeves.

Once the decoration was done, I finished of the reverse side of the neck edge, whipping it down with tiny hand stitches again and being careful not to let them show through on the front edge.

I found that when I wore the camicia, the neckband feel forward a little. This is due to the band not being cut on the bias and the two differing weights of fabrics. It is still wearable, and doesn't do it quite as much once I have a pair or bodies/stays on over the top. Next time I would probably but some little tucks on the inside of the band to hold it in more if the band was not cut on the bias.

Over the next weeks (realistically, probably months), I will continue sewing down the seams on the inside for durability. I have worn it twice in hot weather and I am glad I went to the trouble of trying the voile. I will certainly make more in this fabric. They probably won't last for years because it is a delicate fabric, but it is worth the time for a bit of heat relief. Heat relief is a prime concern at this time of year - where I am is predicted to hit 43 degrees Celsius tomorrow.


Thursday, January 4, 2018

Partlet with Green Embroidery

Late last year I started experimenting with different partlet patterns, designs and fabrics. Partlets are a great accessory to have in a sixteenth century wardrobe because they can really change the look of an outfit, and there are so many different styles depicted in portraits. I haven't managed to find that many extant examples of sixteenth century partlets; heavily embroidered coifs and camicias seem to have been saved and treasured more often. But there are some in museums, and some pictoral references to work from.


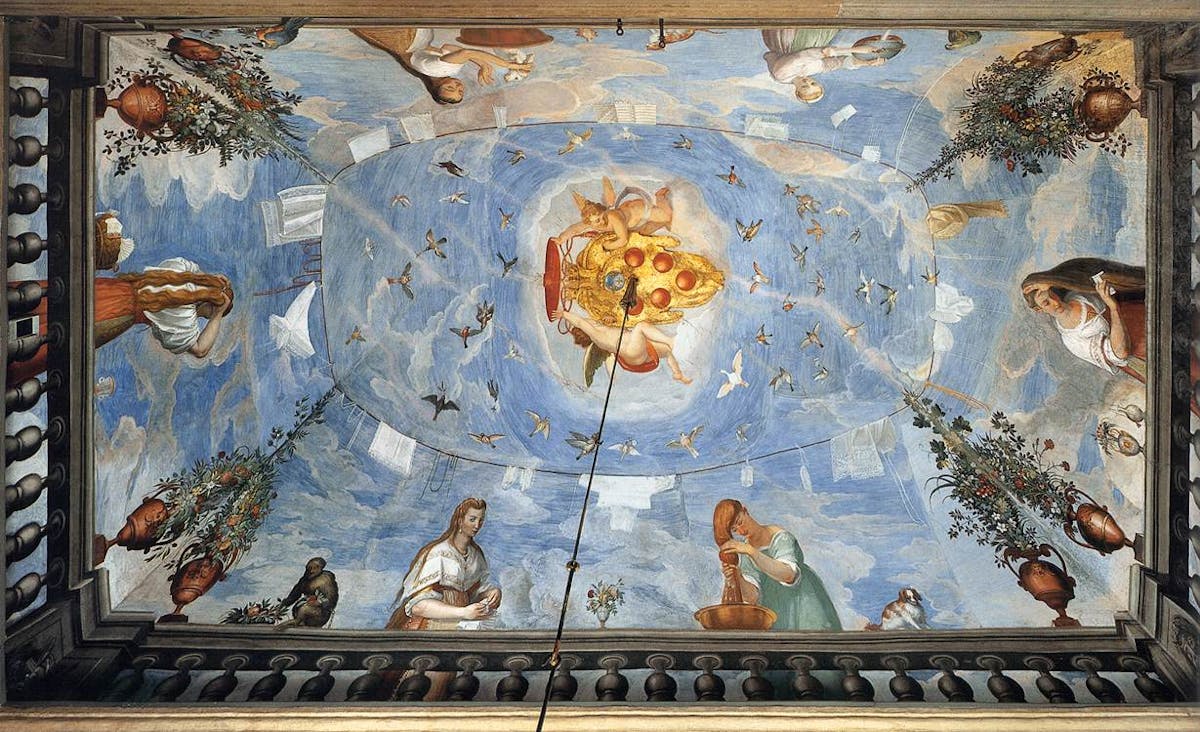
Note the partlet hanging on the line in this scene painted by Allori in the Palazzo Pitti (c. 1598)
Image from  https://www.uffizi.it/en/artworks/loggetta-dell-allori


I used my trusty, decade old partlet pattern which has seams under the arms and does not need ties or pins. This may not be the most historically accurate partlet pattern, but is very useful when one does not have help to dress.

The embroidery pattern is actually adapted from a pre-sixteenth century embroidery pattern that I just really liked. I adjusted it a little and traced it onto the linen base fabric with a Frixion removable marker. I worked the pattern in stem stitch with DMC cotton floss in green. I usually work my designs prior to cutting and assembling the garment, but in this case I made the partlet up first and then worked the embroidery using a small hoop. It was an experiment to see if using the hoop over seams etc. would distort the fabric or embroidery. I also hoped it would make the design placement (in relation to the edges of the garment) more accurate. I was very careful to make sure that the tension was even when embroidering and that the fabric was not warped, and it held up very well. I was pleased with the result, and would consider working embroidery on partlets this way again (depending on the base fabric used. I don't think a loose weave linen or muslin would stand up well to being put in the hoop.)


I added some commercially produced cotton white bobbin lace along the front edges and whip stitched it down. Then I did a row of small running stitches in green along the edge of the lace. Finally I added little knotted ties of green floss on the edge of the lace to tie the whole design  together. The little ties or tufts were inspired by the portrait below.


Portrait of a Woman by Giovanni Francesco Caroto
Portrait held in the Musée du Louvre, Paris
Image from https://i.pinimg.com/736x/3b/46/31/3b4631909dd5ca29fefd8032c00b4cdd--louvre-paris-the-louvre.jpg


First half of the 16th century Andrea Piccinelli (Andrea del Brescianino) - Italian Young Lady
Portait of a Lady by Andrea Piccinelli 
Image from Pinterest https://www.pinterest.co.uk/pin/556687203919307155/


I was pleased with how the partlet looked and how comfortable it was.


Tuesday, January 2, 2018

Bright start to 2018

Well, I got off to a positive start for the New Year! I had a few hours yesterday where the brain fog eased up a bit, so I took advantage of it and did some online training on food handling and hygiene. I have been planning to do this training for a long time, but never seemed to have the spare cash to pay for the training. I was bemoaning this fact to a friend recently, and she advised that many local councils in my state offer the online training for free. I was so glad I found out before I paid the money!
These sorts of courses are a great idea for anyone who runs feasts, helps in the kitchen or brings food to potlucks. The courses provide great reminders of hygiene principles that are so important when preparing and storing food safely.

Image produced by the World Health Organisation